Saltar al contenido principal

APEX AP-GS918 Power/Volume Button Replacement

Qué necesitas

  1. APEX AP-GS918 Power/Volume Button Replacement, Power/Volume Button: paso 1, imagen 1 de 3 APEX AP-GS918 Power/Volume Button Replacement, Power/Volume Button: paso 1, imagen 2 de 3 APEX AP-GS918 Power/Volume Button Replacement, Power/Volume Button: paso 1, imagen 3 de 3
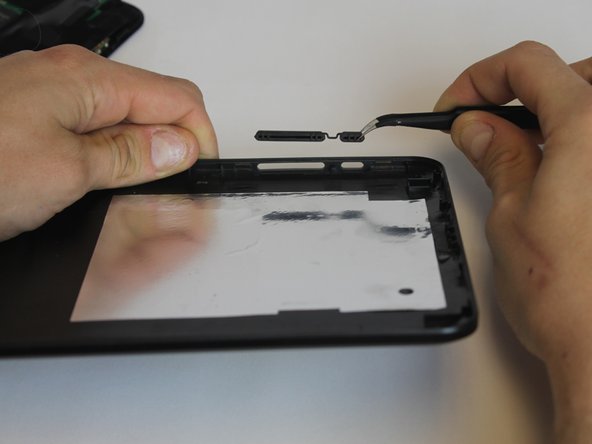
    • To begin, locate the two 4.9mm Phillips #00 screws at the top corners of the case and remove them.

  2. APEX AP-GS918 Power/Volume Button Replacement: paso 2, imagen 1 de 3 APEX AP-GS918 Power/Volume Button Replacement: paso 2, imagen 2 de 3 APEX AP-GS918 Power/Volume Button Replacement: paso 2, imagen 3 de 3
    • Squeeze the plastic opening tool in between the seam where the screen joins the plastic case.

    • Begin separating the bottom of the case from the screen by carefully going around the whole edge of the case and slowly prying it apart.

    • Be careful when separating the lids because the wires holding the speaker to the motherboard are very short.

  3. APEX AP-GS918 Power/Volume Button Replacement: paso 3, imagen 1 de 2 APEX AP-GS918 Power/Volume Button Replacement: paso 3, imagen 2 de 2
    Herramienta utilizada en este paso:
    Tweezers
    $4.99
    Comprar
    • Carefully place the bottom lid next to the screen case. The power/speaker buttons should be visible at the corner of the lid. Remove the buttons with the tweezers.

Conclusión

To reassemble your device, follow these instructions in reverse order.

Equipo

USF Tampa, Team 9-1, Leahy Winter 2015 Miembro de USF Tampa, Team 9-1, Leahy Winter 2015

USFT-LEAHY-W15S9G1

3 Miembros

9 Guías creadas

0 comentarios

Agregar Comentario

Ver Estadísticas:

Ultimas 24 horas: 1

Ultimos 7 días: 5

Ultimos 30 días: 11

Todo El Tiempo: 213