Saltar al contenido principal

AKASO KingPad A90 Camera (Rear and Front) Unit Replacement

Qué necesitas

  1. AKASO KingPad A90 Camera (Rear and Front) Unit Replacement, Camera (Rear and Front) Unit: paso 1, imagen 1 de 3 AKASO KingPad A90 Camera (Rear and Front) Unit Replacement, Camera (Rear and Front) Unit: paso 1, imagen 2 de 3 AKASO KingPad A90 Camera (Rear and Front) Unit Replacement, Camera (Rear and Front) Unit: paso 1, imagen 3 de 3
    • Remove screws.

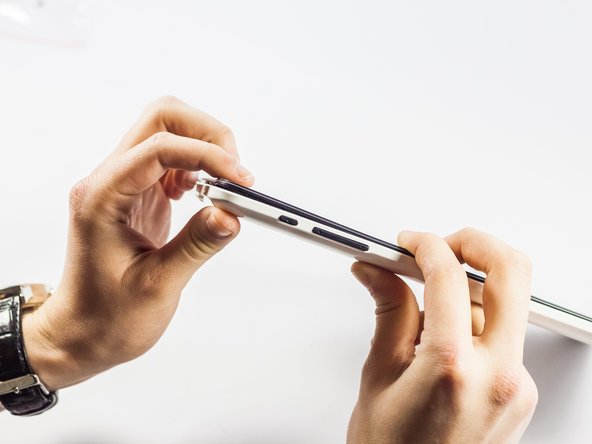
    • Insert spudger tool on the middle of the left side, between the white and black plastic.

    • Slide in a plastic opening tool and use it to further pull the back off.

    • Work your way around the edge of the tablet with the plastic opening tool and insert more as needed.

    • Pull off the back cover.

  2. AKASO KingPad A90 Camera (Rear and Front) Unit Replacement: paso 2, imagen 1 de 3 AKASO KingPad A90 Camera (Rear and Front) Unit Replacement: paso 2, imagen 2 de 3 AKASO KingPad A90 Camera (Rear and Front) Unit Replacement: paso 2, imagen 3 de 3
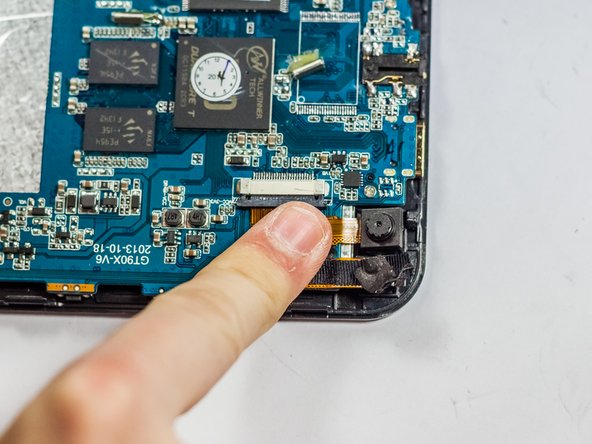
    • Locate the camera unit and note where it is attached to the motherboard.

    • Grasp the camera unit with tweezers or fingers, and pull firmly to remove it from the adhesive holding it to the motherboard.

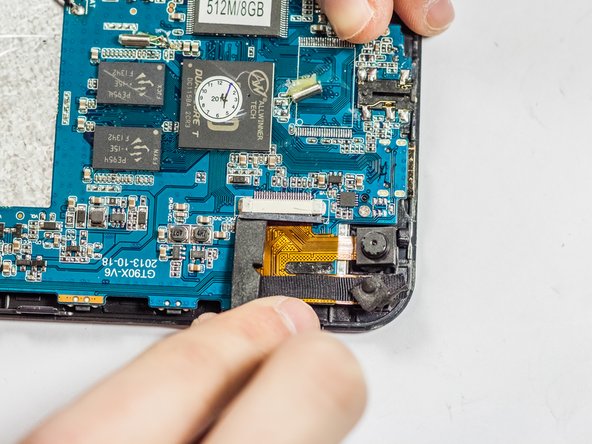
    • Be careful when lifting up the camera unit. Don’t tear the ribbon cable! Ensure that you examine the second picture of this step.

    • Using the spudger, carefully loosen the slot's plastic cover piece holding the ribbon cable in place.

    • Pull the ribbon cable out.

    • Remove the old adhesive with tweezers.

  3. AKASO KingPad A90 Camera (Rear and Front) Unit Replacement: paso 3, imagen 1 de 3 AKASO KingPad A90 Camera (Rear and Front) Unit Replacement: paso 3, imagen 2 de 3 AKASO KingPad A90 Camera (Rear and Front) Unit Replacement: paso 3, imagen 3 de 3
    • Apply a small square of new adhesive in the same spot as the old adhesive was previously.

    • Gently slide the new camera unit's ribbon cable into the slot.

    • Give the ribbon a firm push to make sure it has made contact.

    • Press the plastic cover piece back in place with the spudger.

    • Firmly press the new camera onto the adhesive, making sure to line it up correctly.

  4. AKASO KingPad A90 Camera (Rear and Front) Unit Replacement: paso 4, imagen 1 de 3 AKASO KingPad A90 Camera (Rear and Front) Unit Replacement: paso 4, imagen 2 de 3 AKASO KingPad A90 Camera (Rear and Front) Unit Replacement: paso 4, imagen 3 de 3
    • Replace the back cover with the new camera unit in place.

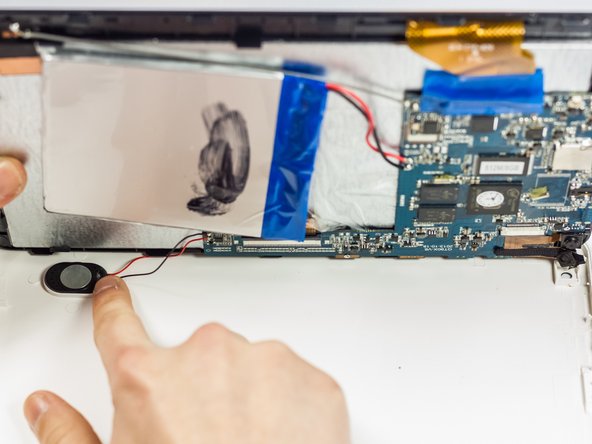
    • Gently press the speaker into place.

    • Don't let the volume rocker unit fall out of place.

    • Replace the screws.

Linea de Meta

2 personas más completaron esta guía.

Miles

Miembro Desde 03/24/15

260 Reputación

2 Guías creadas

Equipo

0 comentarios

Agregar Comentario

Ver Estadísticas:

Ultimas 24 horas: 0

Ultimos 7 días: 1

Ultimos 30 días: 1

Todo El Tiempo: 681