Saltar al contenido principal

AKASO KingPad A90 Battery Replacement

Qué necesitas

  1. AKASO KingPad A90 Battery Replacement, Battery: paso 1, imagen 1 de 3 AKASO KingPad A90 Battery Replacement, Battery: paso 1, imagen 2 de 3 AKASO KingPad A90 Battery Replacement, Battery: paso 1, imagen 3 de 3
    • Remove screws.

    • Insert spudger tool on the middle of the left side, between the white and black plastic.

    • Slide in a plastic opening tool and use it to further pull the back off.

    • Work your way around the edge of the tablet with the plastic opening tool and insert more as needed.

    • Pull off the back cover.

  2. AKASO KingPad A90 Battery Replacement: paso 2, imagen 1 de 3 AKASO KingPad A90 Battery Replacement: paso 2, imagen 2 de 3 AKASO KingPad A90 Battery Replacement: paso 2, imagen 3 de 3
    • Using the black plastic spudger tool, insert it under a corner of the battery.

    • Work your way around the edges to pry the battery and loosen it from the adhesive.

    • Remove the battery.

  3. AKASO KingPad A90 Battery Replacement: paso 3, imagen 1 de 3 AKASO KingPad A90 Battery Replacement: paso 3, imagen 2 de 3 AKASO KingPad A90 Battery Replacement: paso 3, imagen 3 de 3
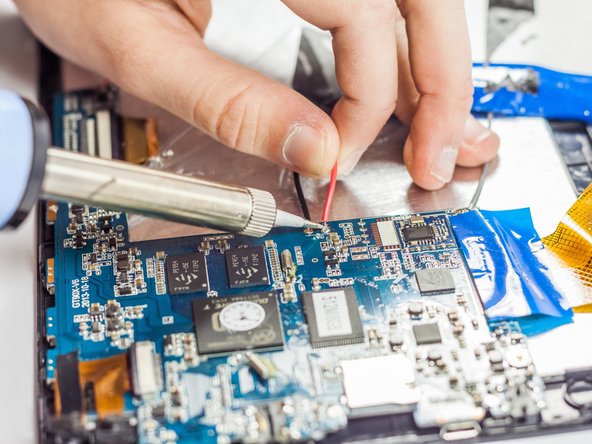
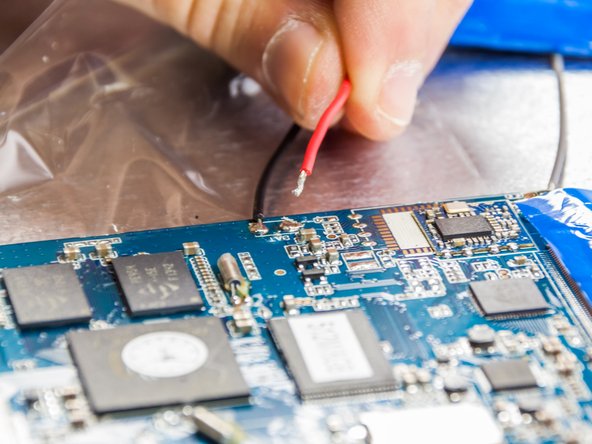
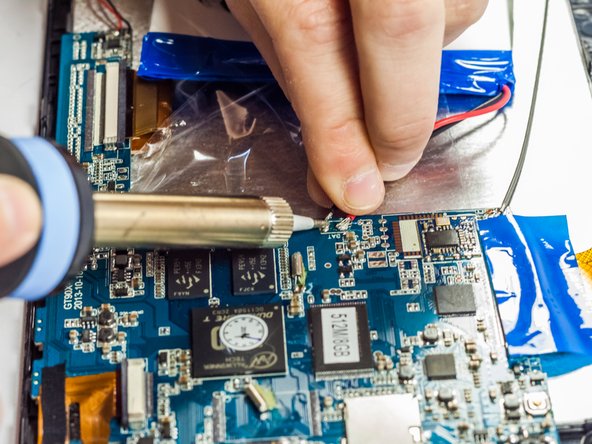
    • Locate the battery unit solder points and note where it is attached to the motherboard.

    • Plug in your soldering iron/pen and wait the required amount of time to heat up.

    • Be careful with the iron as the tip is very hot and it could burn you or the tablet

    • Apply a small amount of pressure with the iron on the solder points until the joints come loose and the wires move freely away from the board

    • Remove the battery unit

  4. AKASO KingPad A90 Battery Replacement: paso 4, imagen 1 de 3 AKASO KingPad A90 Battery Replacement: paso 4, imagen 2 de 3 AKASO KingPad A90 Battery Replacement: paso 4, imagen 3 de 3
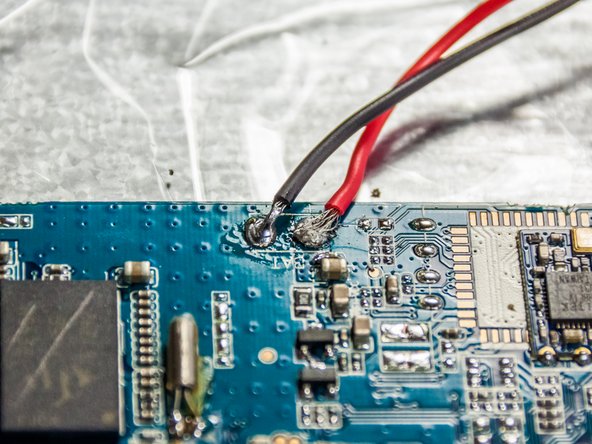
    • Locate the red and black wire ends of your new battery

    • Take your solder out and place it on the point with the wire

    • Use the iron/pen to slowly melt a small piece of solder onto the point and let it solidify.

    • Be careful not to use too much solder as a large blob could result in a short on your device

    • Repeat this step for the other point

  5. AKASO KingPad A90 Battery Replacement: paso 5, imagen 1 de 3 AKASO KingPad A90 Battery Replacement: paso 5, imagen 2 de 3 AKASO KingPad A90 Battery Replacement: paso 5, imagen 3 de 3
    • Replace the back cover with the new part in place.

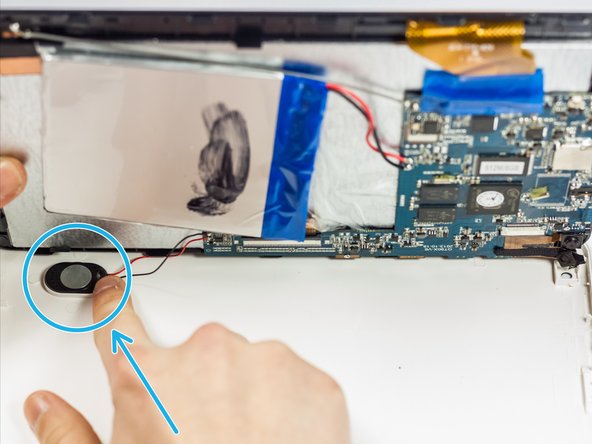
    • Gently press the speaker into place.

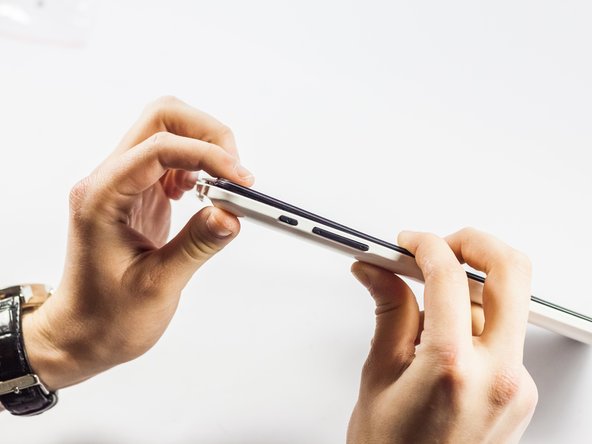
    • Don't let the volume rocker unit fall out of place.

    • Replace the screws.

Linea de Meta

5 personas más completaron esta guía.

Daniel Garcia

Miembro Desde 03/24/15

179 Reputación

2 Guías creadas

Equipo

0 comentarios

Agregar Comentario

Ver Estadísticas:

Ultimas 24 horas: 0

Ultimos 7 días: 1

Ultimos 30 días: 5

Todo El Tiempo: 1,956