Saltar al contenido principal

AARP RealPad MA7BX2 Motherboard Replacement

Qué necesitas

  1. AARP RealPad MA7BX2 Motherboard Replacement, Back Cover: paso 1, imagen 1 de 2 AARP RealPad MA7BX2 Motherboard Replacement, Back Cover: paso 1, imagen 2 de 2
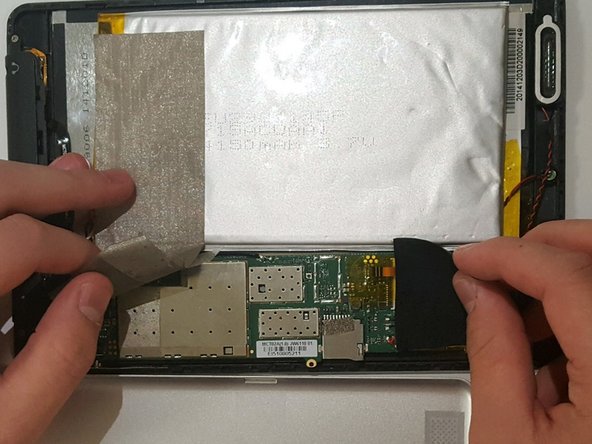
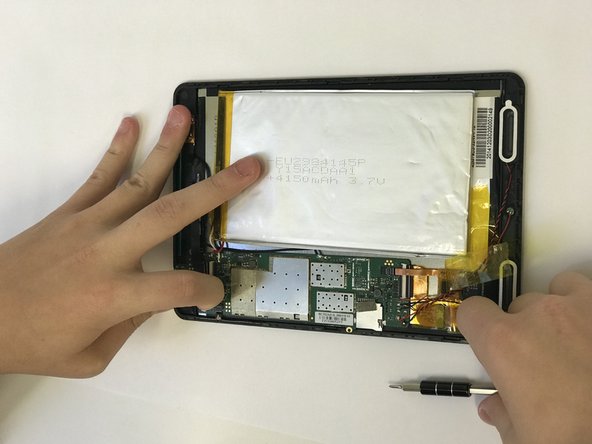
    • Loosen the back cover using the suction cup.

    • Pull up on the center of the back with the suction cup.

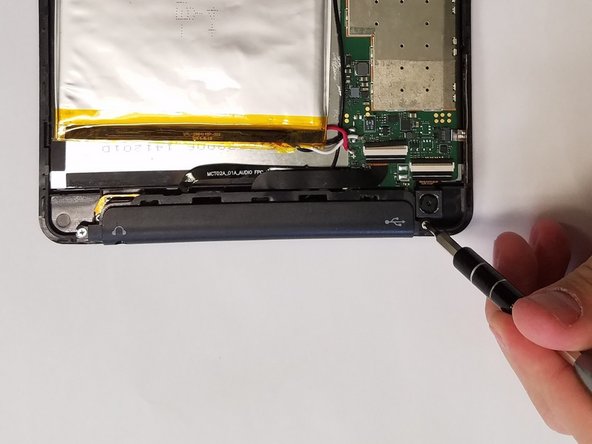
    • Pull up on all four corners of the back with the suction cup.

  2. AARP RealPad MA7BX2 Motherboard Replacement: paso 2, imagen 1 de 1
    • Remove the back cover by gently placing the small opening tool in the crevice created by loosening the back.

    • Slide the opening tool around the edges of the device.

    • Wedge it open using the opening tool.

    • Use the suction cup again if you're having trouble removing the back cover.

  3. AARP RealPad MA7BX2 Motherboard Replacement: paso 3, imagen 1 de 2 AARP RealPad MA7BX2 Motherboard Replacement: paso 3, imagen 2 de 2
    • The black tape is stuck to delicate wires; remove with caution.

    • Peel off the silver tape.

    • Gently pull off the black tape.

  4. AARP RealPad MA7BX2 Motherboard Replacement: paso 4, imagen 1 de 2 AARP RealPad MA7BX2 Motherboard Replacement: paso 4, imagen 2 de 2
    • Using a JIS #000 screwdriver, remove the two 2.5 mm screws.

  5. AARP RealPad MA7BX2 Motherboard Replacement: paso 5, imagen 1 de 2 AARP RealPad MA7BX2 Motherboard Replacement: paso 5, imagen 2 de 2
    • Lift off the black audio cover.

  6. AARP RealPad MA7BX2 Motherboard Replacement, Motherboard: paso 6, imagen 1 de 2 AARP RealPad MA7BX2 Motherboard Replacement, Motherboard: paso 6, imagen 2 de 2
    • Remove the two JIS #000 screws.

  7. AARP RealPad MA7BX2 Motherboard Replacement: paso 7, imagen 1 de 2 AARP RealPad MA7BX2 Motherboard Replacement: paso 7, imagen 2 de 2
    • Flip up the small black connectors using a spudger or your nails.

    • Be careful when flipping them up. Too much force can cause them to break.

  8. AARP RealPad MA7BX2 Motherboard Replacement: paso 8, imagen 1 de 1
    • Remove battery.

    • Removing the battery may need some force. Be careful as to not break anything.

  9. AARP RealPad MA7BX2 Motherboard Replacement: paso 9, imagen 1 de 2 AARP RealPad MA7BX2 Motherboard Replacement: paso 9, imagen 2 de 2
    • Use the tweezers to loosen up the sides of speakers by going into the gaps, before picking it up.

    • There are magnets holding down the speakers. Be careful as to not pick them up with the speakers.

    • The top of the speakers are very fragile and may fall out at the slightest touch. Be careful when picking them up.

  10. AARP RealPad MA7BX2 Motherboard Replacement: paso 10, imagen 1 de 2 AARP RealPad MA7BX2 Motherboard Replacement: paso 10, imagen 2 de 2
    • Remove all wire connections by sliding them out of the connectors.

    • Be careful as to not forcefully pull out anything because the wires are very delicate.

  11. AARP RealPad MA7BX2 Motherboard Replacement: paso 11, imagen 1 de 1
    • Take off the motherboard and set it aside. Your Finished product should look like this.

Conclusión

To reassemble your device, follow these instructions in reverse order.

Una persona más ha completado esta guía.

Un comentario

I have a realpad that's is missing all the motherboard and do y'all know where can I take to get it fix because I got it for my sweet 15 as a gift from my uncle and aunt

Luz Hernandez - Contestar

Agregar Comentario

Ver Estadísticas:

Ultimas 24 horas: 0

Ultimos 7 días: 1

Ultimos 30 días: 2

Todo El Tiempo: 485