Esta versión puede contener ediciones incorrectas. Cambiar a la última instantánea verificada.
Qué necesitas
-
Este paso está sin traducir. Ayuda a traducirlo
-
Using a flat-head screwdriver, wedge underneath the plastic cover to release it from the assembly.
-
-
Este paso está sin traducir. Ayuda a traducirlo
-
Unfasten the 10 mm bolts located at the top and bottom of the door assembly.
-
Remove the door assembly.
-
-
Este paso está sin traducir. Ayuda a traducirlo
-
Wedge the flat-head screwdriver underneath the plastic cover to the switch panel to release it from the door.
-
-
Este paso está sin traducir. Ayuda a traducirlo
-
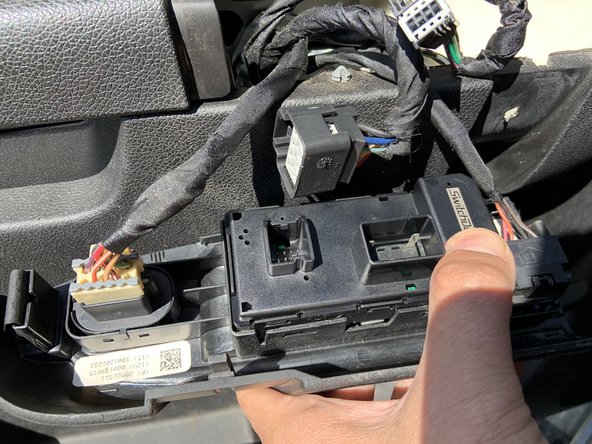
Remove all wire harnesses to the window switches from the back of the panel.
-
-
-
Este paso está sin traducir. Ayuda a traducirlo
-
With the flat-head screwdriver release the tabs to release the window switch panel from the block of switches.
-
-
Este paso está sin traducir. Ayuda a traducirlo
-
Re-plug wire harnesses into the new window switch panel and push panel into the cover.
-
-
Este paso está sin traducir. Ayuda a traducirlo
-
Push the re-assembled switch panel down until you hear a click, this means it is secure in the door.
-
-
Este paso está sin traducir. Ayuda a traducirlo
-
Re-assemble the door arm.
-
Re-fasten the 10 mm bolts to the top and bottom of the door assembly.
-
-
Este paso está sin traducir. Ayuda a traducirlo
-
Re-attach the plastic cover by snapping it into place, start at the bottom for easier installation.
-
-
Este paso está sin traducir. Ayuda a traducirlo
-
You've completed the fix! Now enjoy your working Master Power Window Switch!
-
Cancelar: No complete esta guía.
2 personas más completaron esta guía.
2 comentarios
I have a 2009 Chevy Silverado. i changed the same panel and everything works except drivers window. any thoughts on how to fix it?
I have the same issue with my 2009 GMC Acadia. Does yours click? If so I found a useful how to guide I'm going to try next on this forum


