Esta versión puede contener ediciones incorrectas. Cambiar a la última instantánea verificada.
Qué necesitas
-
Este paso está sin traducir. Ayuda a traducirlo
-
Put the car in park (automatic) or neutral (manual).
-
Apply the parking brake.
-
Place chocks behind the rear wheels.
-
-
Este paso está sin traducir. Ayuda a traducirlo
-
Use a 19 mm lug wrench to loosen each lug nut a half turn.
-
-
Este paso está sin traducir. Ayuda a traducirlo
-
Use a hydraulic jack on the car's frame to jack the car.
-
A small notch shows where to place the jack.
-
It is only necessary to jack the car until the wheel no longer touches the ground.
-
-
Este paso está sin traducir. Ayuda a traducirlo
-
Place a jack stand on the frame and remove the jack.
-
-
Este paso está sin traducir. Ayuda a traducirlo
-
Use a lug wrench to completely remove the four lug nuts.
-
Remove the wheel.
-
-
Este paso está sin traducir. Ayuda a traducirlo
-
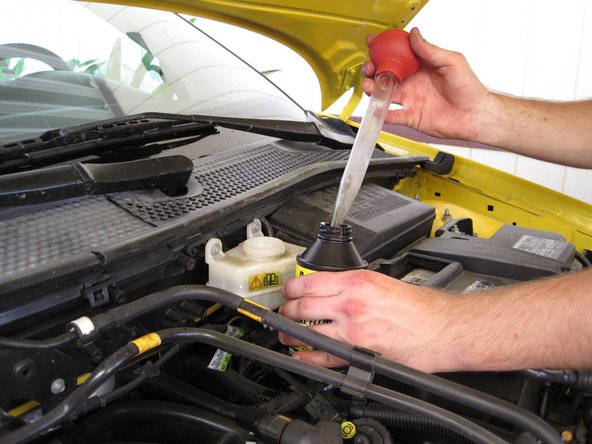
The brake fluid reservoir is located towards the back of the engine compartment.
-
Unscrew the cap and remove it.
-
-
Este paso está sin traducir. Ayuda a traducirlo
-
Use a turkey baster to remove 2-3 ounces of brake fluid from the reservoir.
-
-
Este paso está sin traducir. Ayuda a traducirlo
-
Use a flat head screwdriver or brake spoon to remove the outer pad retaining clip.
-
-
Este paso está sin traducir. Ayuda a traducirlo
-
Use a flat head screwdriver to remove the black plastic guide bolt dust caps.
-
-
-
Este paso está sin traducir. Ayuda a traducirlo
-
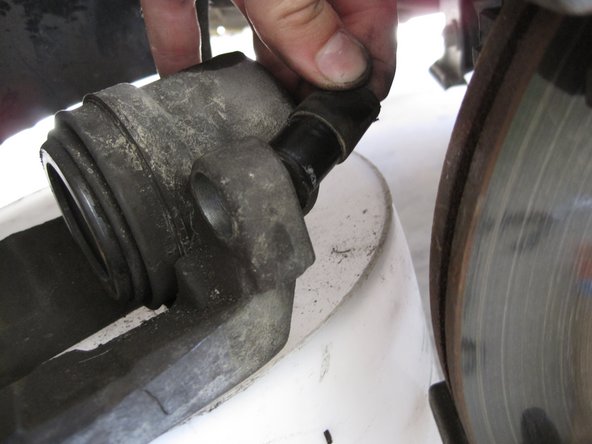
Use a 7 mm Allen wrench to remove the two caliper guide bolts.
-
On the driver's side, turn towards the rear of the car. On the passenger side, turn towards the front
-
-
Este paso está sin traducir. Ayuda a traducirlo
-
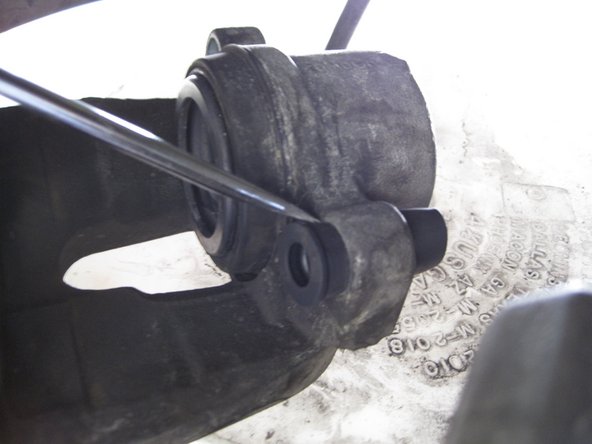
Remove the clip that holds the brake line to the strut with a pair of vise grips.
-
Pull the brake line towards you and out of the bracket.
-
-
Este paso está sin traducir. Ayuda a traducirlo
-
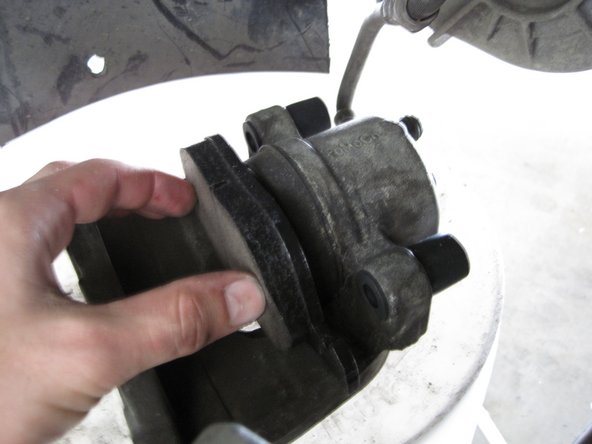
Pull the caliper off of the rotor.
-
Place the caliper on top of a box or bucket so the brake line doesn't stretch or kink.
-
-
Este paso está sin traducir. Ayuda a traducirlo
-
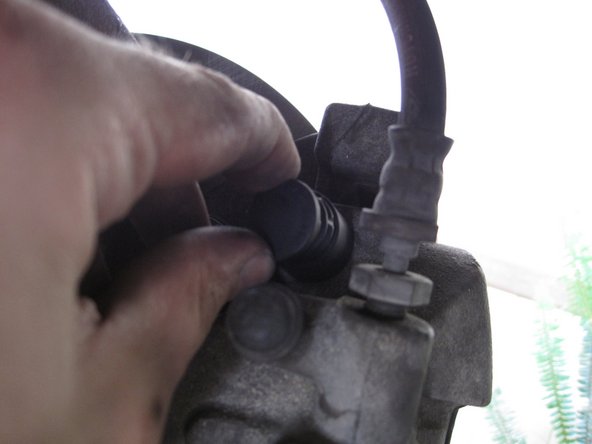
Use a flat head screwdriver to push the bushing through its hole in the caliper.
-
Remove the bushing from the caliper.
-
-
Este paso está sin traducir. Ayuda a traducirlo
-
Clean the rotor, caliper, and all other hardware with an aerosol brake cleaner.
-
-
Este paso está sin traducir. Ayuda a traducirlo
-
Coat the steel backing plates of the new brake pads with an anti-squeal coating.
-
-
Este paso está sin traducir. Ayuda a traducirlo
-
Insert the new bushing from the inside of the caliper.
-
Use a flat head screwdriver to help feed the bushing through its hole.
-
-
Este paso está sin traducir. Ayuda a traducirlo
-
Compress the caliper piston with a C-clamp.
-
Install the new inner pad by pressing it into the caliper and making sure the clips are secure.
-
-
Este paso está sin traducir. Ayuda a traducirlo
-
Grease the two guide bolts and reinstall them.
-
Reinstall the guide bolt dust caps.
-
-
Este paso está sin traducir. Ayuda a traducirlo
-
Place the brake line back in the bracket on the strut.
-
Secure the brake line with the retaining clip. Use the blunt end of a wrench to knock it completely into place.
-
-
Este paso está sin traducir. Ayuda a traducirlo
-
Reinstall the retainer clip by first inserting the ends into the two holes in the caliper, then use pliers to stretch the ends onto the mounting bracket.
-
-
Este paso está sin traducir. Ayuda a traducirlo
-
Put the wheels back on the car and hand tighten the lug nuts.
-
Lower the car and completely tighten the lug nuts
-
-
Este paso está sin traducir. Ayuda a traducirlo
-
Place the cap back on the brake fluid reservoir.
-
Turn the key to the "on" position. Press the brake pedal a few times. It should go to the floor once, and then become firm.
-
Fill the brake fluid reservoir with new fluid, if needed.
-
Replace the brake fluid reservoir cap, close the hood, and lower the car.
-


Cancelar: No complete esta guía.
24 personas más completaron esta guía.

8 comentarios
Excellent guide --- many thanks ! Also applicable with virtually no modifications to my 2012 Ford Ikon, except that on my car the guide pins needed a size 45 Torx bit to unscrew. I had to replace the rotors as well, and discovered Ford had used threadlocking compound on the mounting bolts for the bracket, making them the devil to remove without pneumatic wrench. Threadlocking compound should be outlawed !!
GEB
Awesome guide. Very helpful. No trouble at all.
Top effort… just saved myself £25!