Esta versión puede contener ediciones incorrectas. Cambie a la última instantánea verificada.
Qué necesitas
-
-
Ubica el pestillo del capó al lado de la puerta del lado del conductor, al lado del reposapiés izquierdo.
-
Tira del pestillo hacia ti para soltar el capó.
-
-
Este paso está sin traducir. Ayuda a traducirlo
-
Use a 10 mm hex driver or socket to remove the four screws that hold the spark plug cover in place.
-
Lift the plastic cover and set it aside.
-
-
-
Este paso está sin traducir. Ayuda a traducirlo
-
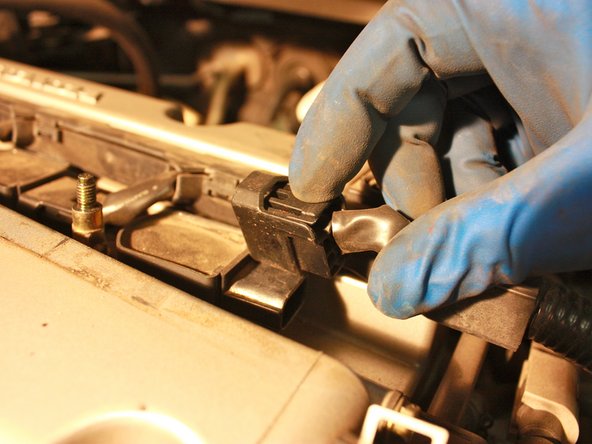
Remove the spark plug wire by pinching the locking tabs on either side of it and pulling it out.
-
-
Este paso está sin traducir. Ayuda a traducirlo
-
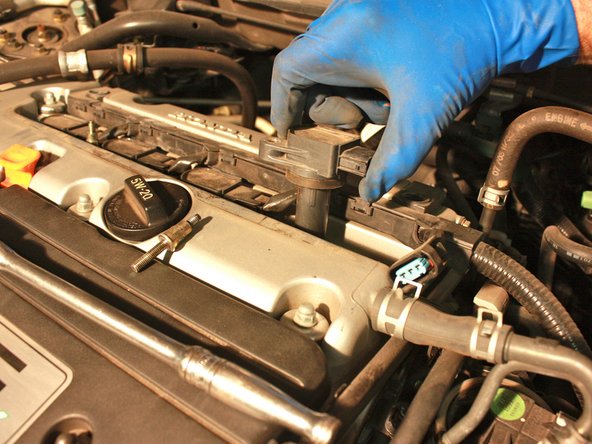
Use a 10 mm hex driver or socket to remove the four spark plug boot screws.
-
-
Este paso está sin traducir. Ayuda a traducirlo
-
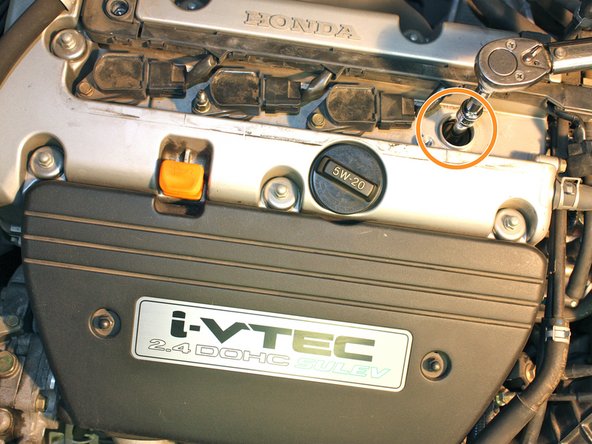
Locate the spark plug at the bottom of the bore.
-
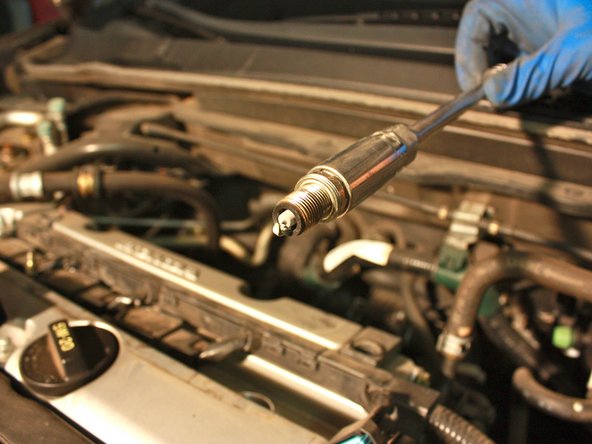
Use a ratchet, extension, and 5/8 inch socket to remove the plug by turning counterclockwise until it's free.
-
-
Este paso está sin traducir. Ayuda a traducirlo
-
Determine if the spark plug needs to be replaced by examining the gap for the problems listed below:
-
The gap is bridged by corrosion.
-
The gap is too large.
-
The area around the gap is black and dark.
-
-
Este paso está sin traducir. Ayuda a traducirlo
-
If the spark plug doesn't need to be replaced, return it to the spark plug bore. If it does need to be replaced, use a new one.
-
Use a ratchet, extension, and 5/8 inch socket to tighten the spark plug by turning clockwise. Use your hand to tighten as well.
-
Repeat Steps 10-13 for the three remaining spark plugs.
-


Cancelar: No complete esta guía.
36 personas más completaron esta guía.
Equipo

Cal Poly, Team 24-27, Regan Fall 2012 Miembro de Cal Poly, Team 24-27, Regan Fall 2012
CPSU-REGAN-F12S24G27
4 Miembros
22 Guías creadas
7 comentarios
Great instructions! I was able to change them pretty quickly.
First rule of thumb when changing spark plugs is to do it when the engine is cold. If you don't have a torque wrench it's ok, you can still tighten them properly. Easiest thing to do is put the new plug in the spark plug socket, attach the extension (8 or 10 in. is perfect) but not the ratchet. Thread the plug in until it is snug, then attach the ratchet to tighten. Most spark plug manufacturers put on the box (especially NGK) how much to tighten. Usually if the plug has no gasket, tighten 1/16 to 1/8 of a turn. If it has a gasket, tighten 1/2 to 2/3 of a turn. For an '05 Accord 4 cyl. they have a gasket.
I appreciate the thorough and precise instructions. I would add using anti-seize on new plug threads.