Introducción
Sure, you can see inside the iFixit Fast Charger, thanks to the clear plastic housing. But what's inside the rest of it? And how do you get it apart?
If you're looking to 3D print your own housing to replace the clear plastic case, or if you're in the mood for some board-level repair, check out the schematics here.
-
-
We designed the iFixit Fast Charger so that you could see what's inside without having to open it up. But if you're itching to take it apart anyway, we can relate.
-
The black plastic prong housing is held onto the clear plastic with tabs. The tabs are pretty secure—you'll want the help of a Jimmy or two and some opening picks.
-
-
-
If you're just trying to replace your case, you can stop here. We've got an STP file of the charger here, ready for you to modify in your own 3D printed design.
-
-
-
-
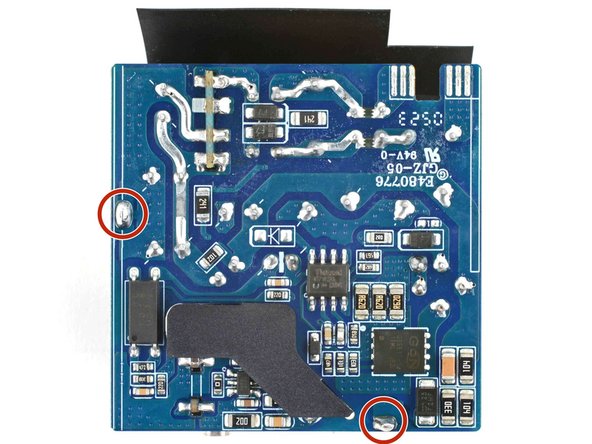
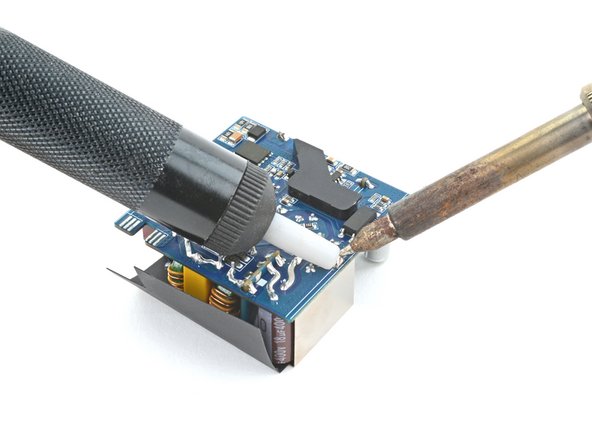
There's an electromagnetic interference shield that doubles as a heatsink on top of the charger. It's soldered to the board with two through-hole pins.
-
Release the shielding from the board by desoldering these pins, using a soldering iron and desoldering pump.
-
-
-
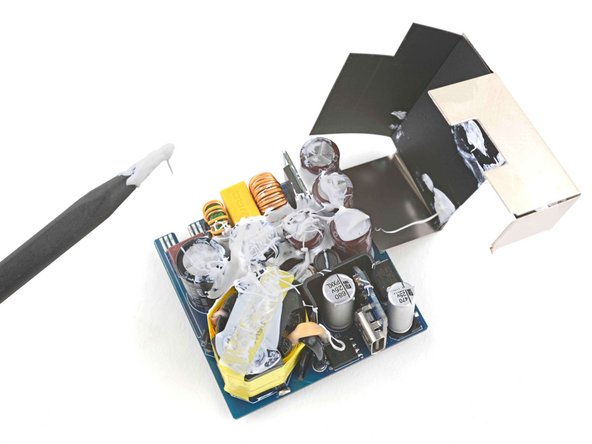
Underneath the shielding, most of the device is covered in thermal compound. We're not big fans of glue, in general, but it's really important for fast charging performance that nothing in here gets too hot.
-
This thermal compound conducts heat away from the electrical components, then out through the shielding. It also helps stabilize the components.
-
The compound cures soft (you can see how it coated our spudger!), which means that any component-level repair will be messy.
-