Saltar al contenido principal

Qué necesitas

Este desmontaje no es una guía de reparación. Para reparar tu Uniden EXP 371, utiliza nuestros manuales de servicio .

  1. Uniden EXP 371 Teardown, Uniden EXP 371 Teardown: paso 1, imagen 1 de 1
    • Uniden EXP371 900 MHz Cordless Phone.

    • 900 MHz Extended Range with One Touch RocketDial/Find Handset Locator and is Desk or Wall Mountable.

  2. Uniden EXP 371 Teardown: paso 2, imagen 1 de 2 Uniden EXP 371 Teardown: paso 2, imagen 2 de 2
    • Remove the battery by first pressing down on the rear of the cover and pushing the cover towards the bottom of the phone.

    • Next remove the battery by pulling on the connector.

  3. Uniden EXP 371 Teardown: paso 3, imagen 1 de 2 Uniden EXP 371 Teardown: paso 3, imagen 2 de 2
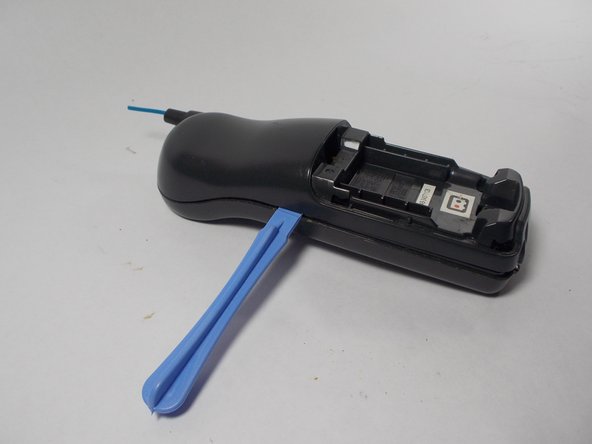
    • Next remove the two screws at the bottom of the phone with a PH1 philips screwdriver.

    • Now remove the top portion of the case from the bottom. This may be difficult to do with your bare hands. The use of a plastic opening tool may come in handy.

  4. Uniden EXP 371 Teardown: paso 4, imagen 1 de 3 Uniden EXP 371 Teardown: paso 4, imagen 2 de 3 Uniden EXP 371 Teardown: paso 4, imagen 3 de 3
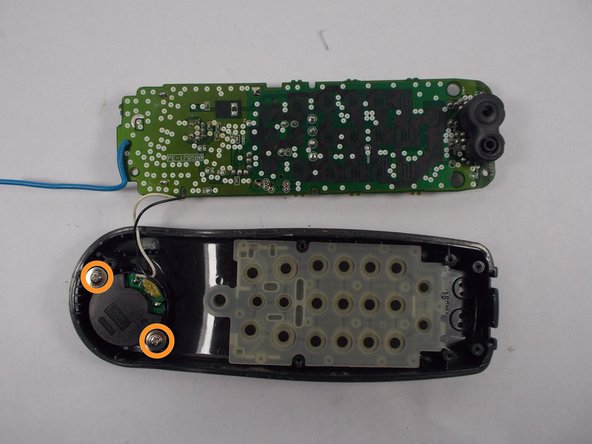
    • Your next step is to remove the five screws holding down the motherboard. Use the PH1 philips screwdriver.

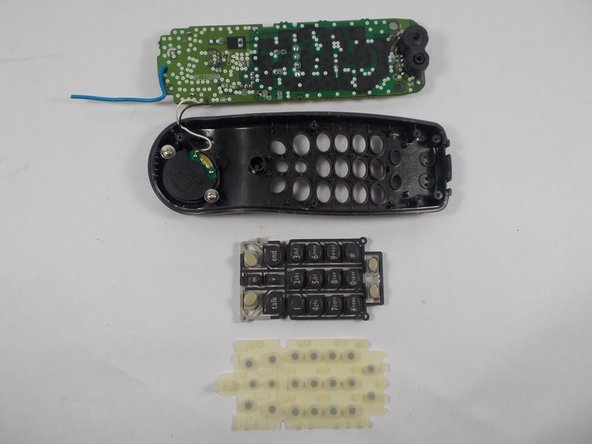
    • Once you have removed the five screws you may lift the motherboard off of the front case.

    • At this point you may also remove the dial pad. It simply lifts off.

    • You may also remove the speaker if needed by unscrewing the two screws using the PH1 philips screwdriver.

    • The whole phone is now disassembled at this point.

Tim Reimer

Miembro Desde 06/19/10

165 Reputación

3 Guías creadas

Un comentario

this guide is poorly written, please delete or improve it.

Walker Quine - Contestar

Agregar Comentario

Ver Estadísticas:

Ultimas 24 horas: 0

Ultimos 7 días: 1

Ultimos 30 días: 3

Todo El Tiempo: 4,565