Saltar al contenido principal
Únete a la Comunidad de Reparación - Crear Cuenta

Qué necesitas

Este desmontaje no es una guía de reparación. Para reparar tu Toaster, utiliza nuestros manuales de servicio .

  1. Toaster Made by Design model KT-3215 Teardown, Toaster Made by Design model KT-3215 Teardown: paso 1, imagen 1 de 1
    • This is what a Toaster Made by Design model KT-3215 should look like before the teardown has started.

    Pregunta a FixBot

    Agregar Comentario

  2. Toaster Made by Design model KT-3215 Teardown: paso 2, imagen 1 de 3 Toaster Made by Design model KT-3215 Teardown: paso 2, imagen 2 de 3 Toaster Made by Design model KT-3215 Teardown: paso 2, imagen 3 de 3
    • Make sure the toaster is unplugged and not near an electrical outlet.

    • Remove the crumb tray, which is located on the back of the toaster. Slide the crumb tray directly out. No lifting or twisting is required.

    Pregunta a FixBot

    Agregar Comentario

  3. Toaster Made by Design model KT-3215 Teardown: paso 3, imagen 1 de 3 Toaster Made by Design model KT-3215 Teardown: paso 3, imagen 2 de 3 Toaster Made by Design model KT-3215 Teardown: paso 3, imagen 3 de 3
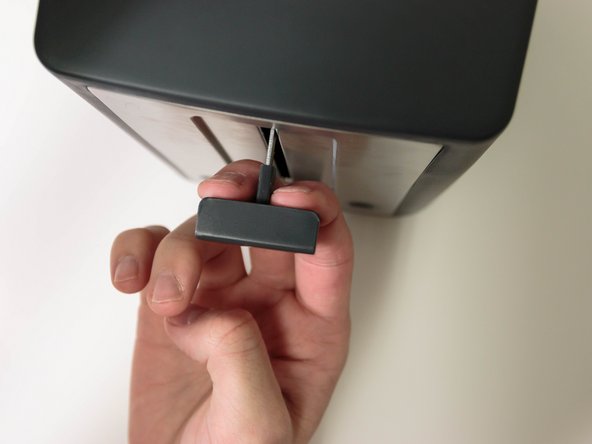
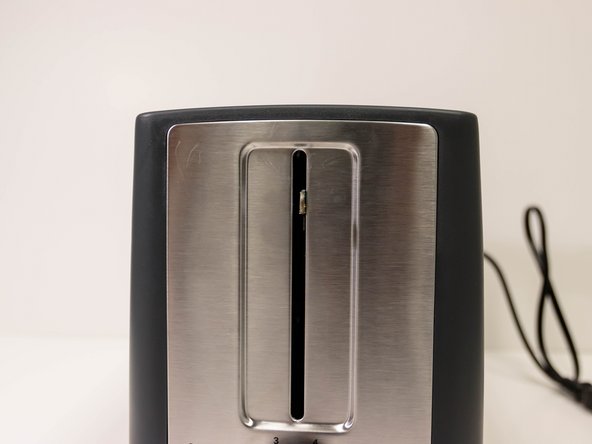
    • Use your index finger and middle finger to grip the loading lever, then pull towards your body to remove the lever. A fair amount of force may be required.

    Pregunta a FixBot

    Agregar Comentario

  4. Toaster Made by Design model KT-3215 Teardown: paso 4, imagen 1 de 1
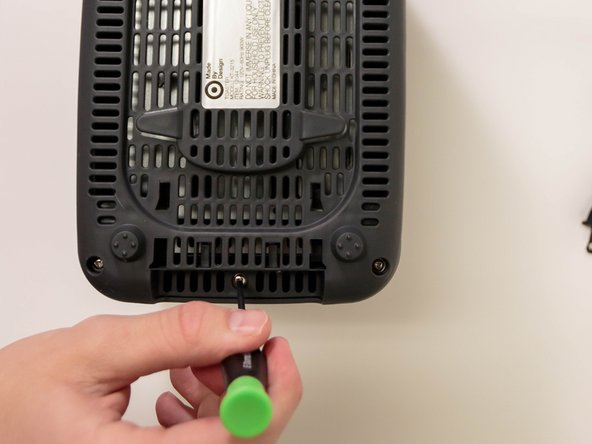
    • Flip the toaster upside down.

    • Use a spudger to remove the two rubber feet.

    Pregunta a FixBot

    Agregar Comentario

  5. Toaster Made by Design model KT-3215 Teardown: paso 5, imagen 1 de 2 Toaster Made by Design model KT-3215 Teardown: paso 5, imagen 2 de 2
    • Use a TA 2.3 screwdriver to unscrew the five triangular screws on the bottom of the toaster.

    Pregunta a FixBot

    Agregar Comentario

  6. Toaster Made by Design model KT-3215 Teardown: paso 6, imagen 1 de 3 Toaster Made by Design model KT-3215 Teardown: paso 6, imagen 2 de 3 Toaster Made by Design model KT-3215 Teardown: paso 6, imagen 3 de 3
    • Lift the toaster casing. This will expose the power splitter cable (white cable).

    • Use a spudger and your thumb, to remove the power splitter cable.

    Pregunta a FixBot

    Agregar Comentario

  7. Toaster Made by Design model KT-3215 Teardown: paso 7, imagen 1 de 2 Toaster Made by Design model KT-3215 Teardown: paso 7, imagen 2 de 2
    • Place the toaster casing upside down.

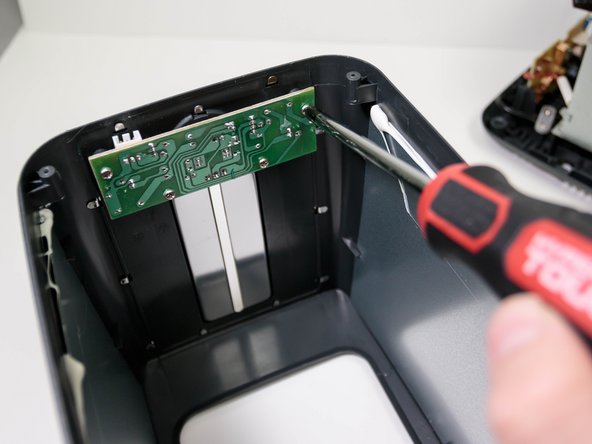
    • Use a Phillips #2 x 4in. screwdriver to remove the four 0.25 in. Phillips head screws. These screws are securing the control board for the buttons and timer knob.

    Pregunta a FixBot

    Agregar Comentario

  8. Toaster Made by Design model KT-3215 Teardown: paso 8, imagen 1 de 2 Toaster Made by Design model KT-3215 Teardown: paso 8, imagen 2 de 2
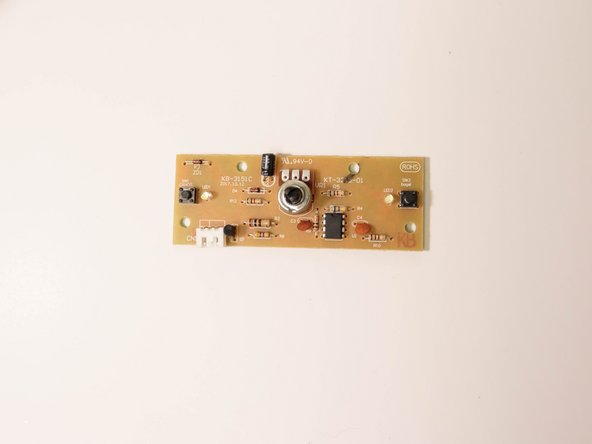
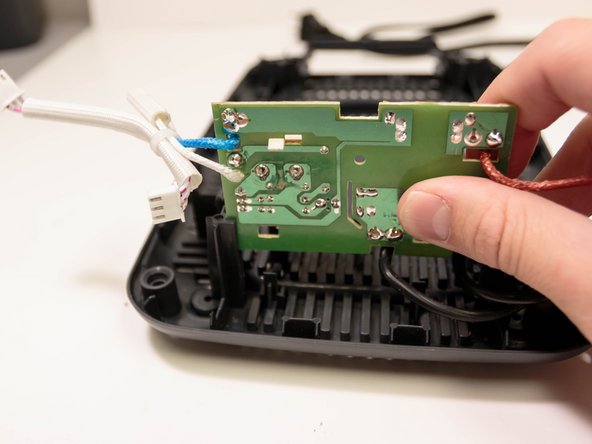
    • Remove the control board from the toaster casing.

    Pregunta a FixBot

    Agregar Comentario

  9. Toaster Made by Design model KT-3215 Teardown: paso 9, imagen 1 de 3 Toaster Made by Design model KT-3215 Teardown: paso 9, imagen 2 de 3 Toaster Made by Design model KT-3215 Teardown: paso 9, imagen 3 de 3
    • Pull the bagel button and cancel button off of the toaster casing. These buttons require little force to remove.

    • Detach the timer knob by pinching the sides of the timer knob and pushing towards the exterior of the toaster casing.

    Pregunta a FixBot

    Agregar Comentario

  10. Toaster Made by Design model KT-3215 Teardown: paso 10, imagen 1 de 3 Toaster Made by Design model KT-3215 Teardown: paso 10, imagen 2 de 3 Toaster Made by Design model KT-3215 Teardown: paso 10, imagen 3 de 3
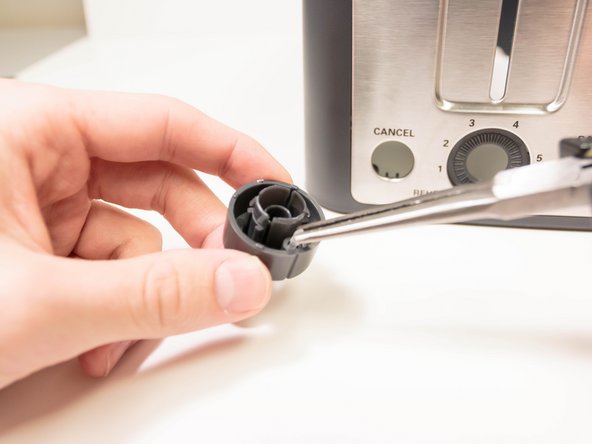
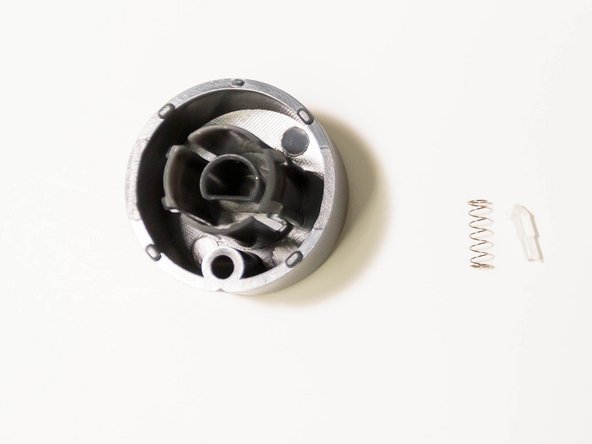
    • Use a pair of mini long-nose pliers to remove the spring components from the timer knob.

    Pregunta a FixBot

    Agregar Comentario

  11. Toaster Made by Design model KT-3215 Teardown: paso 11, imagen 1 de 2 Toaster Made by Design model KT-3215 Teardown: paso 11, imagen 2 de 2
    • Use a pair of mini long-nose pliers to bend the metal lips located on the back of the toaster. The metal lips should be facing towards you after you have bent them.

    • Remove the waveguide cover (rectangular tan cover) on the back of the toaster.

    Pregunta a FixBot

    Agregar Comentario

  12. Toaster Made by Design model KT-3215 Teardown: paso 12, imagen 1 de 2 Toaster Made by Design model KT-3215 Teardown: paso 12, imagen 2 de 2
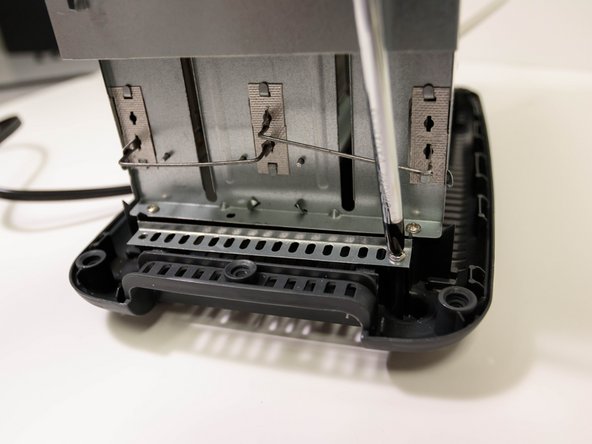
    • Use a Phillips 2 x 4in. screwdriver to remove the two 0.25 in. Phillips head screws. This will allow you to remove the metal bracket.

    Pregunta a FixBot

    Agregar Comentario

  13. Toaster Made by Design model KT-3215 Teardown: paso 13, imagen 1 de 2 Toaster Made by Design model KT-3215 Teardown: paso 13, imagen 2 de 2
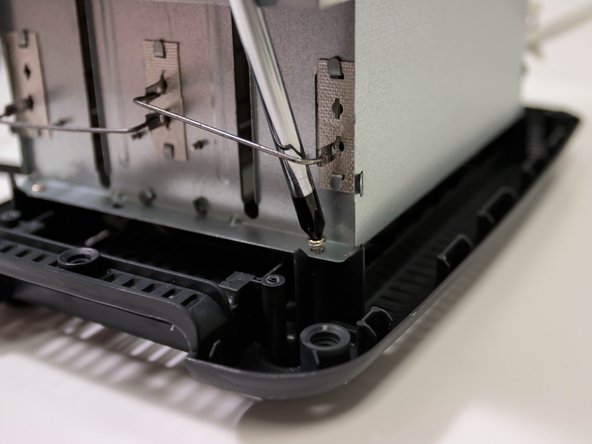
    • Use a Phillips 2 x 4in. screwdriver to remove the two 0.25 in. Phillips head screws. These screws secure the back of the internal housing of the toaster.

    Pregunta a FixBot

    Agregar Comentario

  14. Toaster Made by Design model KT-3215 Teardown: paso 14, imagen 1 de 2 Toaster Made by Design model KT-3215 Teardown: paso 14, imagen 2 de 2
    • Use a Phillips 2 x 4in. screwdriver to remove the two 0.25 in. Phillips head screws. These screws secure the front of the internal housing of the toaster.

    Pregunta a FixBot

    Agregar Comentario

  15. Toaster Made by Design model KT-3215 Teardown: paso 15, imagen 1 de 3 Toaster Made by Design model KT-3215 Teardown: paso 15, imagen 2 de 3 Toaster Made by Design model KT-3215 Teardown: paso 15, imagen 3 de 3
    • Lift the internal housing.

    • Use a pair of mini needle pliers to remove the other end of the power splitter cable.

    Pregunta a FixBot

    Agregar Comentario

  16. Toaster Made by Design model KT-3215 Teardown: paso 16, imagen 1 de 2 Toaster Made by Design model KT-3215 Teardown: paso 16, imagen 2 de 2
    • Place the internal housing flat on the base of the toaster.

    • Use a pair of mini long-nose pliers to detach the wires that are welded to the internal housing. This may require some force.

    Pregunta a FixBot

    Agregar Comentario

  17. Toaster Made by Design model KT-3215 Teardown: paso 17, imagen 1 de 1
    • Remove the internal housing from the base of the toaster.

    Pregunta a FixBot

    Agregar Comentario

  18. Toaster Made by Design model KT-3215 Teardown: paso 18, imagen 1 de 3 Toaster Made by Design model KT-3215 Teardown: paso 18, imagen 2 de 3 Toaster Made by Design model KT-3215 Teardown: paso 18, imagen 3 de 3
    • Use a Phillips #2 x 4in. screwdriver to remove the two 0.25 in. Phillips head screws from the plastic fastener.

    • Remove the plastic fastener.

    Pregunta a FixBot

    Agregar Comentario

  19. Toaster Made by Design model KT-3215 Teardown: paso 19, imagen 1 de 2 Toaster Made by Design model KT-3215 Teardown: paso 19, imagen 2 de 2
    • Remove the main electric controller by gently pushing forward on it then raising it up.

    Pregunta a FixBot

    Agregar Comentario

  20. Toaster Made by Design model KT-3215 Teardown: paso 20, imagen 1 de 1
    • Pull the power cord through the base of the toaster. This will allow separation between the base of the toaster and the main electric controller.

    Pregunta a FixBot

    Agregar Comentario

  21. Toaster Made by Design model KT-3215 Teardown, Completed Teardown: paso 21, imagen 1 de 1
    • The teardown of a Toaster Made by Design Model model KT-3215 is now complete.

    Pregunta a FixBot

    Agregar Comentario

Mallory

Miembro Desde 11/15/21

313 Reputación

1 Guía escrita

0Guía Comentarios

Agregar Comentario

Ver Estadísticas:

Ultimas 24 horas: 1

Ultimos 7 días: 4

Ultimos 30 días: 37

Todo El Tiempo: 2,258