Saltar al contenido principal

Qué necesitas

Este desmontaje no es una guía de reparación. Para reparar tu Sony Ericsson K750i, utiliza nuestros manuales de servicio .

  1. Sony Ericsson K750i Teardown, Battery Cover: paso 1, imagen 1 de 1
    • Remove the battery cover.

    • Press down firmly with your thumb and slide the cover back.

  2. Sony Ericsson K750i Teardown, Back Casing: paso 2, imagen 1 de 1
    • Remove two Phillips #0 screws from the battery chamber.

    • Remove two Torx T6 screws from the battery chamber.

  3. Sony Ericsson K750i Teardown: paso 3, imagen 1 de 1
    • Gently pry off the back casing.

    • Work an opening tool around the entire seam before attempting to pull off the casing. This action will reduce the chance of cracking the casing.

  4. Sony Ericsson K750i Teardown: paso 4, imagen 1 de 1
    • Remove the casing to expose the camera's components.

  5. Sony Ericsson K750i Teardown, Keypad: paso 5, imagen 1 de 1
    • Gently pry open the front casing by working an opening tool along the entire seam.

  6. Sony Ericsson K750i Teardown: paso 6, imagen 1 de 1
    • Remove the front casing by gently lifting it from the phone.

    • Be careful not to pull off any other delicate pieces.

  7. Sony Ericsson K750i Teardown: paso 7, imagen 1 de 2 Sony Ericsson K750i Teardown: paso 7, imagen 2 de 2
    • Remove the keypad.

    • The LCD screen is very fragile. Be careful not to catch the keypad on it while removing.

  8. Sony Ericsson K750i Teardown, LCD Screen: paso 8, imagen 1 de 1
    • Remove the screws holding the screen in place.

  9. Sony Ericsson K750i Teardown: paso 9, imagen 1 de 1
    • Gently lift the base of the keypad to remove it.

  10. Sony Ericsson K750i Teardown: paso 10, imagen 1 de 1
    • Gently pull up the green film, avoiding the joystick.

    • The LCD screen will be attached to this film and come off with it.

  11. Sony Ericsson K750i Teardown, Sony Ericsson K750i Teardown: paso 11, imagen 1 de 1
    • Remove the back cover from the phone.

    • Gently slide the ribbon out of its connection.

  12. Sony Ericsson K750i Teardown: paso 12, imagen 1 de 2 Sony Ericsson K750i Teardown: paso 12, imagen 2 de 2
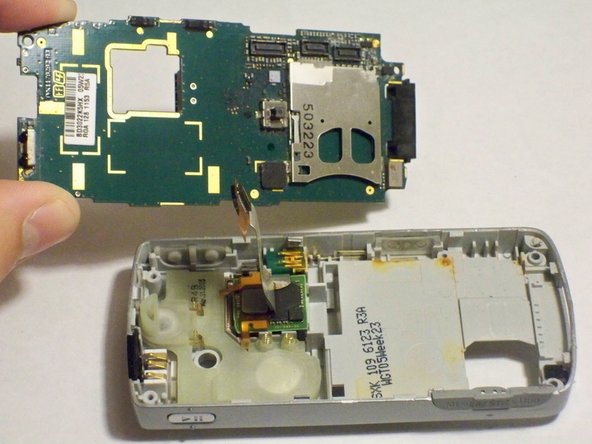
    • Lift the motherboard out of the phone.

    • The ribbon is fragile so work the motherboard off around the ribbon to prevent damage.

  13. Sony Ericsson K750i Teardown: paso 13, imagen 1 de 2 Sony Ericsson K750i Teardown: paso 13, imagen 2 de 2
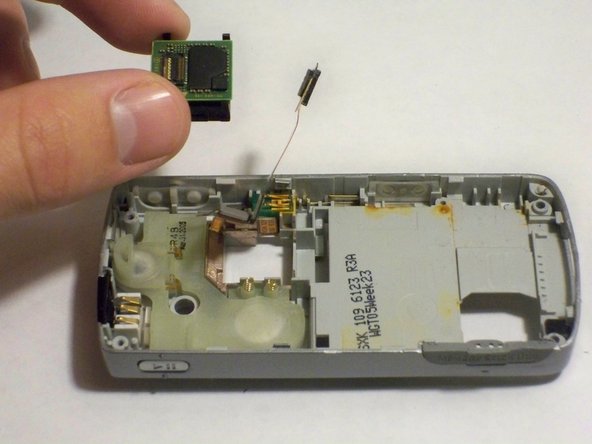
    • Pry off the microchip that is located below the ribbon.

  14. Sony Ericsson K750i Teardown: paso 14, imagen 1 de 2 Sony Ericsson K750i Teardown: paso 14, imagen 2 de 2
    • Lift out the plastic support to complete the teardown.

Abby Evers

Miembro Desde 10/04/11

202 Reputación

6 Guías creadas

Equipo

UW Stout, Team 1-6, Zhou Fall 2011 Miembro de UW Stout, Team 1-6, Zhou Fall 2011

UWSTOUT-ZHOU-F11S1G6

4 Miembros

12 Guías creadas

Un comentario

Agregar Comentario

Ver Estadísticas:

Ultimas 24 horas: 0

Ultimos 7 días: 2

Ultimos 30 días: 23

Todo El Tiempo: 12,421