Qué necesitas
-
Este paso está sin traducir. Ayuda a traducirlo
-
Turn the device off and use your finger to remove the back cover and battery. The Galaxy Note 3 battery is removable, making it easy to remove it without any tool.
-
-
Este paso está sin traducir. Ayuda a traducirlo
-
The back chassis is fastened by twelve Philips screws, so we have to undo the screws with the Philips screwdrivers.
-
-
Este paso está sin traducir. Ayuda a traducirlo
-
Pull out the S pen and use spudger to release the back chassis. Then the chassis is separated from the rest of the device.
-
-
Este paso está sin traducir. Ayuda a traducirlo
-
Disconnect seven cable connectors to remove the mainboard. Then the board is free.
-
-
-
Este paso está sin traducir. Ayuda a traducirlo
-
Use plastic case to release the antenna cable clips and remove the antenna cable.
-
-
Este paso está sin traducir. Ayuda a traducirlo
-
Use spudger to remove the USB board with proper strength because the USB board is stuck with glue.
-
-
Este paso está sin traducir. Ayuda a traducirlo
-
Undo the screw used to fasten the earphone jack and earphone and remove them.
-
-
Este paso está sin traducir. Ayuda a traducirlo
-
Remove the small metal bracket covering the front facing camera and sensor cable. Then remove the front camera and sensor cable.
-
-
Este paso está sin traducir. Ayuda a traducirlo
-
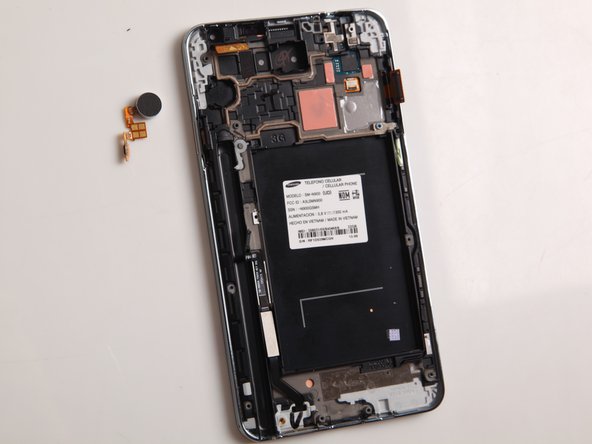
Use screwdriver to pry out the vibrating motor. Please be noted the motor is adhered to the front chassis and connected with the power button. Please lift it up carefully to avoid damaging the power button cable.
-


40 comentarios
is it possible to use a Sprint Galaxy Note 3 USB port on a T-Mobile Galaxy Note 3?
It will fit, but the antenna are different. The phone will not work properly: the wireless reception will be worse.
I did exactly that and I haven't noticed any difference at all. My phone works and charges perfectly now, and all it took was 12 bucks and a little patience. Good luck!
If single sim it same