Saltar al contenido principal

Qué necesitas

Este desmontaje no es una guía de reparación. Para reparar tu Samsung Galaxy Centura, utiliza nuestros manuales de servicio .

  1. Samsung Galaxy Centura Teardown, Samsung Galaxy Centura Teardown: paso 1, imagen 1 de 2 Samsung Galaxy Centura Teardown, Samsung Galaxy Centura Teardown: paso 1, imagen 2 de 2
    • This is the Samsung Galaxy Centura, a low-end smartphone made for the Tracfone/Straight Talk networks.

  2. Samsung Galaxy Centura Teardown: paso 2, imagen 1 de 2 Samsung Galaxy Centura Teardown: paso 2, imagen 2 de 2
    • Remove the battery, and then remove the 7 Phillips screws surrounding the outer casing.

  3. Samsung Galaxy Centura Teardown: paso 3, imagen 1 de 3 Samsung Galaxy Centura Teardown: paso 3, imagen 2 de 3 Samsung Galaxy Centura Teardown: paso 3, imagen 3 de 3
    • Pop the 4 clips on both the left and right side of the phone. The outer casing should come right off by pulling.

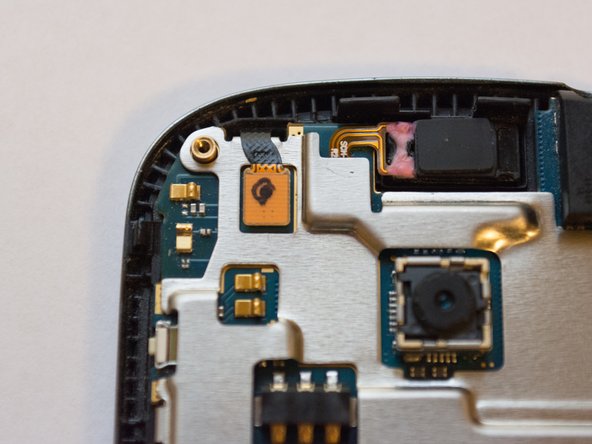
    • This antenna can be removed with a spudger or screwdriver.

    • This is the speaker assembly (with more antennas!)

  4. Samsung Galaxy Centura Teardown: paso 4, imagen 1 de 3 Samsung Galaxy Centura Teardown: paso 4, imagen 2 de 3 Samsung Galaxy Centura Teardown: paso 4, imagen 3 de 3
    • Disconnect the two flex cables with a spudger or plastic opening tool.

  5. Samsung Galaxy Centura Teardown: paso 5, imagen 1 de 1
    • Now the display assembly is free.

  6. Samsung Galaxy Centura Teardown: paso 6, imagen 1 de 1
    • Remove the 3 Phillips screws on the back of the motherboard to remove the EMI shielding.

  7. Samsung Galaxy Centura Teardown: paso 7, imagen 1 de 1
    • Congrats! You've torn down the Samsung Galaxy Centura.

Brooks Robinson

Miembro Desde 07/16/15

127 Reputación

1 Guía escrita

0 comentarios

Agregar Comentario

Ver Estadísticas:

Ultimas 24 horas: 1

Ultimos 7 días: 2

Ultimos 30 días: 7

Todo El Tiempo: 2,378