Introducción
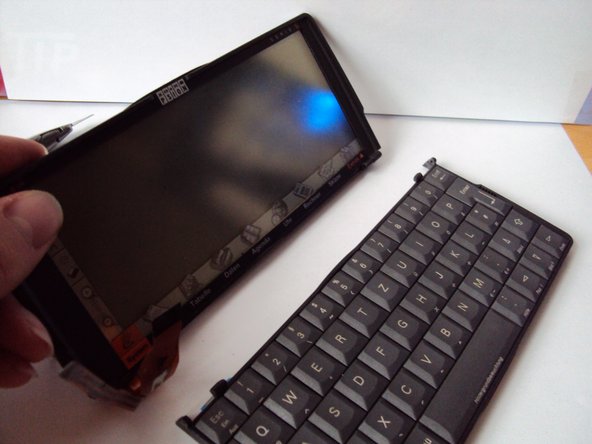
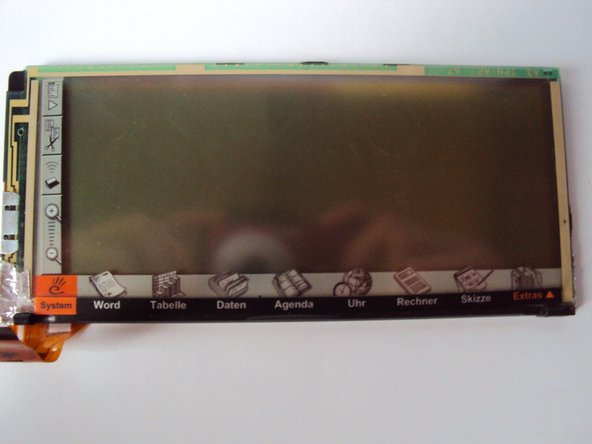
Here's a Psion Series 5 for disassembly. It's manufactured in 1997 and made in the UK. It was very popular for business men because of the stable OS, named EPOC. (Now known as Symbian OS) It's powered by two AA batteries. It has a 640x240 pixel greyscale LCD with a backlight. The keyboard is generally considered to be amongst the best for its size, with large-travel keys and touch-type capability. The most common problem was a design fault in the screen and keyboard cable. By opening and closing, the cables get stressed and lead to vertical lines on the screen.
Qué necesitas
-
-
Flip the Psion onto its back
-
Remove the three screws.
-
There was a "guarantee void if removed" sticker. Anyway, this device is over 12 years old, there's no guarantee!
-
-
-
Pull the lower case away from the chassis. Lift from the rear edge.
-
Pull the rear case away from the chassis. It clips into the chassis, so it may resist a bit. Pull slowly and firmly straight out from the chassis and it should unclip.
-
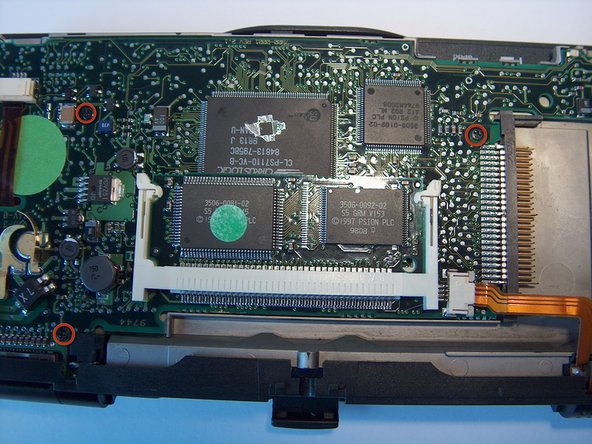
Now let's see what we found:
-
Personality module, with EPOC stored in ROM. The chip on the left holds the base OS, the chip on the right holds language localization. This module is interchangeable with personality modules of other languages or locales.
-
ARM 710 CPU
-
The touchscreen controller.
-
-
-
Remove the three screws holding the mainboard in place.
-
Unclip the two ribbon cable connectors by prying gently on the locking tabs on either side of the ribbon with a spudger or other non-metal tool.
-
Pull the ribbon out of the connector. Repeat this for both connectors.
-
Used for power and speaker.
-
Used for powering the backlight.
-
-
-
-
Pull the mainboard away from the chassis, starting at the front edge.
-
Remove the two ribbon cables, unlocking the tabs the same way as in Step 3.
-
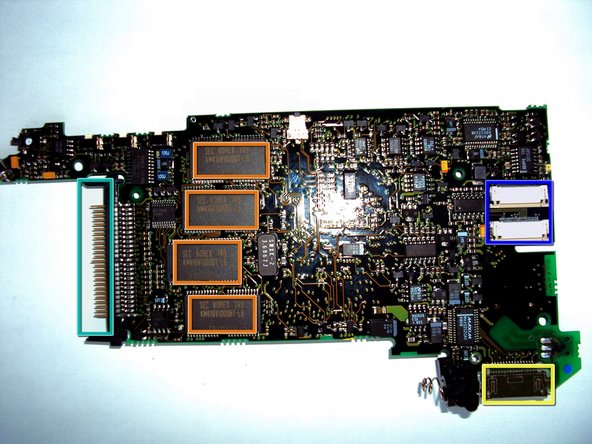
Let's look at the components on this side of the mainboard:
-
4x 2MB of RAM
-
Connectors for the two ribbon cables. The blue one connects the keyboard, the brown one connects the LCD and digitizer.
-
Compact Flash card connector
-
Proprietary RS-232 serial connector
-
-
-
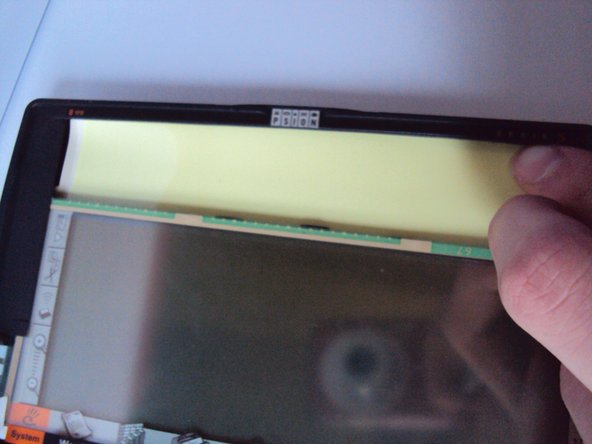
Insert a straightened paper clip or other small cylindrical tool (a T2 Torx driver is pictured here) into the hollow pin on each side of the display housing
-
Apply sideways pressure and pull the pin out. Do this on both sides.
-
The idea here is to use the tip of the tool to dig into the side of the inside of the pin to grab it and pry it out.
-


3 comentarios
For more Psionrepairs: Mail: psion@hccnet.nl (december 2010)
Does there exist a description of the keyboard connector? I have a fully operational Psion 5 but its screen is cracked from top to bottom. Only the left side of the screen is now sensitive to touch. The whole screen shows data so that functions properly. Now I'd like to use the screen with my Rasberry Pi 2. Won't tear it down just yet. Thanks.