Saltar al contenido principal

Qué necesitas

Este desmontaje no es una guía de reparación. Para reparar tu Project Tango Tablet, utiliza nuestros manuales de servicio .

  1. Project Tango Tablet Teardown, Project Tango Tablet Teardown: paso 1, imagen 1 de 2 Project Tango Tablet Teardown, Project Tango Tablet Teardown: paso 1, imagen 2 de 2
    • Welcome back, Project Tango. It's been a while since you've graced us with your presence. Of course, take a seat. Would you like a glass of water? No? Oh you're here for a teardown? Gladly.

    • Project Tango is growing up fast; let's check its specs on the home height chart:

    • 7" HD 1920 x 1200 (323 ppi) touchscreen display

    • 120˚ front-facing camera + 4 MP RGB-IR rear-facing camera along with a 170˚ motion tracking camera

    • 2.3 GHz quad-core NVIDIA Tegra K1 CPU

    • 4 GB RAM

    • 128 GB flash memory, expandable via microSD

  2. Project Tango Tablet Teardown: paso 2, imagen 1 de 1
    • Labeling galore! The Tango tablet has half a dozen numeric identifiers, an Nvidia logo, and a disclaimer that it's not FCC authorized, yet.

    • Buried beneath a myriad of labels and disclaimers is the model number: NX-74751.

    • NX-74751 is the registry number of the USS Yellowstone from Star Trek: Voyager. "Yellowstone" also happens to be the codename of the Tango tablet. We should've known Google was a Star Trek fan.

    • From a repair point of view, we already notice something that might get in our way: Cam glue. With the Cam glue flag set to YES, we hope for the best and prepare for the worst.

  3. Project Tango Tablet Teardown: paso 3, imagen 1 de 2 Project Tango Tablet Teardown: paso 3, imagen 2 de 2
    • Google's ATAP (Advanced Technology and Projects) team, not to be confused with the Arkansas Taxpayer Access Point (ATAP) group, have stepped up their design game.

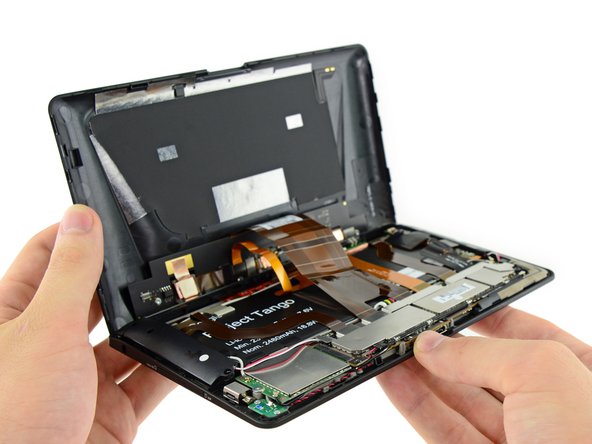
    • The Project Tango tablet is far more polished than the Project Tango phone. The thicker portion of the tablet allows room for the additional cameras, but slims down to a more typical tablet thickness.

    • From Google: "We also use the unique design to guide the fingers away from the camera. Given that we use the cameras for unique user experiences, it may not be obvious to the user that they are blocking them like you would when using a picture-taking app."

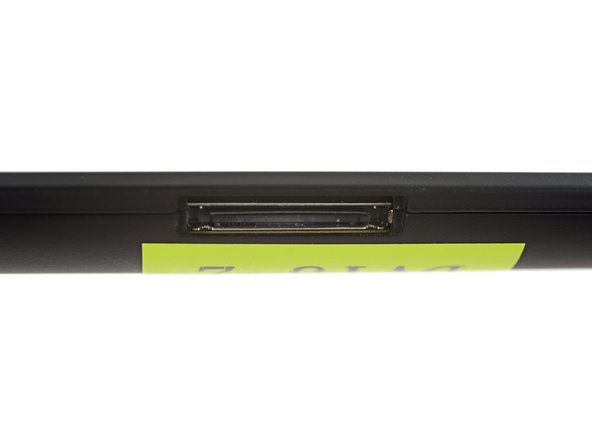
    • The new design also includes a non-standard dock connector that allows for 12 V high-speed charging and USB 3.0.

  4. Project Tango Tablet Teardown: paso 4, imagen 1 de 2 Project Tango Tablet Teardown: paso 4, imagen 2 de 2
    • Riddle us this: How many screws or special fasteners does it take to secure the rear case to the front panel assembly? Zero. No adhesive either.

    • We carefully pry open the Project Tango tablet with a handy plastic opening tool, revealing all those promised goodies.

    • The camera array is mounted on a board attached to the rear case.

  5. Project Tango Tablet Teardown: paso 5, imagen 1 de 2 Project Tango Tablet Teardown: paso 5, imagen 2 de 2
    • Pull out a few screws and the camera board comes free from the rear case, allowing us a closer look.

    • The back cover is full of holes for that vast array of cameras, and covered in antennas—including NFC.

    • We will assume that the inclusion of NFC into the Project Tango tablet can only mean one thing: this is meant to be a prototype shopping tablet for IKEA.

  6. Project Tango Tablet Teardown: paso 6, imagen 1 de 2 Project Tango Tablet Teardown: paso 6, imagen 2 de 2
    • Moving right along, it's time to separate the camera board. Except it's not, because it's connected to the motherboard by several cables, trapped under a metal bracket.

    • Getting closer...

    • While we've got these connectors exposed, let's go ahead and defuse disconnect the battery.

  7. Project Tango Tablet Teardown: paso 7, imagen 1 de 3 Project Tango Tablet Teardown: paso 7, imagen 2 de 3 Project Tango Tablet Teardown: paso 7, imagen 3 de 3
    • We can't help but notice the resemblance to the Kinect.

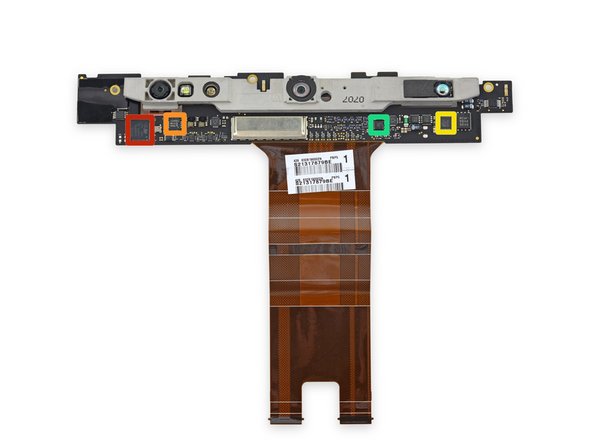
    • There are several ICs on the camera control board:

    • STMicroelectronics STM32L151QD Ultra-low-power ARM Cortex-M3 MCU

    • Google says this is used as the sensor hub for accurate time-stamping of camera captures.

    • NXP Semiconductors PCA9546A in HVQFN16 package (546A 0108 TXD403)

    • Linear Tech LT3743 in QFN package (4C 3743 N3580)

    • ON Semiconductor NCP45560 Controlled Load Switch

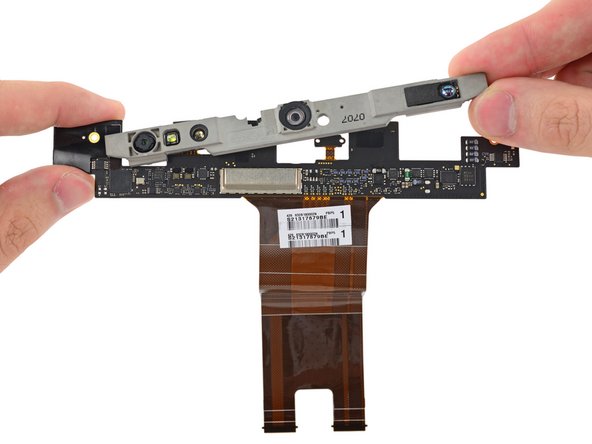
    • Let's remove the camera module assembly to get a closer look at the cameras themselves.

  8. Project Tango Tablet Teardown: paso 8, imagen 1 de 2 Project Tango Tablet Teardown: paso 8, imagen 2 de 2
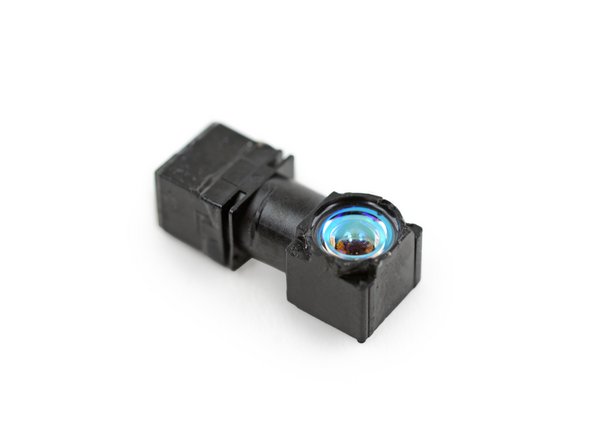
    • The IR projector is tucked within the camera assembly, but our trusty tweezers make removing it a breeze.

    • An IR projector provides infrared light that other (non-RGB) cameras can use to get a sense of an area in 3D space.

    • Curious how this works? We've got you covered. Science with iFixit is ready to satisfy all of your IR curiosities.

    • From Google: "The IR projector is from Mantis Vision, and designed specific to our specs for field of view and resolution. It is custom designed to work in partnership with the 4MP RGB-IR camera on the other side."

    • Looks like we found out what the "cam glue" marking meant! The two rear-facing cameras are hot-glued to the camera assembly, making replacement difficult.

  9. Project Tango Tablet Teardown: paso 9, imagen 1 de 2 Project Tango Tablet Teardown: paso 9, imagen 2 de 2
    • Do you know what kinda sorta really grinds our gears? Not being able to remove the battery in one or two steps.

    • Granted, this is a dev kit so we don't expect pretty cable management, but still.

    • We had to disconnect several connectors and ribbon cables, all held down with mild adhesive.

  10. Project Tango Tablet Teardown: paso 10, imagen 1 de 2 Project Tango Tablet Teardown: paso 10, imagen 2 de 2
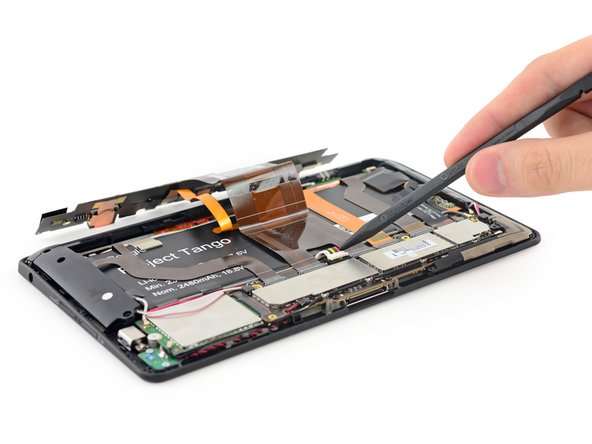
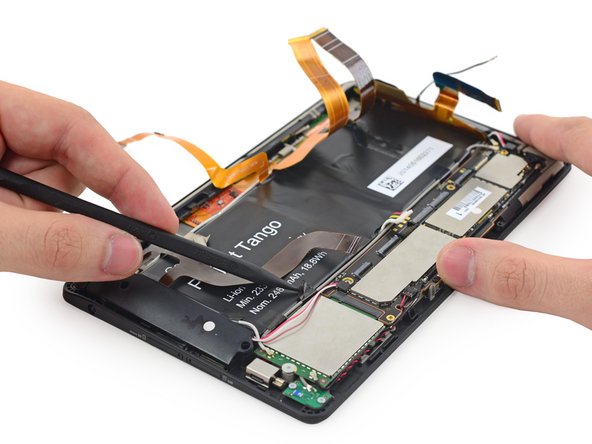
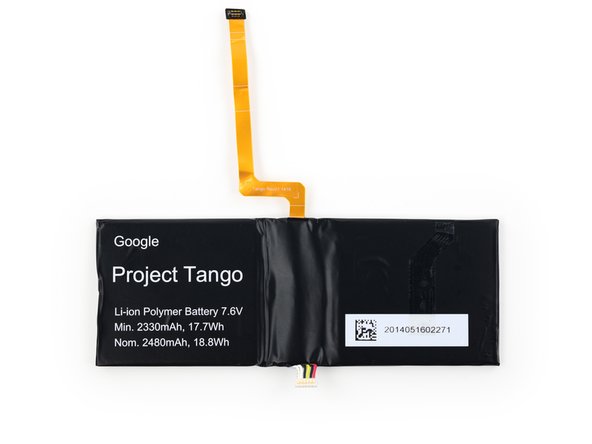
    • Mapping an entire space in 3D requires a hefty source of power. Luckily the Project Tango tablet has just that.

    • From Google: "The battery is custom designed to be dual cell for max power drawn when necessary—again, we want no compromises for the developer wanting to pull juice and kick out heat."

    • A bit of light adhesive is all that anchors the battery to the front panel assembly.

    • The dual-cell 7.6 V Li-ion polymer battery is rated at around 18 Wh of energy, well over the Tango Phone's already-hefty 11.1 Wh.

    • For a relevant consumer tablet comparison, the Nexus 7 2nd Generation featured a 15 Wh battery.

  11. Project Tango Tablet Teardown: paso 11, imagen 1 de 3 Project Tango Tablet Teardown: paso 11, imagen 2 de 3 Project Tango Tablet Teardown: paso 11, imagen 3 de 3
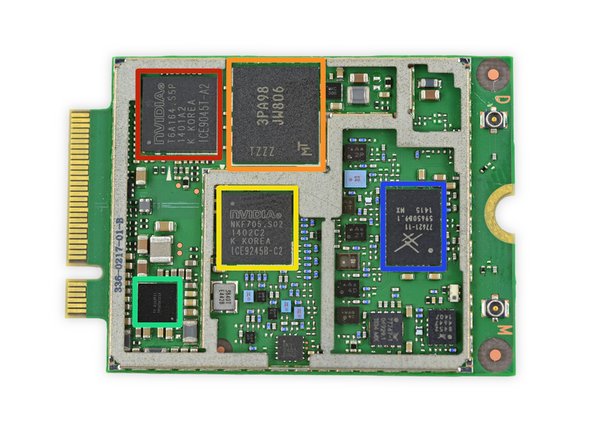
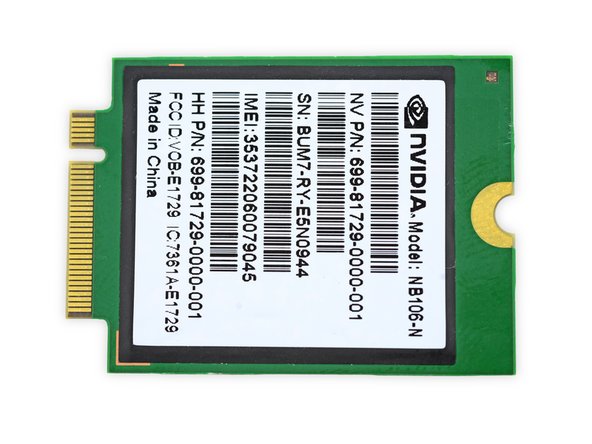
    • While scouring inside the Project Tango tablet we came across this Nvidia NB106-N baseband module.

    • It looks like Google wanted to use an off-the-shelf module so that they could easily deploy the Tango tablet in multiple regions that have different network certifications.

    • Notable ICs on the baseband module:

    • Nvidia ICE9245B-C2 low-power, multi-mode RF transceiver

    • Micron 3PA98 JW806 NAND-based MCP

    • Nvidia Icera ICE9045T-A2 LTE Modem

    • Texas Instruments TPS659121A PMU for Processor Power

    • Skyworks 77621-11 Multimode Multiband Power Amplifier Module

  12. Project Tango Tablet Teardown: paso 12, imagen 1 de 3 Project Tango Tablet Teardown: paso 12, imagen 2 de 3 Project Tango Tablet Teardown: paso 12, imagen 3 de 3
    • Houston, we've found speakers. A pair of stereo speakers to be more precise.

    • To the untrained eye, these may seem like ordinary speakers. But to the trained eye...they just seem to be ordinary speakers.

    • Expanding upon audio and mapping 3D space, how great would it be if the Project Tango tablet was able to map a 3D sound field?. Granted it would take more than speakers. Obviously a set of microphones, but if you're listening Google, we thought of it first.

    • "Ok Google..."

  13. Project Tango Tablet Teardown: paso 13, imagen 1 de 2 Project Tango Tablet Teardown: paso 13, imagen 2 de 2
    • We continue our trek to uncover the motherboard. At this point, we've got just a few small obstacles:

    • Two antenna cables

    • Two T5 Torx screws

    • One vibrator motor cable

    • Lifting up the motherboard reveals a hefty heat pipe running along the length of it.

    • With more and more power available on mobile platforms, it seems the only limit is dissipating heat. Loaded with that Tegra K1 quad-core, removing more heat means squeezing out more power. Google didn't want anything to limit Tango devs.

  14. Project Tango Tablet Teardown: paso 14, imagen 1 de 2 Project Tango Tablet Teardown: paso 14, imagen 2 de 2
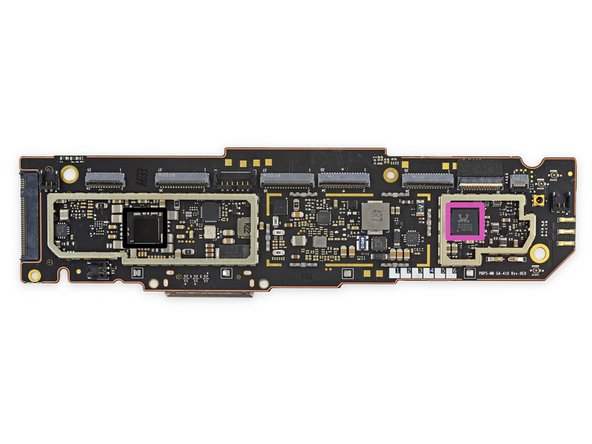
    • Prominent ICs driving the Project Tango tablet:

    • Nvidia TD580D-A1 2.3 GHz quad-core Tegra K1 processor

    • SanDisk 4133DF4PG02X 128 GB flash memory

    • Elpida FA232A2MA 2 GB LPDDR3 RAM (two ICs for 4 GB total)

    • Broadcom BCM4752IUB2G integrated multi-constellation GNSS receiver

    • Broadcom BCM43341XKUBG single-chip dual-band combo device supporting 802.11n, Bluetooth 4.0+HS & FM receiver

    • Realtek ACL5642 Hi-Fi audio single chip with voice/sound DSP and CODEC

    • Texas Instruments 45A2RFI

  15. Project Tango Tablet Teardown: paso 15, imagen 1 de 3 Project Tango Tablet Teardown: paso 15, imagen 2 de 3 Project Tango Tablet Teardown: paso 15, imagen 3 de 3
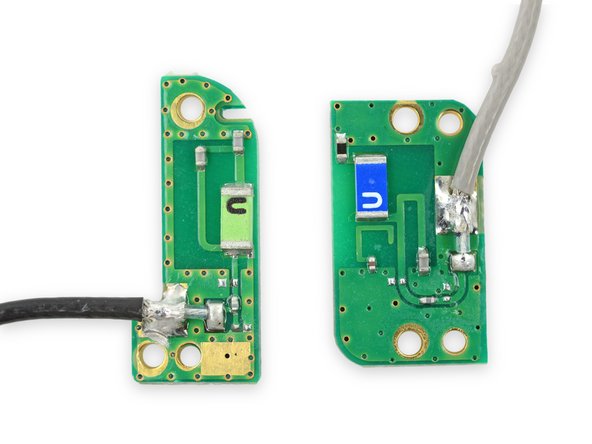
    • More antennas! The rear case obviously wasn't enough to keep this device 100% connected. This bar holds a couple extra stuck-on antennas.

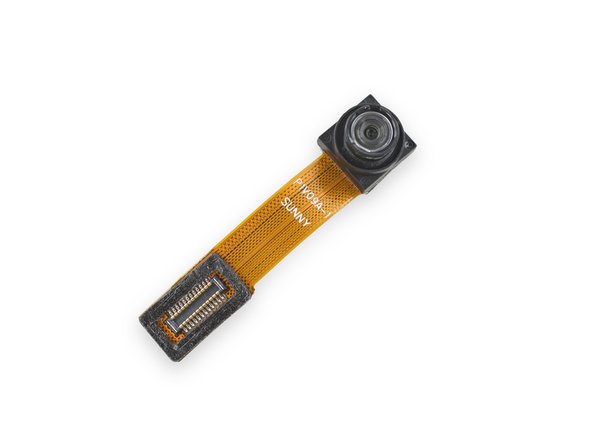
    • In what has become a staple of life as we know it, the Project Tango tablet has a front-facing camera with a 120˚ field of view, perfect for all your selfie needs.

    • The front-facing camera is labeled as P1V09A-1.

    • We're betting that this camera is very similar to the P1V06A 120 degree front-facing camera found in the Tango phone.

  16. Project Tango Tablet Teardown: paso 16, imagen 1 de 3 Project Tango Tablet Teardown: paso 16, imagen 2 de 3 Project Tango Tablet Teardown: paso 16, imagen 3 de 3
    Herramienta utilizada en este paso:
    Phillips #00 Screwdriver
    $5.49
    Comprar
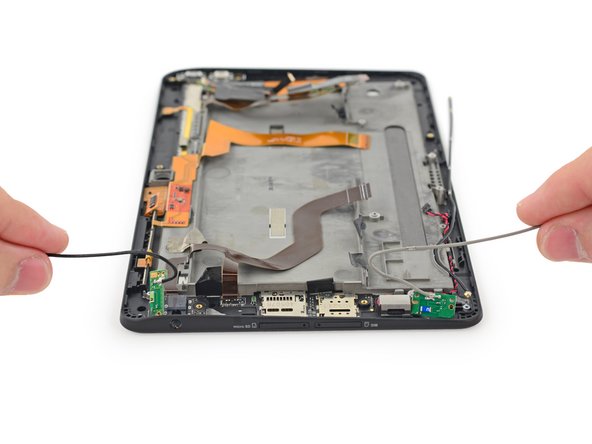
    • This is starting to get ridiculous. We're drowning in a sea of antennas. These little guys live on the top and bottom right corners of the device, and are probably really important.

    • Teardown Update: We have it on good word that the left green doohickey is the GPS antenna, while the right green doohickey is the Wi-Fi antenna.

    • With a few turns of our trusty Phillips #00 screwdriver, we free two antenna boards from the Tango.

  17. Project Tango Tablet Teardown: paso 17, imagen 1 de 2 Project Tango Tablet Teardown: paso 17, imagen 2 de 2
    • A hefty amount of adhesive holds the headphone jack, microSD, and SIM card assembly down, but it comes out easily with a little work.

    • This is also the first time we've seen a microSD card slot with a paperclip-actuated tray, commonly seen in SIM slots.

    • Google says that these trays were an idea from Speck Design, an engineering design firm who partnered with ATAP to build the Tango tablet.

  18. Project Tango Tablet Teardown: paso 18, imagen 1 de 2 Project Tango Tablet Teardown: paso 18, imagen 2 de 2
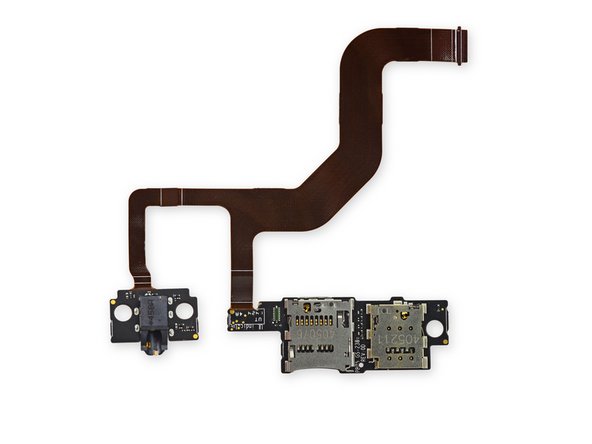
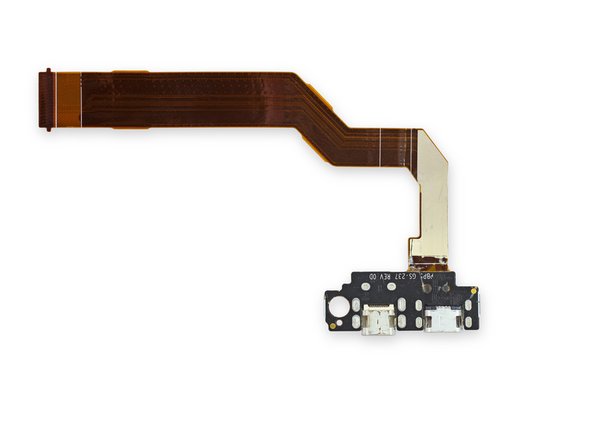
    • This looks familiar. It's a component that protrudes through the edge of the case, is adhered to the back of the display assembly, and has a fairly long ribbon cable to connect it to the motherboard, probably by reaching over the battery.

    • So what we're saying is that we've gone back in time. Welcome back to the step immediately preceding this one. Now with USB and HDMI instead of card slots and headphone jack.

  19. Project Tango Tablet Teardown: paso 19, imagen 1 de 2 Project Tango Tablet Teardown: paso 19, imagen 2 de 2
    • With that, we're about tapped out for pulling gently-glued-in bits out of the back of this display assembly. Time to disassemble the assembly and pull out the un-gently-glued-in glass and LCD.

    • But before we go, we spy a touchscreen controller! RM31280 50051 1418A1U0

    • Also of note is the sweet grab-bag cable we're leaving behind: power/volume buttons, camera connectors, and front-facing microphone.

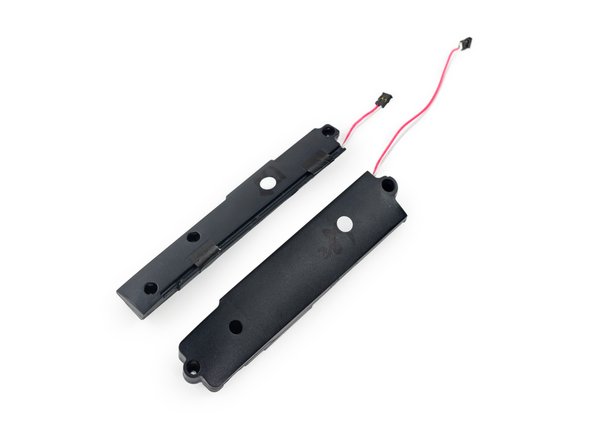
    • Before we bring out the heat, a little probing reveals easily-removed speaker grilles. This will make prying the display out considerably easier. Great!

  20. Project Tango Tablet Teardown: paso 20, imagen 1 de 3 Project Tango Tablet Teardown: paso 20, imagen 2 de 3 Project Tango Tablet Teardown: paso 20, imagen 3 de 3
    Herramienta utilizada en este paso:
    iOpener
    $19.99
    Comprar
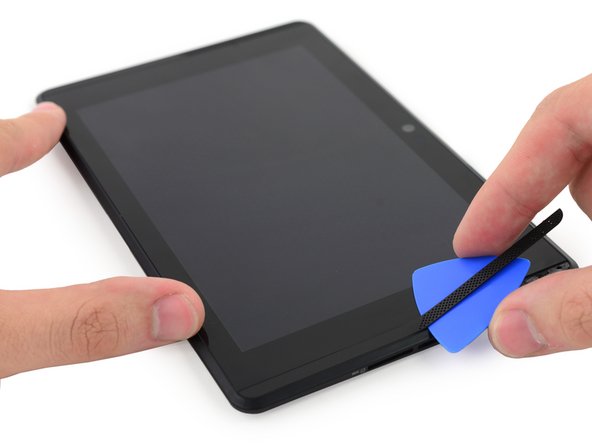
    • Grilles out, let's throw this puppy on the grill. Or maybe under the broiler. The iOpener broiler.

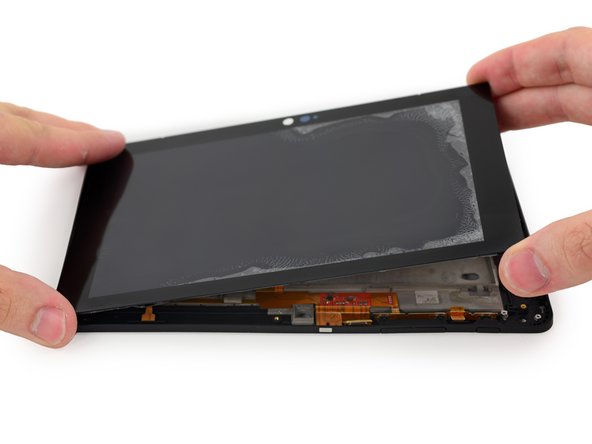
    • After plenty of prying around the edge of the display panel, we get the screen up and out from the frame.

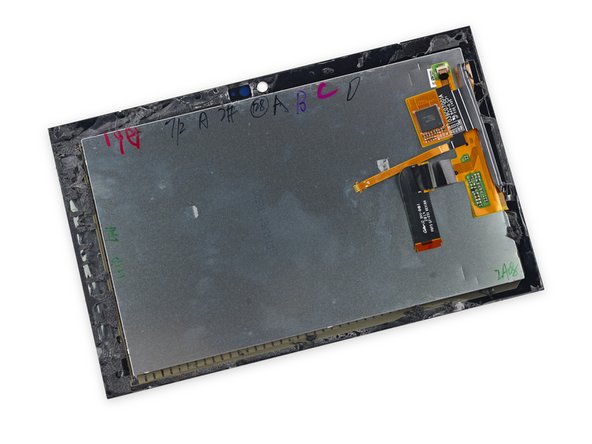
    • Our hard works pays off! We get a first look at the hidden Sharpie hieroglyphics of the production and QA notes.

    • This 7" HD 1920 x 1200 (323 ppi) touchscreen display is based off a tested standard—the Nexus 7 2nd Generation.

  21. Project Tango Tablet Teardown: paso 21, imagen 1 de 2 Project Tango Tablet Teardown: paso 21, imagen 2 de 2
    • While this top-secret prototype is hardly a consumer device, we're happy to give it a Repairability Score.

    • Project Tango Tablet Repairability Score: 4 out of 10 (10 is easiest to repair).

    • The rear case is super easy to open with no screws or adhesives—only plastic clips.

    • Several cables cover the battery and make it a pain to remove—but at least you don't need to melt adhesive.

    • Low modularity—several components soldered to the same components makes replacement parts more expensive.

    • Complex internal construction—this thing is full of cables and not at all fun to disassemble or reassemble.

5 comentarios

Anyone know what 3/6/9 DOF (accel/gyro/compass) IMU chip they're using?

erssonkk - Contestar

I would love to know that detail as well.

Mike Trieu -

I would like to know too.

jirka362 - Contestar

7 inch touch screen (touch screen & LED screen)

Can I get it?

hjcce - Contestar

My tango dev-kit tablet fell from a height of about one meter. The screen failed and did not display anything. It did power the screen (backlight) and the touch worked. But the screen was black and did not display anything.

I was hoping that the damage was not substantial, something like a connection problem. I opened the tablet following the revertible steps in this instruction. Assembled again and now it's working! This was really exciting , thank you so much :)

Saeed Gholami Shahbandi - Contestar

Agregar Comentario

Ver Estadísticas:

Ultimas 24 horas: 2

Ultimos 7 días: 5

Ultimos 30 días: 22

Todo El Tiempo: 37,877