Introducción
Panic, la empresa que está detrás de esto que no es un Game Boy, dice que ha creado este extravagante dispositivo "sólo por diversión", y eso se nota. Desde la pantalla de 1 bit hasta su distintiva manivela, el Playdate irradia novedad. Esperamos que sea tan divertido de desmontar como de jugar.
Revelación completa: Nuestra unidad de desmontaje vino directamente de Panic, que, rechazando todo tipo de sobornos, nos envió una unidad de desmontaje gratis. Desgraciadamente, no venía con ningún juego, así que sólo servía para hacer un desmontaje. No sabían que el desmontaje es nuestro juego favorito. (Vale, probablemente lo sabían).
Asegúrate de seguir el canal de iFixit en YouTube, nuestro Instagram, y nuestro Twitter, y suscríbete a nuestro boletín para ser el primero en saber cuando la tecnología de consumo más reciente llega a la mesa de desmontaje.
Qué necesitas
Resumen del Video
-
-
Algunas especificaciones mientras sacamos esto de su caja:
-
Pantalla de altísima resolución (400×240) de 2.7 pulgadas a 173 ppi
-
CPU ARM Cortex-M7F a 180 MHz
-
16 MB de memoria interna
-
4 GB de almacenamiento flash
-
Wi-Fi de 2,4 GHz (b/g/n), Bluetooth 4.2, USB-C, conector para auriculares
-
¿Por qué una manivela mecánica? Porque sí.
-
Está claro que no han engullido las especificaciones de esta cosa, pero entonces, si te obsesionabas con las especificaciones, ya te has perdido el objetivo.
-
-
-
Como de costumbre, empezamos con una buena radiografía exploratoria de Creative Electron.
-
Técnicamente esto muestra todo el interior, así que... ¿nuestro trabajo está hecho?
-
-
-
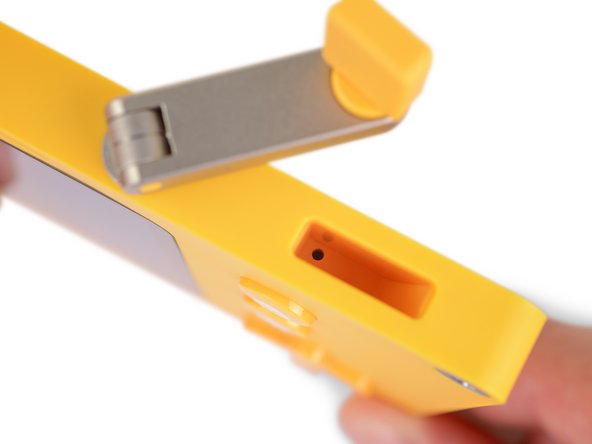
Dentro de la cavidad de la manivela: algo de información secreta.
-
Nuestro número de serie es 1255. ¿Quién consiguió las primeras 1.254 unidades? Ni idea.
-
Esperemos que no se les haya ocurrido desmontarlo y ponerlo en Internet. En serio, ¿quién haría eso?
-
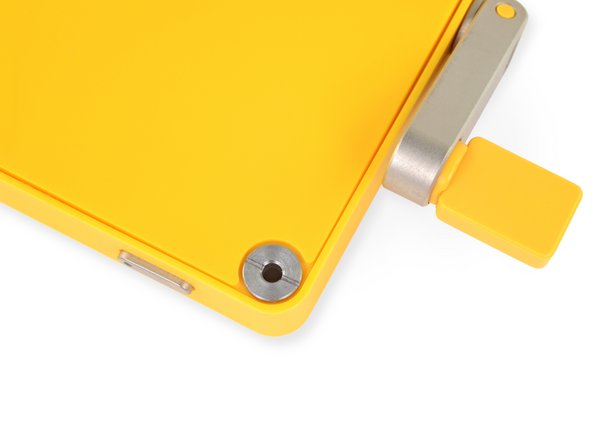
Respuesta: alguien que no se sienta intimidado por estos tornillos de cabeza plana con forma de dona. Mmm... donas.
-
Espera mientras pensamos en una estrategia para abrir esta cosa. Si tenemos que comer una docena de donas en el proceso, es un sacrificio que estamos dispuestos a hacer. ¿Ayudará eso? De alguna manera, sí.
-
-
-
Ese tono amarillo... me resulta familiar, de alguna manera.
-
Cosas que no coinciden:
-
El volumen físico: el Playdate gana por goleada. ¿Es siquiera 1/4 del tamaño? ...en serio, ¿lo es? No estamos aquí para medir las cosas por ti.
-
Calidad de la pantalla: otra victoria para el Playdate, siempre que las espinacas no sean tu color favorito.
-
La capacidad de arranque: de nuevo, un guiño a la Playdate.
-
Te oímos decir que hay que desmontarlo. En cuanto nos acabemos las espinacas, te decimos. Y entonces esperas pacientemente el resto del desmontaje. ¿Verdad? Hola?
-
-
-
Ya está. Tomamos nuestro destornillador de cabeza plana grande para esta consola tan diminuta, y giramos algunos tornillos.
-
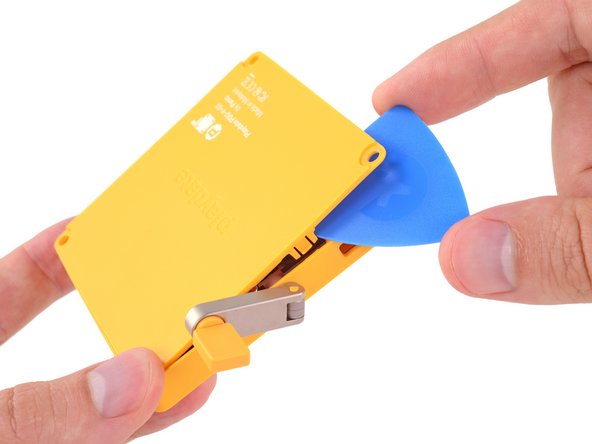
A continuación, unos clips de plástico hacen guardia en el punto de entrada. Tenemos cuidado de que no se nos escape ninguna nostalgia valiosa mientras blandimos nuestro púa de apertura.
-
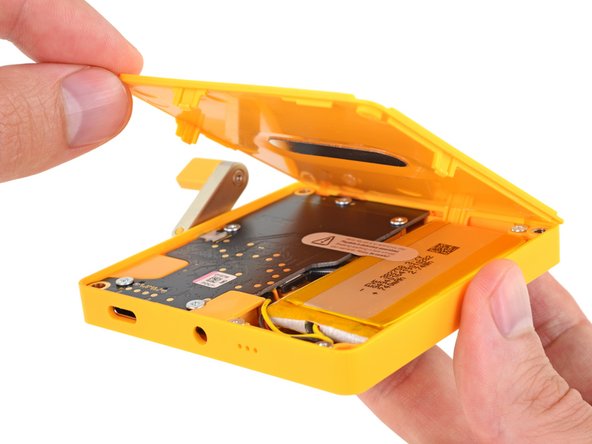
El primer vistazo al interior revela: La pulcritud. El color amarillo. Y una batería de fácil acceso, también conocida como la felicidad de la reparación.
-
-
-
-
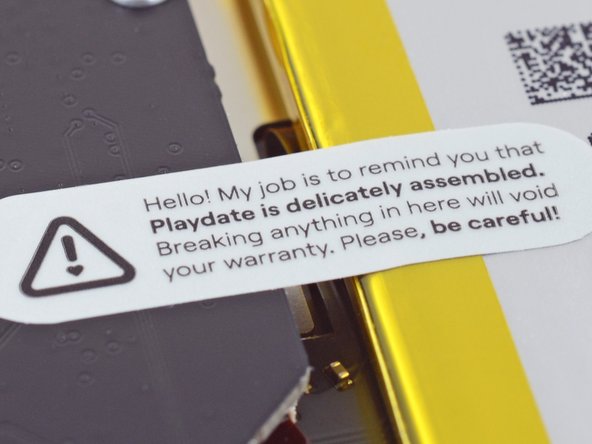
Espera, hay una especie de pegatina de garantía que protege esta batería.
-
¿Ampliar y mejorar?
-
Oh, espera: la rotura anula la garantía, no la simple apertura. Un aplauso para los buenos señores Magnuson y Moss, y seguimos con cuidado.
-
-
-
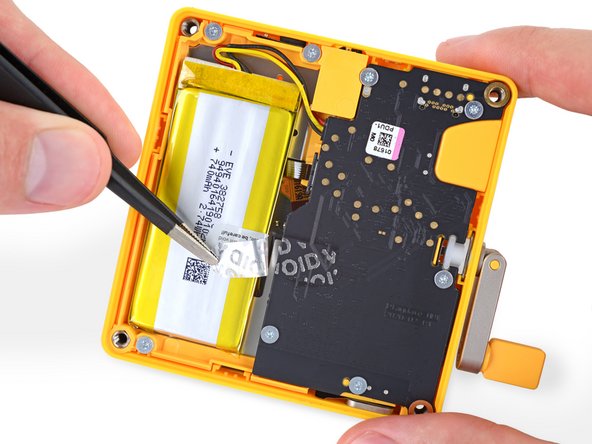
"Desenchufabilidad" de la batería: 8.5/10, casi siempre fácil. Sólo hay que asegurarse de no pinchar nada inflamable con las pinzas.
-
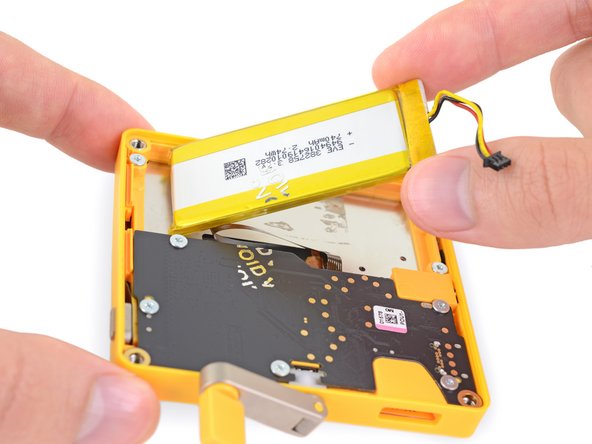
La propia batería está ligeramente pegada. Sé persuasivo, pero no la hagas enfadar.
-
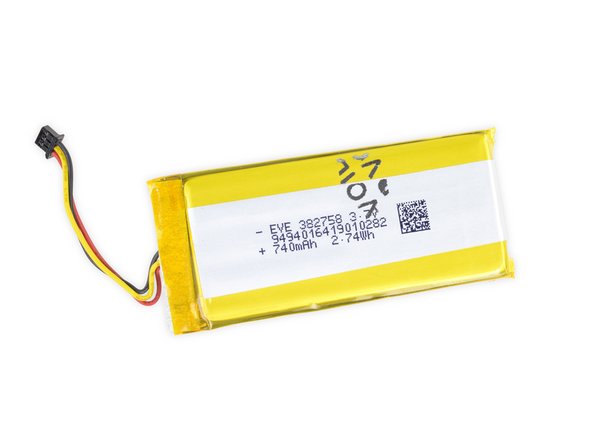
¿Especificaciones de la batería? Tiene una capacidad de 2.74 Wh (740 mAh a 3.7V).
-
Eso es aproximadamente el 25% de la capacidad de un iPhone 12, o
-
1.9% de la batería de un coche pequeño (más o menos)
-
Dentro del rango del tipo de batería AA "de uso general" que los Game Boys comían para hacer deporte
-
Cerca del rendimiento de una batería de patata de 500 libras que una vez se condujo por Portland, Oregon.
-
-
-
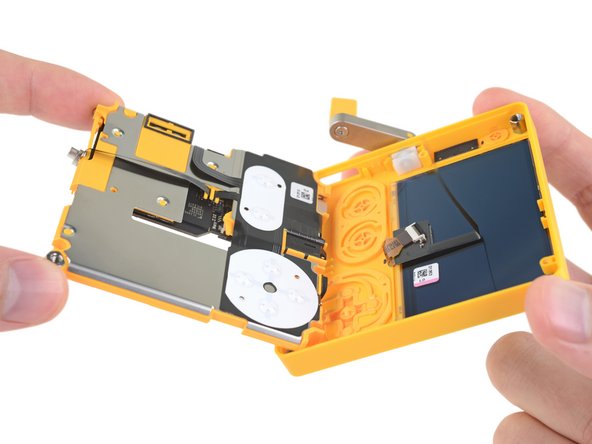
Con nuestro minimalista kit de destornilladores Minnow aplicado a un dispositivo minimalista, separamos casi todo de casi todo lo demás.
-
Tanto la pantalla como la manivela permanecen cómodamente instaladas en la carcasa delantera, junto con algunas cubiertas de botones.
-
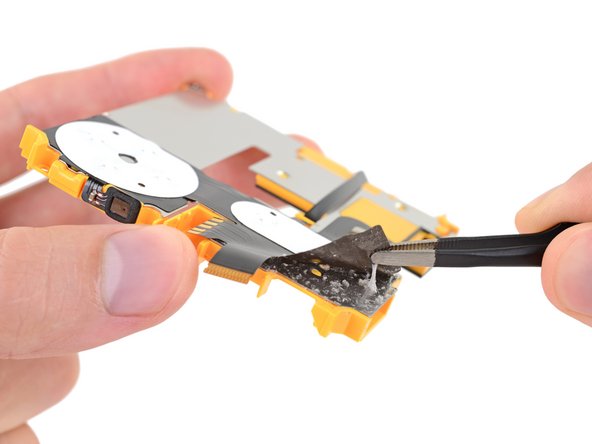
Todo lo demás se puede sacar, siempre y cuando se sea hábil con un spudger y se pueda persuadir a algunos pequeños cables planos para que se aparten.
-
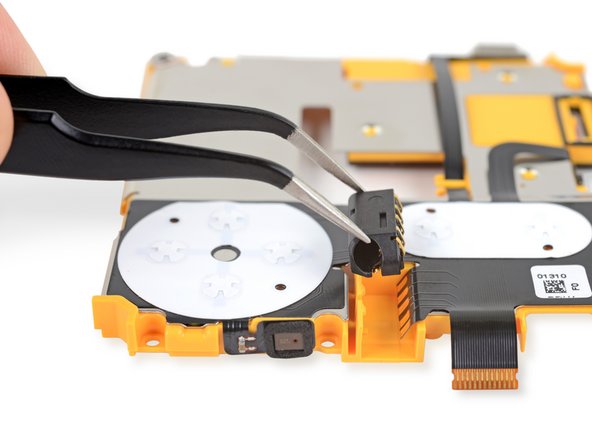
Y aquí tenemos un primer vistazo al funcionamiento de la manivela. ¡Sin engranajes! Nada de cosas raras. Sólo un sencillo sensor de efecto Hall y una... cosa... envuelta en plástico blanco. ¿Importante? Ya lo veremos.
-
-
-
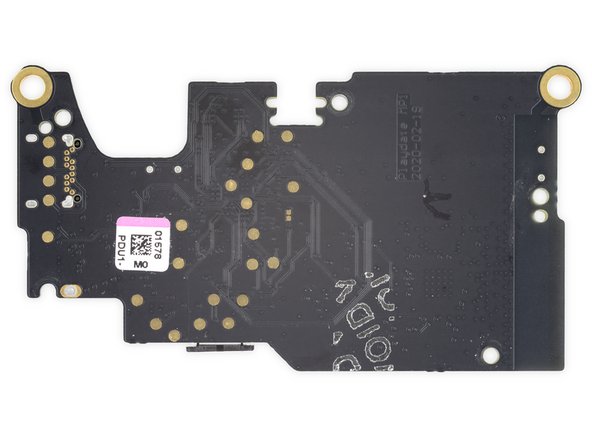
Más acción de manivela en un minuto, pero primero: Veamos qué es lo que impulsa esta pieza de bolsillo de la bondad de los juegos. La parte oculta de la placa contiene:
-
STMicroelectronics STM32F746IGK6, un SoC basado en ARM Cortex-M7
-
4 GB de memoria NAND de Kioxia (antes Toshiba) THGBMDG5D1LBAIT eMMC
-
128 Mb de SRAM de bajo consumo Winbond W967D6HBG
-
32 Mb de memoria flash NOR de serie Winbond W25Q32JV
-
CI de gestión de energía LTC3576 de Analog Devices (antes Linear Techology)
-
Códec de audio Cirrus Logic CS42L52 con amplificadores de auriculares/altavoces
-
SoC Wi-Fi y Bluetooth Espressif Systems ESP32-D0WDQ6
-
-
-
Esta pequeña placa está repleta, ¡así que continuemos!
-
Acelerómetro MEMS de 3 ejes LIS3DH de STMicroelectronics
-
Interruptor de efecto Hall A1266 de Allegro Microelectronics
-
Controlador USB-C FUSB301TMX de ON Semiconductor
-
Detectores de voltaje BU4216FVE de 1.6V y BU4227FVE de 2.7V de Rohm
-
Bomba de carga buck-boost de 60 mA REG710NA-5 de Texas Instruments
-
Regulador LDO de 150 mA / 3,3 V MIC5365-3.3YC5 de Microchip (antes Micrel)
-
Traductor de nivel de tensión NTB0104 de NXP Semiconductor
-
-
-
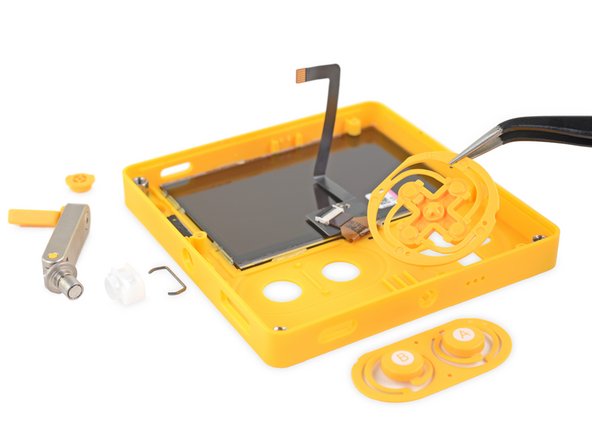
Es hora de tirar de la manivela.
-
Sale. Hay un imán cilíndrico incrustado en el eje. Al girar, el campo magnético golpea el mencionado sensor de efecto Hall, que activa... algo, en tu juego.
-
¿Una cosa que esta manivela no hará? Deriva. No hay un limpiador, ni un resorte, ni una superficie de sensor que se pueda desgastar. El diseño es la simplicidad misma. Incluso se podría decir que no hay... ninguna manivela.
-
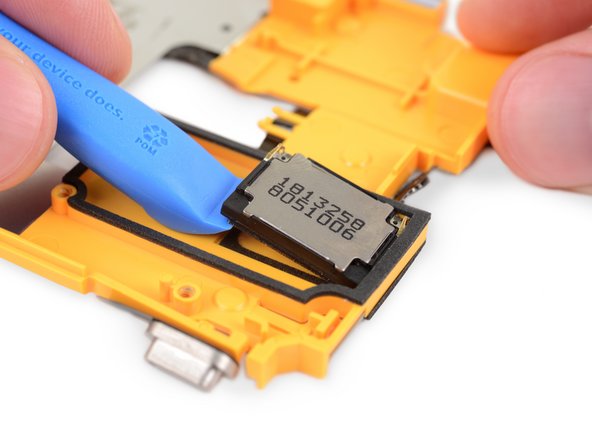
En otra parte de la parte frontal, el pequeño altavoz mono está adherido en su lugar. Bastante fácil de quitar, pero sería quisquilloso volver a trabajar y reemplazar.
My crank broke. I have the yellow turner and the yellow disc that sits under it but I don't see how it goes back together in the metal arm. It doesn't seem to screw in. It should snap in?
-
-
-
Aquí es donde nuestros esfuerzos de desmontaje se ven afectados.
-
La pantalla, que parece ser una pantalla LCD de Sharp Memory, parece estar firmemente pegada a la mitad delantera de la carcasa de plástico. Si tienes que reemplazar la pantalla, probablemente necesitarás una cara de plástico completamente nueva; no estábamos seguros de poder separar la pantalla sin destruirla. Probablemente no sea caro, pero no es lo ideal.
-
Mientras tanto, los botones y otros diversos E / S viven en este circuito impreso flexible en expansión, que se pega a la estructura media. Empezamos a despegarlo antes de darnos cuenta de que no era una buena idea, ni reversible.
-
Sin embargo, un gran punto positivo es esta toma de auriculares 100% modular. ¿Ahora se considera retro? Sea como sea, somos grandes fans.
The Sharp Memory LCD link here now goes to a dodgy website.
-
-
-
¿Vuelve a estar en su sitio y sigue funcionando? Sí, lo hace. Eso es una buena señal. Espera nuestro vídeo con la prueba de vida, y luego lo desmontaremos de nuevo.
-
Sin embargo, como es probable que sepas, entrar y sacar algunas piezas no es demasiado doloroso.
-
Hablando de piezas: Panic ha desarrollado este pequeño aparato en colaboración con Teenage Engineering. Oye, ¡los conocemos!
-
- Un destornillador grande de cabeza plana y una púa de apertura te permitirán acceder al interior.
- Puedes quitar todos los tornillos internos (Pozidriv) con un destornillador Phillips básico.
- La batería es inmediatamente accesible y sólo está ligeramente adherida en su lugar.
- El conector de los auriculares es completamente modular, y el diseño de la manivela es simple y servicial.
- Se puede cambiar la pantalla, pero sólo si se sustituye toda la carcasa frontal.
- Todos los controles están agrupados en un único FPC, fácil de cambiar, pero un poco inútil si sólo se rompe una cosa.
- El puerto USB-C está soldado a la placa principal.


Consideraciones Finales
Calificación de Reparabilidad


(10 es lo más fácil de reparar)
Un agradecimiento especial a estos traductores:
88%


Estos traductores nos están ayudando a reparar el mundo! ¿Quieres contribuir?
Empezar a traducir ›
29 comentarios
Wonderful teardown! I think the modding community is going to have a great time with this one!
The Screen (which by the way it may be Sharp LS027B7DH01 or LS027B7DH01A) looks very identical to Adafruit 4694 (SHARP Memory Display Breakout https://www.adafruit.com/product/4694) so aside from being glued, Screen replacement may be possible
I am pretty curious whether if the display is already cracked (from a drop), that it would be acceptable to just put the front part in hot water to soften the glue, and just rip out the cracked display. The only reason I’d swap out is if the display was already broken.
I can re-glue a new display, perhaps?
It would be pretty hard to crack the display since the bezels on these devices are immense, compared to modern cellphones.
Also, the outside screen with round edges are probably plastic (maybe glass) and are separate from the actual display, so the actual display is even less likely to break.
However, the outside screen, if glass, may be stubbornly glued in place. But again, I didn’t buy and took apart one of these yet.
But yes, if your display is cracked then I’m sure you can replace one yourself.
I managed to damage my display but it did not crack. The device slipped right out of my hand and slammed face down on hard tile floor. The display has a flicker and discoloring issue now. Panic Support has not reached back to me so I am going to attempt to take matters into my own hands.
I am going to attempt to remove the defective display and replace it with the display linked here https://www.adafruit.com/product/4694
Anyone had any luck with this? I’m only worried about removing the defective screen from the plastic case since it is apparently glued down. Any recommendations would be appreciated!
Seems like the connector on the display is mostly identical, and so perhaps a display swap is a doable process.
Any luck with the screen replacement? I had the same problem after one whole day of having it. I'm now Shame-Googling options.
MMcMen -
The display is unfortunately quite easily cracked if you drop something else on it. I'm also interested if anyone has managed a self-repair of the LCD.
Well, I decided to give it a shot and attempted to replace my cracked screen by myself. This teardown worked well as a disassembly guide, and the Sharp LS027B7DH01 was the right display. I got it for $30 from DigiKey. They say the LS027B7DH01A is the same model, just the units that had 1 or 2 bad pixels so they sell them a bit cheaper.
Unfortunately I failed at separating the LCD from the front glass. I tried heating them up, applying alcohol and slicing them apart with a blade, but I broke the front glass. I'm not experienced with this stuff, so there's probably something I should have done differently and I definitely should have researched more when I realized it wasn't easy.
I reassembled it with the new LCD and no front glass, and it almost works, but the enclosure doesn't quite keep the LCD in properly so it kind of pops out at the top. It looks janky and obviously is less protected. So, yeah, I would recommend trying this until there's a way to get a replacement front glass.
I’m at a loss to understand how the USB-C connector could be better by not being soldered.
Soldering is easy to repair, right ?
What do you want, a screw-terminal connector ?
For it to be on a separate board, so you can replace the damage prone connector without rework on the mainboard
If a USB-C port gets really damaged, damage to the main board can also occur. This may not be repairable.
These small things are almost impossible to repair with a generic soldering iron (station, temperature controlled or alike) and is more than a challenge with hot air guns (which may overheat the board) especially if it is half-smt and half thru-hole “hybrid” mounting kind.
But given the 4GB of storage, it’s unlikely one need to frequently plug and unplug the device to flash software. But again, charging will be frequent, and the USB-C, while being stronger than both USB-Micro-B and USB-Mini-B, is still far from being indestructible.
A row of pin headers, especially male ones, are practically indestructible (aside from being bent), and allows freedom of connections.
@cdr_xavier in what world is USB-C “stronger” than USB-Micro-B and USB-Mini-B?
logically: USB-C packs far more and far smaller pins into a smaller surface than older USB variants. These simply cannot be made as robust as a result.
empirically: over many years of use I never saw a USB-B connector fail, not once. USB-C? I’ve blown through dozens of cables due to failed connectors over the the covid period alone. so has my wife. so have my co-workers. there are reasons to like USB-C but robustness simply is not one of them - it’s the first significantly fragile USB connector since USB was first deployed.
The reason USB-C is more "stronger” is not because it have more pins. It is because the external “metal housing” is made larger, more thick, and more strong than either micro USB A/B or mini USB A/B.
Yes, good micro USB ports are very tough, but a good C is even tougher. At least, on the PCB side.
Realistically, a stress test probably end up with both connectors snapping the cables right away. But that’s okay, because cables are replaceable. Ports are not.
I can't say the USB-C connector is more sturdy than micro-USB, they fair equally in the near hundred devices we have in IT class like microcontroller boards and such. On the cable side reliability is best for micro-USB.
What is a big pain-in-the-ass is that soldering a new USB-C connector needs reflow soldering. Where you can do a USB-micro port swap with a regular soldering station. The pin spacing is way tighter.
Blanka -
In step 11 you mention that the crank stimulates the aforementioned hall-effect sensor from step 10, however the hall-effect switch from step 10 appears to be a different part? It seems like the hall-effect switch circled in orange might be for detecting stowage of the crank in the body, whereas there is a separate 3D hall-effect sensor for actual crank rotation. I wonder where that is on the PCB? Anyways, phenomenal tear down, it was very entertaining!
Hall effect sensor for the crank is located right here!
So, not a repair question, but one asking about the capabilities of the Hall sensor. I'm noodling with some game ideas.
Do people here expect it to provide a reliable position reading? No need to calibrate it occasionally, etc.
I'm wondering if it will be precise enough for something like using the four cardinal directions for settings.
Also, does the Playdate know if the crank is furled or not?
Fretting about a USB connector being soldered to a board shows that iFixit doesn't know anything about mechanical engineering or PCB design. They always make these pronouncements about what they'd like to see in a perfect world, but that are never grounded in reality.
In fairness, modular connectors beat non-modular connectors (in terms of repairability, at least)
Even though the connectors last really long
The problem is more with modern connectors like USB-C, MicroUSB/miniUSB or even USB-A where the socket contain parts that can easily wear out (compared to, say, VGA, RS232 or Parallel, or even RJ45 where the sockets are much more robust)
Which is fair, since USB is never a industrial standard (compared to the ones mentioned). They never require a locking mechanism, and are built to be more convenient. Broken HDMI and DisplayPort due to cable sag comes to mind.
what is the voltage rating for charging through the screws?
My playdate screen has broken, I wonder if I can replace it by buying the recommended screen https://www.adafruit.com/product/4694. Does anyone know if there would be any issues with to screen not functioning correctly if I'm able to get the original broken screen unglued and replace it with the adafruit sharp memory display?
You can get the LCD here: https://www.digikey.com/en/products/deta...
But read my comment above about the difficulty of repairing the screen.
I should have also mentioned that there's a reasonably priced Playdate repair (replacement) program: https://shop.play.date/products/playdate...
Love this!
Does it look as if the disk space can be increased by changing components?
I opened up my Group #5 Playdate, serial in the 40k range, and my battery says 2.812Wh, 760mAh https://imgur.com/a/pAVwC2t
Panic should really improve warranty handling and spare part buying options.
The yellow handle on the crank has a serious design failure, making it break very easily. For now Panic only allows complete returning the device, which makes us wait for over 3 months now not being able to use it.
Sending out replacement handles through for example Digikey would mean a 2€ part with next day delivery for another 5€, not worth the mess of filling customs forms and waiting crap as a return would demand. Not to mention the returned device will probably become e-waste. If you have such big troubles with processing pre-orders and stock, why mess up your time with full returns for a single piece of plastic, less than 1 gram.