Introducción
Esto es un desmontaje del lanzamiento original de la PlayStation 3. Una de las mejores unidades que tenía retrocompatibilidad y los lectores de tarjeta. Por desgracia esta unidad tiene la GPU dañada, así que está rota.
Editado: Apodo fix, formalmente Karasumachitose. Disculpas por cualquier inconveniente que esto pueda causar.
Qué necesitas
-
-
Aquí está, una de los dos modelos originales de PS3 disponibles en su lanzamiento (60GB).º
-
Tiene retrocompatibilidad con la PS1/PS2 y un lector de multitarjetas. La actual PS3 Slim no tiene lector de tarjetas. El otro modelo de lanzamiento le faltaba el lector de tarjetas y el Wi-Fi (20GB).
-
-
-
Utiliza el destornillador TOR (T8 o T10) para quitar el tornillo torx que está debajo del pie de goma.
Mine was a T10
this screw came out using a phillips #1or#2 with no issue.
I have an original CECH-A01 fat model and I had to use a T3.
-
-
-
Coloca tu PlayStation 3 boca arriba de forma que seas capaz de leer el logo de "PlayStation 3"
-
Coloca la palma de tu mano en el logo de PlayStation 3 y desliza la carcasa de plástico frontal hacia a ti para quitarla del resto de la carcasa. Colócala a un lado.
How Do you open
My case is still stuck, and refusing to budge… I removed the screw and HDD already.
-
-
-
Quita el receptor metálico que soporta el tornillo torx que acabas de desatornillar.
Some PlayStation3 gen 1 consoles do not have a removable receiver. If yours does not, just skip this step.
-
-
-
Quita los 9 tornillos de la carcasa exterior utilizando un destornillador Phillips #2.
-
6 tornillos largos.
-
1 tornillo mediano.
-
2 tornillos pequeños.
Cita de paulius:
The annotation on the photo in Step 9 is inaccurate. The blue circle should be aqua/cyan coloured, while the two cyan/aqua coloured circles should be blue. No biggie, great disassembly otherwise.
I double checked it, it should be correct. There is only one medium screw and two small screws.
If you leave the two small screws until after you remove the top (they aren't attached) it will make things easier because the card readers will stay down and there will be no ribbon cable to deal with when removing the top.
I have found the same. It can be a mess otherwise.
-
-
-
-
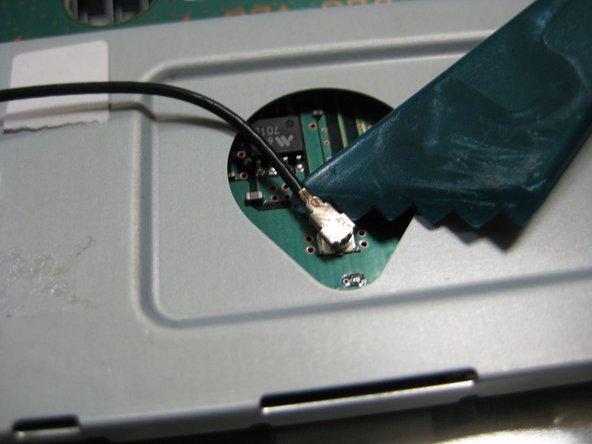
Localiza el otro conjunto inalámbrico al cuál está conectado el cable RF negro.
-
Quita el tornillo Phillips #2 que lo mantiene asegurado a la placa base, levanta el conjunto y ponlo a un lado.
-
-
-
Quita los cables que conectan la fuente de alimentación a la placa base.
-
Quita el conector AC de la fuente de alimentación.
Power connector on my 20gig launch unit was epoxied. If this is the case with yours be VERY careful. Mine popped off the board, now searching for a fix.
-
-
-
LEE ESTE PASO COMPLETO ANTES DE CONTINUAR. Levanta el lector lentamente para poder ver el cable plano que hay debajo.
-
Quita ese cable plano de la placa base y coloca la unidad con el cable a un lado.
Remove the ribbon cable from the drive end, not the motherboard end. The clip holding the ribbon cable to the motherboard is difficult to reattach and will often snap. It does make it a bit more difficult to disassemble but far safer.
I had to use two spudgers to pry the clip UP on the motherboard to release the cable.
If you do break the clip on the motherboard side, just clip the ends off the broken clip and, using the thin side, push it in the remaining motherboard recess so it keeps the ribbon connection in place. There are multiple youtube vids if you need additional info. Had to do mine and worked like a charm.
-
-
-
Quita los 9 tornillos del cuerpo principal.
-
5 tornillos Phillips #2 medianos.
-
2 tornillos Phillips #1 pequeños.
-
1 tornillo Phillips # con arandela de toma de tierra.
-
1 tornillo tipo perno (debajo del cable de la corriente alterna "AC").
What does the bolt philips screw look like?
-
-
-
En la parte superior de la placa base, quita también los tornillos Phillips #2 que sujetan el disipador.
-
Quita las placas y los tornillos de la placa base.
I broke off one of these screws, 'Philips #2 screw' has not gotten me a correct screw from google.
Any clue what exact screw this would be?
PS
I have an idea how I could remove the broken screw, but any suggestions?
Search on Ebay under PS3 Screw there are some on there with clamps.
-
-
-
Dale la vuelta a la placa base.
-
Levanta (o haz palanca con los dedos) el disipador para quitarlo de la placa base y de los procesadores.
Looks to me if your goal is to replace the thermal paste, this is as far as you need to go. Apply the new paste and begin reassembly. Here's a video showing how to apply the paste: http://www.youtube.com/watch?v=EyXLu1Ms-...
Wich is the best way to apply the paste and what brand do you reccomend?
Just use a small dot, not bigger than a pea right in the middle. Let the heatsink spread it out.
DO NOT DO THIS IF YOU DO HAVE THERMAL PASTE!!!
If the thermal paste is disturbed you MUST remove all the old paste and apply new (unless you are okay with destroying your processors). To remove the old paste, cotton swabs work best. Once you have removed as much as you can, dampen a cotton swab with rubbing alcohol and carefully clean the processor surface AND the heat sink surface using small circular motions, being careful to not allow any alcohol to contact the main board. Do this until ALL traces of the old compound are COMPLETELY removed. Once removed, allow a short amount of time for the alcohol to completely evaporate. Once the alcohol is evaporated, place a SMALL amount of new compound (I use Arctic Silver) directly onto the processor (about the size of a pea OR LESS). Using a straight edge (such as a credit or ID card) carefully spread the compound into an even, thin layer which completely covers the surface of the processor.
This is not as hard as it sounds. Just take your time and get it as even as you can. And gaps in the paste will result in “hot spots”, which can easily damage your processor (this is why just “letting the heat sink spread it out” is such a bad idea). The layer should only be about 1/64” (0.016”) to 1/32” (0.031”) thick. For reference, a common sheet of paper is about 0.004” thick, so roughly 4 to 8 sheets of paper thick. Do remember that this is NOT as critical as I am making it out to be. It is simply a reference for “a thin layer of compound”. Don’t overthink it.
Now that your fresh compound has been applied, reinstall the CLEAN heat sink as evenly and gently as possible. Install the fasteners and tighten, tightening and alternating n SMALL INCREMENTS. The idea here is to tighten the heat sink in as even a fashion as possible. This helps to ensure the most even distribution of thermal compound as possible.
I have repaired many Xbox 360s and PS3s in my time, and have never had this method fail, and as en electrical engineer would encourage anyone to follow these procedures when replacing any thermal compounds.
-
-
-
.Observa todos los chips con almohadilla térmica que hay en esta cosa.
-
Ahí está el chip de Emotion Engine y el de sintetización gráfica que permiten la retrocompatibilidad.
-
Procesador cell IBM. Esta CPU tiene 9 núcleos y 10 hilos y trabaja a 3.2 GHz.
i have a SERIOUS PROBLEM. i put my ribbon cable from my bluray drive into my ps3 while it was on and i heard a pop. the drive was no loner able to recieve power and i saw someone else had the same problem but on a differnt ps3. they said it was the ic chip on the daughter board and i dont even know where that is.... im only 16 and i plan on being an electronic engineer can anyone please help me because im a SEMI-noob future genius noob now.
Advice- Next time make sure the system does NOT have power.
-
-
-
¡Más chips!
-
CPU IBM cell.
-
GPU Nvidia RSX.
-


Un agradecimiento especial a estos traductores:
100%

¡ MemoryOverflow nos está ayudando a reparar el mundo! ¿Quieres contribuir?
Empezar a traducir ›

16 comentarios
ii got a broken ps3 from my step dad, it turns on but theres no picture. I've taken it apart 3 times now and couldnt figure out how to get it fully apart. I've put everything back together and it does the same thing. So i didnt mess it up and more than it was. lol. From what i was told it was on top of a tv and a dog caught the cord and pulled it down. It slammed down on the back of the system and hasnt been able to show video and sound. Like i've said, i've tryed to mess with it but i know nothing about this stuff. Any ideas as to what could be broken? The port itself is cracked, but i've tryed HDMI and that doesnt work either. Any advice is helpful. Thank you.
lol couple years later, no all u have to do is switch out the fan inside your ps3 :) it happen to mine or buy a new ps3 and switch hard drives :)
It's the GPU
I love the way you post a warning as to how fragile the ribbon cable is and then say, "remove ribbon cable" without any detail as to how to release it. Thanks. Now my PS3 is trash.
Instructions not clear enough. Stuck my finger in a light socket.
10/10, would electrocute self again.
watch ifixit's video on youtube, it helps a lot, these pictures help out more after you see the video...
Hello,
I'm wondering why SIXAXIS Gyroskope might stopped from working after reaseambly.
Can you please suggest something?
Alexander
Take the HDD out and get a new one or check what's the problem
Can you fix it again after splitting it? Bc. My Ps can't turn on, only in 1 second and then it turns it self off. So i told it too my dad, and he said "can you get in to the computer itself, without breaking it and then fix it again, after that" and i aswered "i don't know, i'll go chek" and here i am, knowing how to split it but not fixing it again. Uhh so please answer me... Can it be fixed again after splitting it??!
Great teardown tutorial. Can confirm it saved my butt when I needed to open a 60GB CECHA01 PS3, which I successfully did in addition to (a) replacing the thermal paste, and (b) clean all the dust off.
Only problem with this tutorial is what sonofjay817 mentioned: poor instruction regarding the ribbon cables. THIS IS VERY IMPORTANT: the receptor end for the Blu-Ray ribbon cable needs to have a small black tab pulled open BEFORE removing, and BEFORE inserting the cable. I accidentally got it open by chance, but you might not be so lucky without my warning - and if the ribbon cable is done for, you will need to replace it completely.
I followed this tare down tutorial to clean my PS3s and replace the thermal paste on my two 60gb models, afterwards both now YLOD on me. I wish there was something for re assembling everything because following the instructions backwards obviously hasn’t worked for me (both were perfectly working since new before this).
My PS3 one's I turn it on it always go back off and I continue turning it on it keeps on for about some minutes then finally it comes on and works perfectly … what the course of it going off
What kind of PSU it is using?
Interesting, the internals of mine looks quite different. I have 2 GIANT heatsinks not shown here, maybe they were added later due to overheating
@step9 the big screw sizes are:
complete length 50mm (with head)
without head 48mm
threadded part 20mm
core 2mm
core with thread ~2.9mm
I turn it On and it just automatically shuts off ok Google
Timothy Thompson - Contestar