Saltar al contenido principal

Qué necesitas

Este desmontaje no es una guía de reparación. Para reparar tu Pinecil v2, utiliza nuestros manuales de servicio .

  1. Pinecil V2 Teardown, Remove tip: paso 1, imagen 1 de 2 Pinecil V2 Teardown, Remove tip: paso 1, imagen 2 de 2
    • Pull the tip of the Pinecil out.

  2. Pinecil V2 Teardown, Loosen exterior screws: paso 2, imagen 1 de 3 Pinecil V2 Teardown, Loosen exterior screws: paso 2, imagen 2 de 3 Pinecil V2 Teardown, Loosen exterior screws: paso 2, imagen 3 de 3
    • Remove the Phillips retention screws at the base of the cartridge.

    • Remove the Phillips grounding screw, located near the barrel connector.

  3. Pinecil V2 Teardown, Remove rubber grip: paso 3, imagen 1 de 1
    • Remove the rubber grip by gently pulling it up in the direction of the tip.

  4. Pinecil V2 Teardown, Pry the case apart: paso 4, imagen 1 de 2 Pinecil V2 Teardown, Pry the case apart: paso 4, imagen 2 de 2
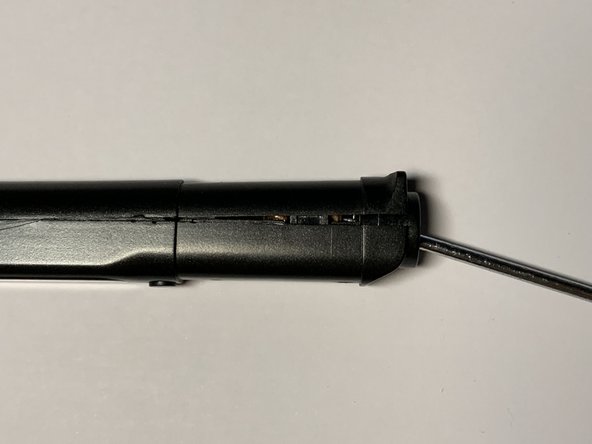
    • Insert a thin screwdriver into the cartridge hole.

    • Gently pull the screwdriver towards the direction of where the OLED screen is. The lever action will cause the case to snap partly off as shown in picture 2.

    • You only need to insert the screwdriver in a couple of centimeters. The halves should come apart with relative ease, do not force it.

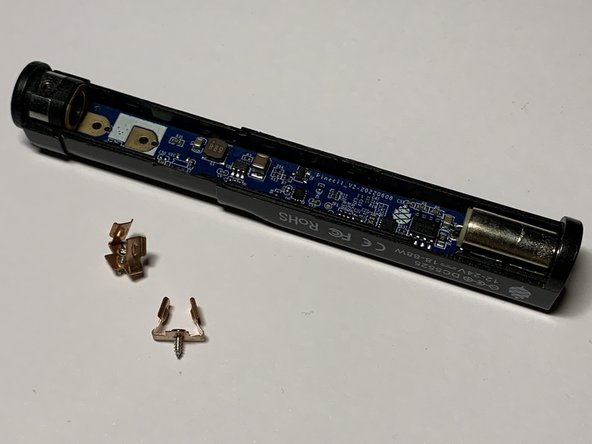
    • After making the initial separation using the screwdriver, manually pull each halve apart from each other. As always, do not be impatient as there are thin plastic tabs that could be damaged by one's haste.

  5. Pinecil V2 Teardown, Loosen cartridge contacts: paso 5, imagen 1 de 2 Pinecil V2 Teardown, Loosen cartridge contacts: paso 5, imagen 2 de 2
    • Remove the 2x Phillips screws holding down the cartridge contacts.

    • The contacts will fall out with gravity once the screws are removed.

  6. Pinecil V2 Teardown, Board removal: paso 6, imagen 1 de 3 Pinecil V2 Teardown, Board removal: paso 6, imagen 2 de 3 Pinecil V2 Teardown, Board removal: paso 6, imagen 3 de 3
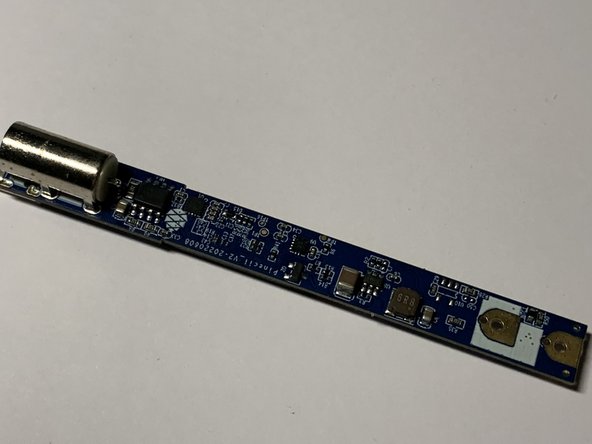
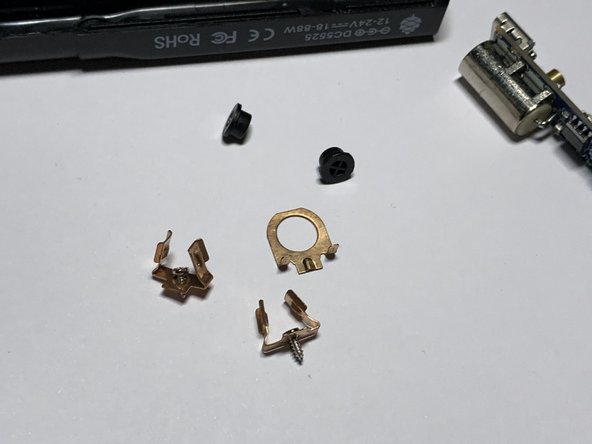
    • The board will fall out naturally with all the screws removed. Avoid losing the copper grounding ring and the buttons.

David

Miembro Desde 03/05/24

1,307 Reputación

1 Guía escrita

0 comentarios

Agregar Comentario

Ver Estadísticas:

Ultimas 24 horas: 4

Ultimos 7 días: 23

Ultimos 30 días: 155

Todo El Tiempo: 458