Saltar al contenido principal

Este desmontaje no es una guía de reparación. Para reparar tu DualSense, utiliza nuestros manuales de servicio .

  1. PS5 Controller Trigger Teardown, PS5 Controller Trigger Teardown: paso 1, imagen 1 de 1
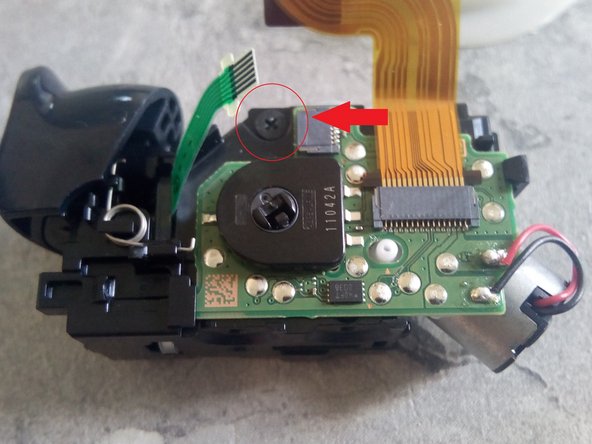
    • Once you have opened your controller to this point remove those 4 screws to separate the middle frame from the outer frame.

  2. PS5 Controller Trigger Teardown: paso 2, imagen 1 de 1
    • Once you have separated the middle frame from the outer remove the 2 screws securing the trigger assembly to the middle frame. Remove the opposite 2 if you are changing parts on the other side.

  3. PS5 Controller Trigger Teardown: paso 3, imagen 1 de 1
    • The trigger assembly comes out easy now.

  4. PS5 Controller Trigger Teardown: paso 4, imagen 1 de 2 PS5 Controller Trigger Teardown: paso 4, imagen 2 de 2
    • Remove these 3 screws on this side of the trigger assembly and one more hidden behind the ribbon cable on the other side.

  5. PS5 Controller Trigger Teardown: paso 5, imagen 1 de 2 PS5 Controller Trigger Teardown: paso 5, imagen 2 de 2
    • Your trigger assembly is now open. Gently remove the plastic piece to reveal more of the metal pin. Refer to second pic. Pull the metal pin holding the trigger out using a pliers and this will free up the assembly for the button film replacement.

  6. PS5 Controller Trigger Teardown: paso 6, imagen 1 de 1
    • The metal pin is now out and the trigger is free.

  7. PS5 Controller Trigger Teardown: paso 7, imagen 1 de 1
    • Remove the button conductive rubber and now replace the button film.

  8. PS5 Controller Trigger Teardown: paso 8, imagen 1 de 1
    • For reassembly reverse the order. Congratulations. You have successfully replaced your R1, R2 or L1, L2 button film.

vickyjean1007

Miembro Desde 03/28/22

169 Reputación

1 Guía escrita

0 comentarios

Agregar Comentario

Ver Estadísticas:

Ultimas 24 horas: 13

Ultimos 7 días: 141

Ultimos 30 días: 680

Todo El Tiempo: 2,902