Introducción
Let's face it, the year is 2013. Where are our flying cars? Why isn't deep space travel a thing yet? Why hasn't virtual reality become, well, reality? The Oculus Rift seeks to fill that lack of virtual reality in our lives. Still in its early developmental stage, the Oculus Rift promises to deliver VR gaming to the yearning public. Join us as we take a peek inside the Oculus Rift and its hardware.
Find us elsewhere in the virtual world on Twitter and Facebook to catch the latest teardowns and tech talk.
Qué necesitas
-
-
While not much is known in terms of tech specs, here's what we've gathered so far:
-
Resolution of 1280 x 800 pixels, with 640 x 800 per eye.
-
Horizontal Field of View greater than 90 degrees.
-
Diagonal Field of View greater than 110 degrees.
-
Head tracking accomplished with 1000 Hz absolute 9DOF orientation sensor (includes gyroscope, accelerometer, and magnetometer).
-
Currently available for PC only.
-
We also found out it comes in a handy case that holds over one billion cables/adapters (our professional estimate).
-
-
-
It isn't exactly a holodeck—rather the Oculus reminds of a cross between ski goggles and a tablet…
-
…wait, we've seen something like this before.
-
The snazzy adjustable head-harness keeps the action on your face, a shortcoming we have seen in the Wii.
-
-
-
Ah, the friendly face of a robot, well, until virtual death ensues.
-
For us, this death comes in the form of Team Fortress 2, one of the compatible games for the Rift, or so says its online dating profile.
-
One of the most innovative technologies brought about by the Rift is its head tracking capability. Accomplished with a gyroscope, accelerometer, and magnetometer, the Rift allows for 3 degrees of freedom so you can look around the virtual world without having to move your entire virtual body.
-
We foresee the future of Starbucks coffee tables across the country.
-
-
-
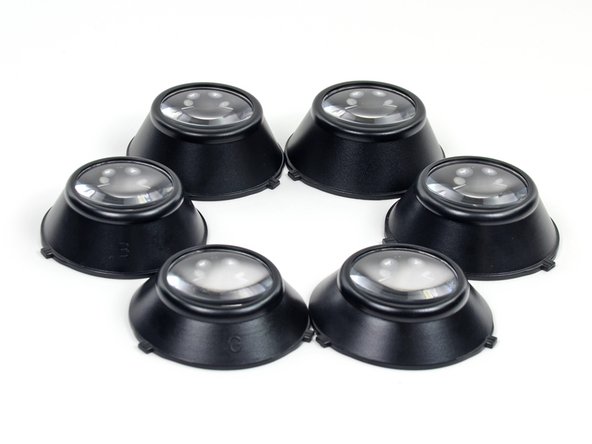
Before we crack into the device, we can't help but play around with it a bit!
-
Using a shiny cupronickel coin, we adjust the focal lengths on either side of the Rift to optimize it for our 3D viewing pleasure.
-
We're ready to play. Bring it on, Team Fortress 2! -
Nope, not just yet.
-
Apparently we have to choose either A cups, B cups, or C cups for our eyes. Then we have to measure our IPD (inter-pupillary distance), and put TF2 into VR mode.
-
A couple of hours later, we're ready to play. Bring it on, Team Fortress 2!
-
-
-
Check it out! Wearing the Rift allows one eye to see the image on the left, while the other eye sees the image on the right. As it turns out, the 3D effect of the Rift is not actually magic, but science!
-
If you look closely, you can see that the left-hand image is framed slightly to the right, and vice versa. Our brains—fantastic computers that they are—note the disparities between the images in each eye, calculate the angles and dimensions, and merge them into a single image with perceptible depth.
-
Prest-o blam-o! 3D rockets flying past our n00b heads.
-
-
-
-
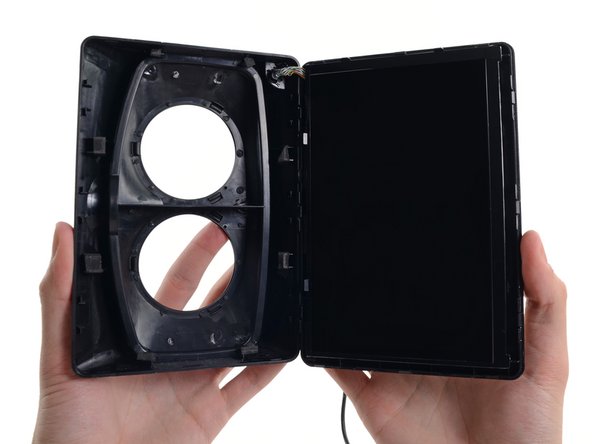
In order to separate the display from the strap assembly, all we need is the Phillips #1 bit from our 54 Bit Driver Kit.
-
Does the fact that this isn't the final production version of the Rift have anything to do with it being easy to take apart? Perhaps -- only time will tell.
-
Will the final consumer version be more difficult to get into? We hope not.
-
-
-
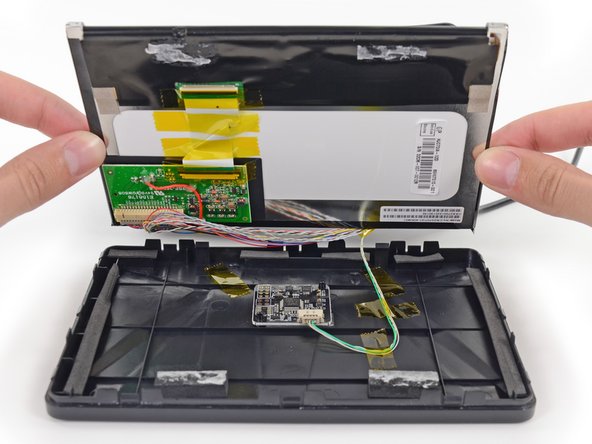
A couple of clips and some sticky foam adhesive hold the display securely into the front panel of the Oculus, ensuring a firm grip on the screen while you're whipping your head around in-game.
-
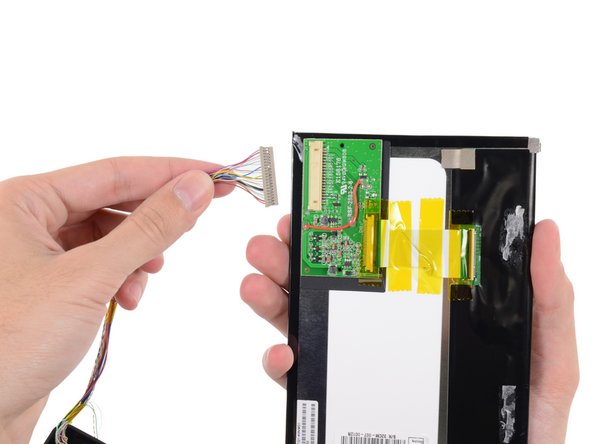
Disconnecting one cable from the display assembly allows us to completely remove it for further examination.
-
-
-
Great News! The Oculus uses an Innolux HJ070IA-02D 7" LCD.
-
The back of the LCD hosts a Himax HX8851 timing controller.
-
-
-
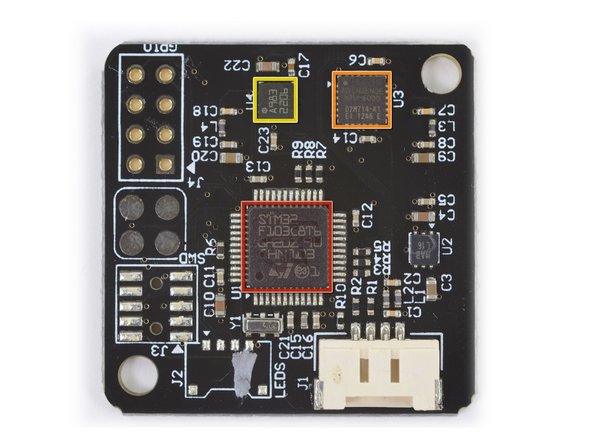
The final component out of the headset is the Oculus Tracker V2 board, custom designed and optimized for a 1000 Hz refresh rate.
-
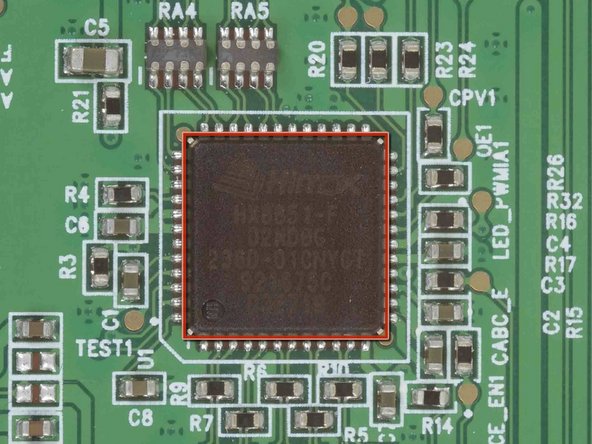
Here we find the chips controlling the revolutionary head-tracking device:
-
STMicroelectronics 32F103C8 ARM Cortex-M3 microcontroller with 72 MHz CPU
-
Invensense MPU-6000 six-axis (gyro + accelerometer) motion tracking controller
-
Honeywell HMC5983 three-axis digital compass, probably used in conjunction with the accelerometer to correct for gyroscope drift
-
The back of the sensor board is covered in shiny contact points, presumably for easily testing each board in a spring contact rig.
-
-
-
How does the Oculus Rift hook up to your PC, you ask? With the control box, of course.
-
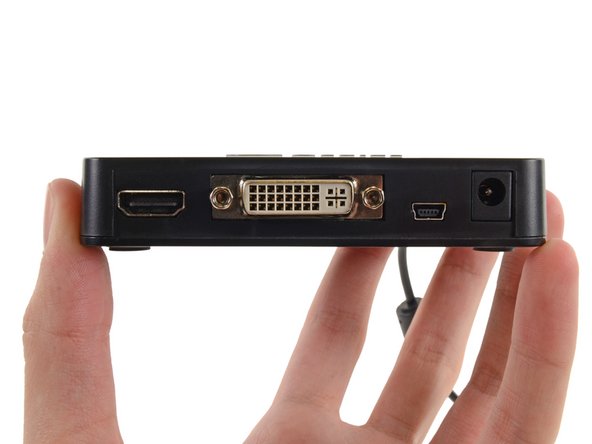
Our Development Kit control box is a pretty basic device, consisting of buttons for adjusting the Rift's settings and a handful of I/O ports.
-
From left to right: HDMI, DVI, Mini USB, and DC-in.
-
Video input to the Oculus Rift is DVI, but the handy dandy control box is capable of converting your PC's HDMI output to DVI. VGA is not supported at this time.
-
-
-
Just like its headset counterpart, the control box opens up after removing four Phillips #1 screws.
-
Oculus could have simply glued the control box shut rather than securing it with screws and a removable panel. This design goes to show that even devices of the future can be easily accessible.
-
The main chips on the control box motherboard:
-
Realtek RTD2483AD display interface controller
-
Winbond W25X20CL 256 KB serial flash
-
Techcode TD1484A synchronous rectified step-down converter
-
-
-
The Oculus Rift Development Kit Repairability Score: 9 out of 10 (10 is best)
-
This is a preliminary score, given that this Rift is essentially a beta product. We'll know for sure once the real thing is released down the line—but here's what we've got for now!
-
Standard Phillips #1 coarse thread screws are used in both the headset and control box, making it a cinch to open them.
-
Standard clips around the perimeter make separating the front panel pretty easy.
-
Two foam adhesive pads holding the LCD in place were a tad annoying, but easy to re-adhere during reassembly.
-
The entire device can be taken apart in less than 10 minutes.
-
Kapton tape is used to hold some cables together, which should probably be replaced with new tape if the product is disassembled.
-


9 comentarios
I have a Dell M6400 with only a VGA (female) out, would a DVI adapter work? Any Suggestions?
Are the cables/connections provided female/male? DVI-D, DVI-A, or DVI-I?
You would need something like this:
http://www.datapro.net/products/vga-to-d...
It requires a converter with active electronics; a passive adapter would not work.
A different rev. of the Rift might support analog input, but this one does not appear to have the signals hooked up (based on what I can see, which isn't quite enough).
cityzen -
Thank you for the confirmation cityzen! and for the recommendation.
a digital converter is a pricey addition, do you think a USB2.0 to HDMI adapter (http://www.amazon.com/Sabrent-1920x1080-...) could be a more economical option?
or maybe an ExpressCard or PCMCIA card would provide the necessary bandwidth? But don't see many offerings.
hello -
A USB2.0 adapter would not be suitable for fast-action video. I wouldn't count on the other options, either. You can find cheaper adapters than the one I pointed out, which was just the first I happened to come across. Another example is: http://www.ambery.com/2covivgatodv.html
Actually, looking at the specs for your notebook, you should have a DisplayPort, and you can get a cheap adapter from that to DVI-D.
cityzen -
cityzen, you are a gentleman and a scholar. my thanks go out to you!
hello -