Introducción
En este desmontaje, abrimos una Wii a la placa lógica. No podría haber hecho esto sin la ayuda de mi novia, Elizabeth.
Qué necesitas
-
-
Desconecta todos los cables externos de la consola Wii.
-
Reúne todas las herramientas.
-
-
-
Un pequeño tornillo sujeta la batería de la memoria del BIOS.
-
Una vez que se quita ese tornillo, puedes deslizar la ranura de plástico.
-
-
-
Retira estos tres tornillos de la caja negra. El de la derecha es unos mm más largo. Estos tornillos sujetan la cubierta de plástico negro de los puertos de GameCube.
-
-
-
Retira todos los tornillos de la caja.
-
Varios tornillos de caja requieren un destornillador Tri-Wing.
-
El siguiente paso tiene más imágenes de cómo quitar los pies de goma y los tornillos debajo. Los pies y las cubiertas para tornillos son autoadhesivos, pero no todos los pies o cubiertas para tornillos tienen un tornillo.
What tri wing screwdriver size i need?
I used Y1 in the ifixit kit
-
-
-
Una vez que hayas quitado todos los tornillos, deberías poder sacar el panel frontal de la unidad.
-
El cable que conecta el panel frontal (cuadrados verdes en la tercera imagen) se puede sacar suavemente con la mano o con la ayuda de un spudger.
If you actually take the time to do this step It would not have a broken holder
I was not gentle enough in removing the plastic wire connector. The red wire broke off, with a small piece of the red wire stuck in the plastic connector. I really can't get the small piece of red wire out of the connector.
Anyone know of anywhere that sells a connector, or at least what the name of kind of connector is?
-
-
-
-
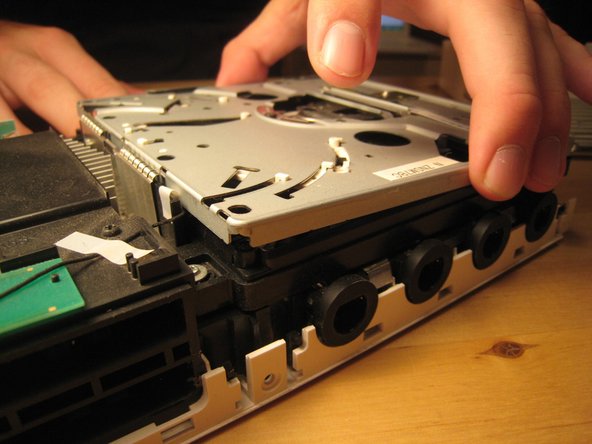
Levantamos la tapa de la unidad óptica quitando los seis tornillos Phillips #00. Todos ellos están etiquetados en la imagen anterior.
-
Hay un montón de piezas en la unidad óptica, pero no hay nada muy elegante en esta unidad en comparación con otras unidades de carga por ranura, por lo que no la desarmé por completo. También hay un montón de engranajes y palancas con los que no quería lidiar.
The six Phillips screws are only holding in the optical drive, so if you only need to take the case off, the sides of it are just very snug against the inside wall and other components
-
-
-
Los tornillos que sujetaban la unidad estaban profundamente dentro de la carcasa.
-
Una vez que se quitaron esos tornillos, se pudo levantar toda la caja.
-
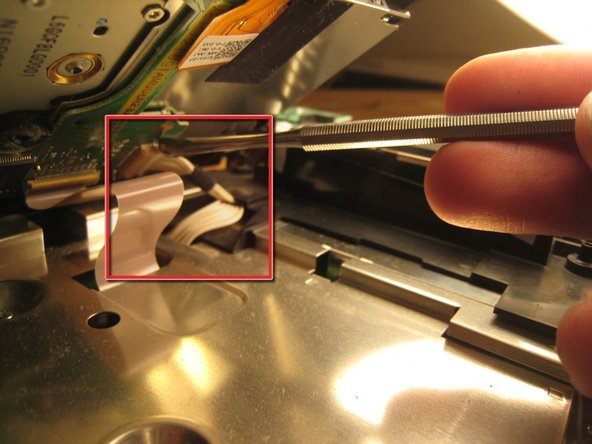
Este cable se deslizó fuera de su ranura horizontal. Una vez que se separó, el cable plano también salió.
-
-
-
Comenzamos tratando de llegar a la placa lógica quitando este pequeño borde de plástico negro.
-
Una cruz significa que se sujeta a una pieza de plástico y una caja significa que se sujeta a otro escudo EM o disipador de calor.
-
-
-
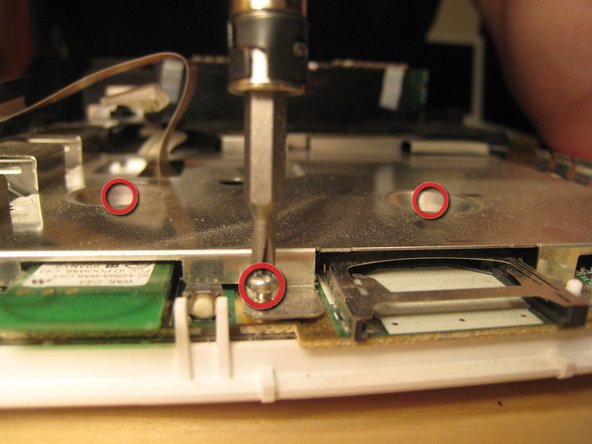
Retira todos los tornillos de la cubierta de la placa lógica. Dos están empotrados en el medio; otros están a lo largo del borde. Más se volverán visibles a medida que se eliminen otras partes. ¡Es como un juego! Puedes comenzar con los tornillos que sujetan las piezas de plástico negro, pero yo comencé con las más visibles y fui desde allí.
-
Hay dos cables (que se muestran en la tercera imagen) que salen de la placa lógica y están conectados a las antenas Wi-Fi. Estos son delicados. No los rompas.
-
-
-
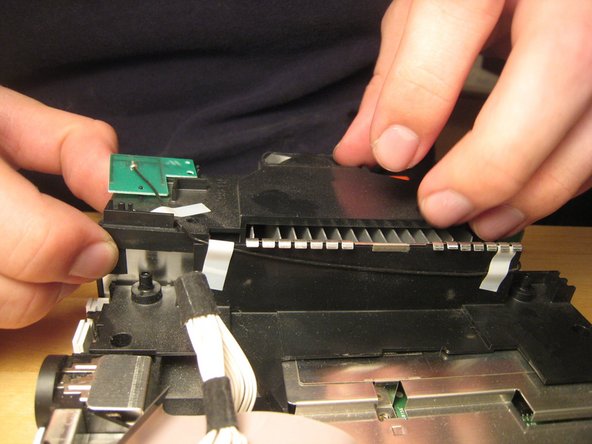
Separa el ventilador de la caja. Hay dos tornillos que lo sujetan.
-
Debes desconectar el conector de alimentación del ventilador si deseas quitarlo por completo.
-
-
-
Si tu destornillador no está magnetizado, necesitarás un imán para sacar algunos de los tornillos incrustados. Puedes sostener un imán contra el eje de tu destornillador para magnetizarlo temporalmente.
-
Una vez que hayas sacado todos los tornillos, puedes comenzar a quitar la carcasa negra.
-
-
-
Con las cubiertas de plástico negro quitadas, podemos ver todos los orificios de los tornillos. La mayoría de los tornillos ya se han quitado, pero una vez que se hayan quitado el resto, puedes levantar la tapa de la placa lógica.
-
Ten en cuenta que al menos una parte está acolchada térmicamente en la cubierta de la placa lógica. Es posible que tengas que reemplazar esta almohadilla térmica, pero yo no lo hice. Simplemente los volví a juntar. ¡Oh bien!
-
Retira los tornillos restantes en la cubierta de la placa lógica.
-
-
-
Nos detuvimos ahí.
-
Un molde para muffins funcionó muy bien para organizar todos los tornillos.
-
Volver a armar la Wii tomó solo media hora y funciona perfectamente. Mejoramos el diseño de Nintendo con tres o cuatro tornillos y una tuerca cuadrada, pero empeoramos su diseño con un trozo de cinta adhesiva (para sujetar la batería de la bios).
The extra Square Nut goes in the right hand side of the plastic bracket in step 12. It is the reason you ended up needing duct tape for the battery door.
-


Un agradecimiento especial a estos traductores:
100%

¡ Francisco Javier Saiz Esteban nos está ayudando a reparar el mundo! ¿Quieres contribuir?
Empezar a traducir ›
27 comentarios
I was kinda hoping you would take apart the optical drive assembly, you said there is "nothing fancy" about it, but since Nintendo designed this drive to be able to take the "mini" discs from GameCube, they have to work out a mechanism to center the disc before loading it onto the motor, hence "a ton of gear and levers" and that's the exact thing I actually wanted to see, I really wanted to know how they made it work..
:P
Maybe I can make a guide for you with it like that. I plan to replace the Hard Drive in my wii so ill make a guide.
@zeldaawesome It is not a hard drive, it is NAND. In fact, that’s about as far away from a hard drive as you can get.
Xu Xian -
I have a dud drive, so i might just do this.
Nice guide. I have one suggestion and one comment to add.
Suggestion: a different color circle in the pictures for the Tri tip screws would speed up re-installation.
Comment: the extra square nut holds in the BIOS battery cover which is quite inconvenient to discover as it is the last screw you reinstall.
Thank you! Helped a lot to change the casing. The only advice that I can give is to organize the screws properly to mount it up again.
Cheers!
Thanks for this. My Wii is now 9 and I need to do a good clean out of dust and what not. This will be really helpful.
so i got off the first two triangle screws under the black plastic on the gamecube controller ports, and after, i went to take off the four on the side of the wii. i got the ones that were deep in the console, but as i tried to get the black triangle ones that are a little smaller i messed up the screws to much and i pretty much lost the threading on the two. what can i do to get them off. i can replace them if i can get the darn things off. also i was using a flat head that worked on all the other silver triangle screws.
Would you mind answering a question? My Wii was dropped on accident, and I thought I heard something come loose. Sure enough, little black chunks of plastic came out of the fan slot when I examined it. The Wii itself appeared to work, but I can't help but worry that somehow gameplay might be effected. Any ideas where the black pieces of plastic came from? Will this effect the Wii's performance? Please respond as soon as you can!
Thanks for the 411. It was useful, with a few side notes:
1)I tried following your tool list on the cheap. Thinking that I had a ton of tool kits already, I skipped ordering the Phillips screw drivers. I panicked a little when I started my teardown, only to find all my drivers too big for the job....save one. The Phillips screw driver in the "Radio Shack 61PC Computer and Electrical Tool Set" handles all the Phillips screws on the teardown.
2)The notation about the hidden screws was a little misleading and a bit of an aggravation, as only a small percent of the feet actually covered screws (1, actually, IIRC). For a future edition of this teardown, please add some sketches to show the proper locations.The recommended "Pro Magnetic Project Mat" and my lame excuse for art skills saved me in this area.
Thanks for the brilliant and well annotated tear down! A dab of no nails with a cocktail stick will make sure the rubber feet will stay sat when you reattach them.
@gjwilder - that's the center piece out of the holder inside the game case, it probably broke off and got stuck in the center hole of the disk and loaded into the slot unnoticed.
I can't imagine how that would work; torx and tri-wings are shaped very differently. In any case, it's much better to use the right tool for the job, or you risk stripping screws and never getting them out again. Tri-wing drivers are pretty easy to get ahold of, so best not to take shortcuts ;)
the hannah mareiMedlock
misc parts (ie metal & plastic holdings) missing from the final picture. Could be useful to make sure you have all the parts when you try to put it back together…
We improved Nintendo's design by three or four screws and one square nut, but worsened their design by one piece of duct tape.
LMAO (good tutorial tho)
You missed the face and the screws for re assembling are super confusing …I stripped my case from that confusion and missing face
Hey guys, Here it is, I still have the original Wii. Still looks immaculate, and has no mechanical issues. The problem is… I wanted to play the Original Luigi’s Haunted Mansion. I picked up a memory card (Supposedly OEM Nintendo Brand), put it in the slot up top. Played the Game for a while. But, when trying to remove the card. It’s a no go. It is stuck. I used a strip of an old super thin laminated ID card. I Got in the slot to the side of the card, but now see that there is also prongs on the inside of the card too.
Any solutions, or is this going to need a complete tear down to remove?
I wanted to see the CPU, but it still looks good inside.
Where is the wireless receiver that is inside the wii console
I need to remove it and put it in
The usb part of the wii console
In order for me to play spyros adventures
Yea, I used cello tape for the bios battery too.