Introducción
Das Nexus 4 kam grade rechtzeitig für eine freitägliche Teardown-Session bei uns an. Wir haben uns dann auch gleich diese #Freitagsfragen gestellt:
- Ist es ein gutes Telefon?Keine Ahnung, wir sind direkt in das Innere des Nexus 4 eingedrungen - das überlassen wir der Wissenschaft!
- Wie reparierbar ist es? Das wird sich zeigen. Weiter unten findest du die besten Informationen über die Innereien des Nexus 4.
Du hast auf ewig einen Platz in unserem Herzen* wenn du uns auf Twitter folgst, unsere Facebookseite likest, oder unseren YouTubeChannel abonniertst. (am besten alles davon)
*Aber nur, wenn du nett zu uns bist.
Qué necesitas
-
-
Google hat die 4. Generation seiner Smartphoneserie Nexus enthüllt und es trägt den Namen - haltet euch fest - Nexus 4! Mal sehen, was da so drin steckt.
-
4.7 "1280 x 768 Pixel Touchscreen LCD mit IPS
-
Qualcomm Snapdragon S4 Pro-System auf einem Chip (SoC) mit 1,5 GHz CPU
-
2 GB RAM
-
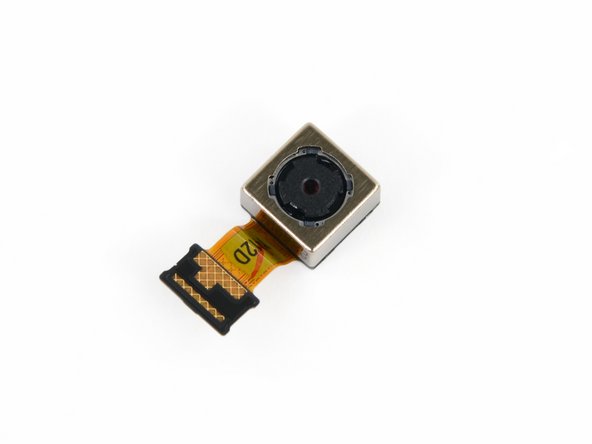
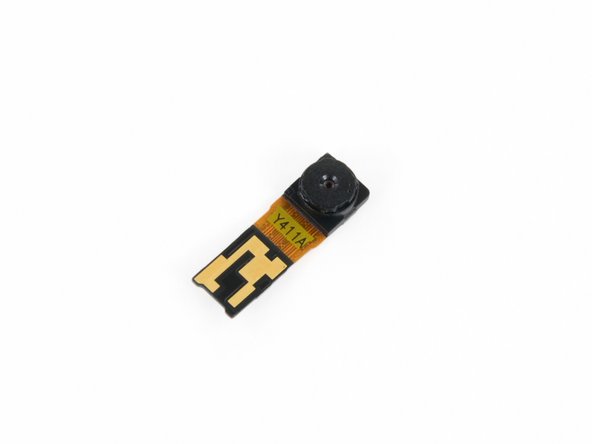
8-Megapixel-Rückkamera und 1,3-Megapixel-Frontkamera
-
Nahfeldkommunikation (NFC)
-
Android 4.2 (Jelly Bean)
-
-
-
Auf den ersten Blick sieht das Nexus 4 nicht besonders spanned aus, aber durch sein glattes, sauberes Design ist es alles andere als ein Schandfleck.
-
Google entschloss sich bei dem Design für eine Partnerschaft mit der Firma LG. Zum Dank durfte LG sein Logo auf die untere Rückseite drucken (und hat vielleicht etwas bessere Verkaufszahlen erreicht).
-
Vielleicht haben wir über die Optik des Nexus 4 zu vorschnell geurteilt. Auf den ersten Blick sah es nicht besonders aus aber die Rückseite offenbart uns ein tolles neues Feature: es glitzert!
-
-
-
Von links nach rechts: iPhone 4S, iPhone 5, Samsung Galaxy Nexus, Samsung Galaxy SIII, LG Nexus 4.
-
Wir hätten gern auch noch ein Galaxy Note II dazugelegt aber dieses iPad Mini war das, was vom Größenvergleich her am ehesten passte.
-
Trotz der leichten Variation in der Optik, sind nicht alle schwarzen Rechtecke gleich. Im Gegensatz zum Galaxy Nexus - dem Vorgängermodell - ist das Nexus 4 ein winziges bisschen schwerer (139 g vs 135 g), dicker (9.1 mm vs 8.9 mm), und breiter (68.7 mm vs 67.9 mm).
-
-
-
Wann immer ein neues Android Phone auf den Markt kommt, fühlen wir uns gezwungen, es mit dem neusten iPhone zu vergleichen. Mal sehen:
-
Beide Smartphones haben ihren Haupt- I/O Stecker auf der Unterseite und seitlich davon jeweils zwei Schrauben. Beim iPhone ist es der Lightning Connector und die beiden appleeigenen Pentalobe-Schrauben. Beim Nexus 4 hat hier einen universellen Micro-USB/SlimPort HDMI Port und zwei relativ gewöhnliche Torx Schrauben.
-
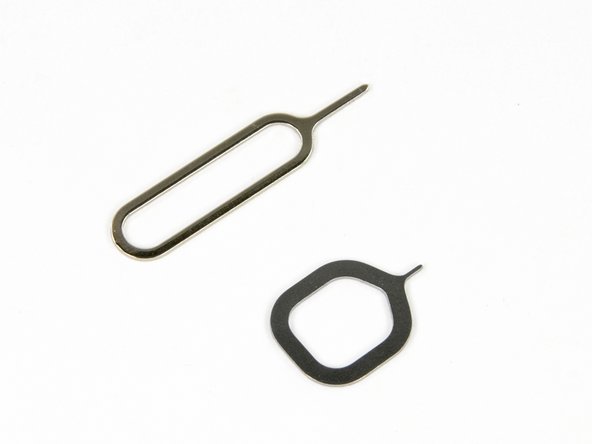
Statt den Micro Sim Kartenleser unter dem Akku zu verstecken, wie es viele Handyhersteller tun, hat LG den Kartenleser an die Seite des Handys gesetzt ihr eigenes kleines Simkartenfachöffnungswerkzeug integriert. Total Cupertino-mäßig.
-
-
-
Mit unserem neu erworbenen Simkartenfachöffnungswerkzeug machen wir also den ersten Trippelschritt hin zur kompletten Demontage des Nexus 4.
-
Puh, das war anstrengend! Ohne das Simkartenfach ist das Nexus 4 endlich ein wenig leichter und bringt jetzt nur noch 138.8 Gramm auf die Waage.
-
-
-
Nachdem wir die zwei T5 Torxschrauben aus ihrem Gefängnis befreit haben, brauchte es dann nur noch paar Minuten Frickelarbeit mit einem iFixit Öffnungswerkzeug, um die Rückabdeckung abzunehmen.
-
Es war nicht wirklich schwierig, dieses Gerät zu öffnen, aber ohne das richtige Werkzeug wäre es vermutlich sehr frustrierend.
-
Auf den ersten Blick lässt sich schon erkennen, dass der Akku wesentlich schwerer auszutauschen ist als bei dem früheren Modell Samsung Galaxy Nexus. Das könnte Punktabzug bei der Reparierbarkeit geben, aber wir haben ja grad erst angefangen!
-
-
-
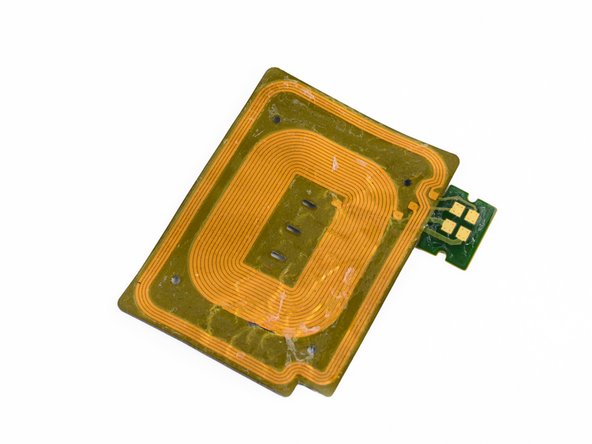
Die Rückabdeckung der meisten Handys ist ein langweiliges Stück Plastik, das nur den Zweck erfüllt, die Batterie zu verdecken. Hier ist das nicht der Fall.
-
Ein paar Druckkontakte versorgen die NFC Antenne mit Strom und verbinden die Induktionsspule, die für das kabellose Aufladen benötigt wird, mit dem Motherboard.
-
Als wir lasen, dass "kabelloses Laden" als offizielles neues Feature im Datenblatt aufgeführt war, waren wir schon ziemlich neugierig, das zu testen. .Leider war die kabellose Ladestation im Lieferumfang nicht enhalten. Buh.
-
Vor zwei Jahren brachte Google NFC mit ins Reich der Smartphones mit dem Nexus S. Es war ein langer Weg dahin, aber nun scheint sich diese Technologie durchzusetzen.
-
-
-
-
Der Batterieanschluss wird mit Schrauben festgehalten.
-
Bei uns hier sieht es einfach aus, aber die Batterie ist ziemlich fest verklebt und es braucht viel Hebelarbeit, um sie aus dem Gehäuse zu bekommen.
-
-
-
Endlich können wir den 3.8 V, 2100 mAh Akku herausnehmen.
-
Genau wie Apple beim iPhone 5 nutzt auch LG einen 3.8 V Akku, um das Nexus 4 mit Strom zu versorgen.
-
Seltsamerweise schreibt Google keine technischen Daten über den Akku auf ihre Produktseite. Wir müssen uns in Bezug auf die Akkuleistung also auf praktische Erfahrungen verlassen.
-
-
-
Das Lautsprechergehäuse wird mit zwei Schrauben und ohne Kabel im Gehäuse festgehalten. Es ist durch Federkontakte mit dem Telefon verbunden, dadurch ist der Ausbau ein Kinderspiel.
-
Bonuspunkte für die Reparierbarkeit!
The speaker assembly is easier to remove/replace if you loosen the bottom motherboard cover screw first, because there's a little curved tab that slots underneath it.
-
-
-
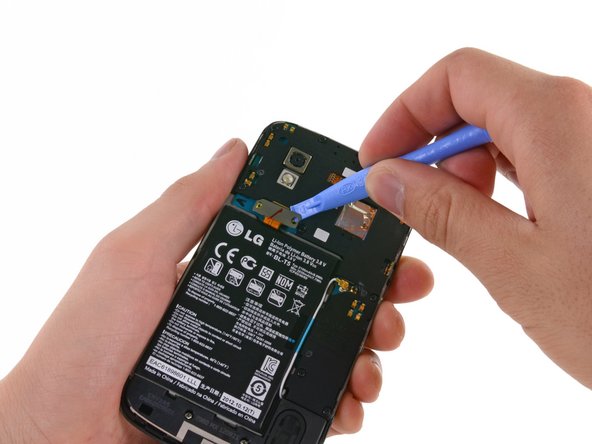
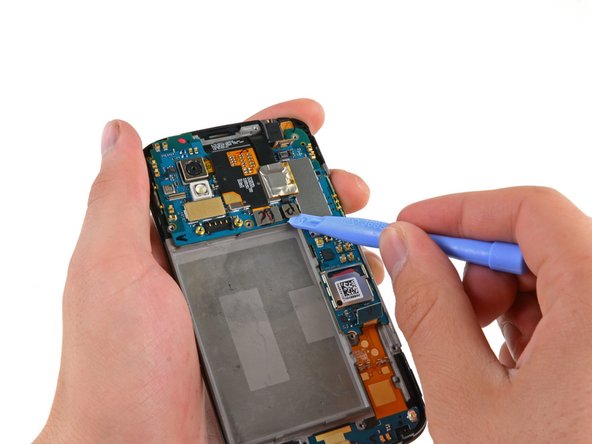
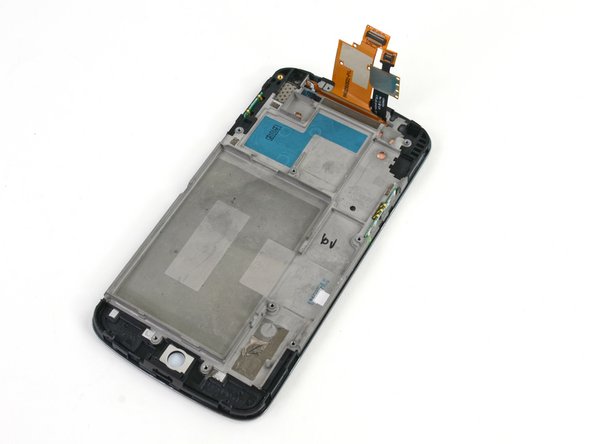
Als nächstes ist der aufdringliche Plastikrahmen dran, der das Motherboard verdeckt.
-
Nachdem der Rahmen gelöst ist, ist das Nexus 4 nun offiziell komplett schraubenfrei. Insgesamt waren es nur 4 verschiedene Schraubenlängen und insgesamt 15 Schrauben. Am besten halten die übrigens auf unserer magnetischen Arbeitsunterlage.
-
-
-
Zusätzlich dazu, dass es etwas Stabilität bringt, beherbergt dieser Rahmen den Ohrhörer-Lautsprecher und den Vibrationsmotor, die beide über Druckkontakte mit dem Motherboard verbunden sind.
-
Im Nexus 4 sind linear schwingende Vibrationsmotoren verbaut im Gegensatz zu den Vibrationsmotoren mit rotierenden Gegengewichten im iPhone 5.
-
-
-
Die Frontseite des Motherboards:
-
Toshiba THGBM5G6A2JBAIR 8GB Flash
-
SlimPort ANX7808 SlimPort-Sender (HDMI-Ausgangskonverter)
-
Invensense MPU-6050 Sechs-Achsen (Gyrometer + Beschleunigungsmesser)
-
Qualcomm WTR1605L Seven-Band 4G LTE-Chip
-
Avago ACPM-7251 Quad-Band GSM / EDGE und Dual-Band-UMTS-Leistungsverstärker
-
Murata SS2908001 802.11 a / b / g / n WLAN und Bluetooth Modul
-
Avago 3012 Ultra-Low-Noise-GNSS-Front-End-Modul
Google Translator = Is it possible to replace the flash memory to a larger memory or solder a sd card on the flash memory contacts on it?
German: Kann man den Flash speicher auf einen gröseren speicher austauschen oder eine sd karte auf die flash speicher kontakte drauf löten?
Would you be kind to please tell me how Nexus 4 gets Detected to the PC using USB , Coz. my nexus 4 Is Not getting Detected and I tried almost every possible way to fix it . i even tried to change the MicroUSB part as well in Nexus 4 , but still its not able to detect my Nexus 4 Device .
PLease Help
-
-
-
Rückseite des MoBos:
-
Samsung K3PE0E00A 2 GB RAM. Wir vermuten, dass die Snapdragon S4 Pro (APQ8064) 1,5 GHz CPU darunter liegt.
-
Qualcomm MDM9215M 4G GSM/UMTS/LTE Modem
-
Qualcomm PM8921 Power Management
-
Broadcom 20793S NFC-Controller
-
Avago A5702, A5704, A5505
-
Qualcomm WCD9310 Audiocodec
-
Qualcomm PM8821 Power Management
Wifi :)
Hi,
is there a possibility to upload a high resolution picture from the Avago A5702, A5704, A5505 Section? I have to find the magnetic field sensor, so maybe you can help me?
Thank you very much!
Have you ever seen LG optimus G mobo ? I think they are the same.
-
-
-
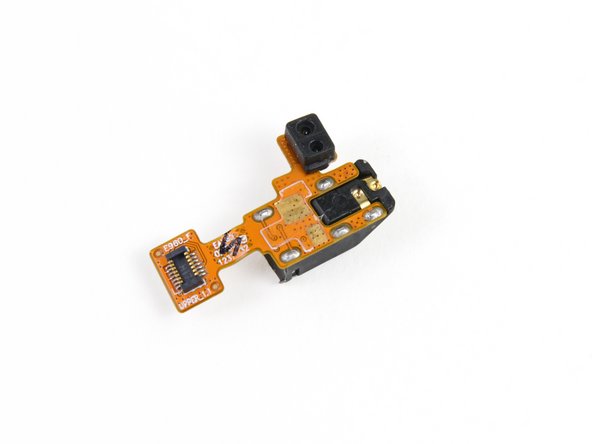
Zurück zum Front Panel: Wir nehmen den standard 3,5mm Kopfhöreranschluss heraus, der auch die dualen Umgebungslichtsensoren enthält.
-
Es wird spät und Walter ist nach einem langen Teerdown-Tag erschöpft ...
FYI, just replaced my screen assembly and ran into an issue where the proximity sensor is always blocked. After scouring hours unsuccessfully for a solution, a YouTube comment mentioned swapping the orientation of the rubber gasket so that the big hole surrounds the little proximity sensor. That solved it!
-
-
-
Das Frontpanel: verschmolzenes LCD, Glas, und Rahmen.
-
Durch den Synaptics S7020A Touchscreen Controller werden eure Finger zu super präzisen Schweinetötungsmaschinen verwandeln.
-
Das 4,7", 1280 x 768 , WXGA IPS Display wird von LG Display hergestellt.
-
Das Display ist mit LH467WX1 gekennzeichnet.
The description for removing the digitizer/screen aren't descriptive enough to get the job done right without frustration. Any clarification would be appreciated.
Could someone tell me what kind of EMI shielding tape should be used on the digitizer ribbon?
-
-
-
Das Nexus 4 erhält 7 von 10 Punkten auf unserer Reparierbarkeits-Skala. (10 ist am einfachsten zu reparieren).
-
Um die Rückabdeckung abzunehmen braucht man nichts weiter als einen Schraubendreher, ein Plastic Opening Tool und etwas Geduld.
-
Das komplette Gerät hat lediglich 4 verschieden Schraubenlängen - alles gewöhnliche Schraubentypen - insgesamt nur 15 Schrauben.
-
Nachdem die Rückabdeckung und der innere Rahmen entfernt sind, sind die inneren Komponenten durch Druckkontakte leicht zu entnehmen.
-
Der Akku ist mit sehr viel Klebstoff am Rahmen befestigt, also könnte es etwas schwierig werden, ihn zu entnehmen ohne den Akku zu beschädigen.
-
Das Glas, das Display und der Displayrahmen sind miteinander verschweißt. Achte also darauf das Glas nicht zu zerbrechen, es sei denn, du kannst sehr gut mit einem Heißluftgebläse umgehen oder du bist scharf darauf, Glas, Display und Rahmen gleichzeitig zu ersetzen (€€€).
I just broke the screen of my nexus 4 today, bummer! Any idea how I can get it repaired beside calling LG?
Thanks
Hahaha LG tiene buen hardware pero lo de la bateria deja mucho que desear, ademas con las últimas actualizaciones caparon la opción de LTE
-


Un agradecimiento especial a estos traductores:
100%


Estos traductores nos están ayudando a reparar el mundo! ¿Quieres contribuir?
Empezar a traducir ›
38 comentarios
Can the LTE chip somehow be activated/unlocked?
Do not think it would be possible because it would make no sense to sell it without LTE having a possible working LTE functionality.
Can you use the LTE functionality of the nexus 4?....not out of the box, you have to unlock the bootloader and modify the nexus 4's software...in short yes when it's modded
While taking this phone apart (Nexus 4), was there a special place where a microSD slot could have been if Google would have wanted one put on there?
Maybe LG wanted to allow the users to expand the storage but later dropped the plan for some reasons.
Anyway, I am looking forward for the Wii U teardown
Where is the application processor located? Is it the APQ8064?
Awesome teardown. I really wonder why they didn't include the LTE function. Maybe they didn't have time before Christmas for doing it?
Would it be possible to swap the 8gb flash module (or 16gb in the 16gb version) to a 32gb module? I'm guessing the 16gb version would use a Toshiba THGBM5G7A2JBAIM module, which has the same package and power requirements as the THGBM5G8A4JBAIM (32gb module). Could this be as simple as a straight swap? I tried to get a closer look at the IC in your pic on step 17, but the red outline makes it hard to get a good look at the surface mount soldering on the chip. But seeing as you guys have actually seen it, would it be at all possible to make this modification by hand?
is the hardware of the nexus 4 able to use USB OTG?? can it provide voltage to an usb device? cose i really need it :C and maybe with a software update it can be fixed
Hey... Why is one of Walter's arms much bigger than the other one?
Reminds me of this - http://www.youtube.com/watch?v=4ZHBUMldz...
How accessible are the SIM pins with the mobo out? I've bent one and it's nearly impossible to correct the bend through the tiny SIM hole with the case on. But I don't want to rip the entire phone apart and risk breaking it further if I won't gain an advantage in SIM pin access by doing so (I will just continue to try and straighten it out through repetitive "massaging" :)
How accessible are the SIM pins with the motherboard out? I have a bent one, but don't want to tear the whole phone apart if it doesn't give me an advantage in re-shaping the bent pin by doing so. Help!
Linear Resonant Actuator: Would it be possible to get part information on the LRA and the driver for it? This actuator is extremely mild, in fact so much so that it is useless as a ringer substitute in my pocket. I would like to see if there might be any drop in replacements for it
Tech specs (www.google.com/nexus/4/) list compass and barometer as features. Are these MEMS on the board?
Omg,last day i drop my nexus 4 in the water,when i was stay at the glow sticks midnight party,that's time to till its have no any power,any idea?how to i fix this?
Easiest way to take of the front screen: start at the simcard slot, and make sure the tool is snugly in place, then slide it left and right to loosen the side, until you hear a click, which means the screen has separated from that side. Once one side is fully released, the other sides are much easier to loosen. leave the top of the phone last, and use a guitar pick or some other shorter device to take that part off completely.
I used this tear-down to change the the lcd/glass/touch/frame assembly. I had the right tools and was very careful. But the battery gave me problems, the glue held up a good fight. I didn't know that there was a small control board in the upper part where the connector sits. So i lifted the battery all the way around, and it got a little bent while doing this. When i put everything back together, it wouldn't start. I plugged it in the charger and the LED blinks red. The battery was fully charged before i took it apart.
I suspect that i broke the battery, trying to get it out. Would you agree?
I tried to take the connector of the battery and reconnecting, no change. When i plug the charger in, while the battery is disconnected, the screen shows the battery logo. I can even turn it on for a few seconds, it vibrates and shows the google logo. then turns back off. I guess because of the missing battery?
Do you think it's safe to order a new battery, and that it will work again?
Yes, it's the battery. Same thing happened to me.
alexei -
Can you replace the notification LED without having to change any other parts?
i know its a little late but it's on the daughter board along with the charge port i believe(taken my n4 apart a few times to replace screen three times)
Hello , someone can help me for a problem of battery? The phone not start. I remove battery and i saw with multimeter is 2,5 volts (so is very down). Now i try to charge with a external charger (very slow for now), however on the nexus there 4 pin. Someone can tell me the right voltage when plug the usb?? Because i dont understand if the phone charge fine or not
Your writing concept is very delighted about the Iphone. That is able to compare Iphone between Macbooks, iMacs, iPads, iPhones, iPods and iPod Touches. I hope your writing concept is able to give us a useful look about the Iphone.http://www.amazon.co.uk/dp/B00FPFM4AY
I can't figure out where is GPS antenna? I think it's broken on my Nexus 4.
I bought a Torx T5 screwdriver to open my Nexus 4 (bought my Nexus in the Netherlands) but it doesn't fit. I think I need a T4 screwdriver (as mentioned here http://www.anandtech.com/show/6440/googl... )
While I was replacing my nexus 4 battery , I accidentally broke the white wire/cable pasted on the old battery. I could reconnect it to a certain level, but not well connected. You can see that cable is removed in Step 11 to 12 in this article.
1) What is that cable
2) I guess it is wifi antenna cable. If that is the case, is my phone un harmed given that wifi still works
3) Does it affect phone calls, I can not test it since I am out of the country where my SIM card does not work
The 4G LTE radio/modem in the Nexus 4 can be activated. You have to be rooted and have a custom recovery. A special zip file has to be flashed via custom recovery to activated 4G LTE. Google search "LTE Nexus 4 xda" open link(s) and follow directions. I got LTE on my Nexus 4 right now as I'm typing this. Oh yeah, your carrier APN needs to be corrected in settings and make sure your carrier has 4g LTE activated by default cause some, like AT&T turn LTE off when they detect you are using a non LTE phone like the Nexus 4.
I was trying to take mine apart and i shattered the back glass while taking the back off, im so stupid!