Qué necesitas
-
Este paso está sin traducir. Ayuda a traducirlo
-
Released in 2012 as the best phone in the L series (the other phones were L3, L5 and L7)
-
This phone exists in different versions : the P760 (this one), the P765 (for India), P768 (for America - and a 8 MP camera) and P769.
-
The specs of this phone :
-
CPU: Cortex A9 (dual-core @ 1 GHz)
-
RAM: 1 GB (0.75 GB according to the phone)
-
Storage: 4 GB (2.3 GB usable) + micro-SD
-
Screen: 4.7" IPS, 540x960.
-
OS: Android 4.1.2 (for the latest version - 4.2 with Cyanogen 10.1.2)
-
-
Este paso está sin traducir. Ayuda a traducirlo
-
To access to the battery: easy: let it drop or lift with your thumbnails the rear cover.
-
The battery can be removed the same way (dropping the phone is not a good idea...)
-
The battery has a capacity of 2150 mAh. Not that bad but it runs out quite quickly (good point: the battery is removable)
-
-
Este paso está sin traducir. Ayuda a traducirlo
-
Let's begin the fun part: with a screwdriver, let's remove the three Philips screws.
-
Keep the screws on a magnet not to lose them (or two: there are two types of screws in this phone: the little short and the little long screws)
-
This part can be lifted easily (eg: insert a flat screwdriver on the top of the part)
-
-
Este paso está sin traducir. Ayuda a traducirlo
-
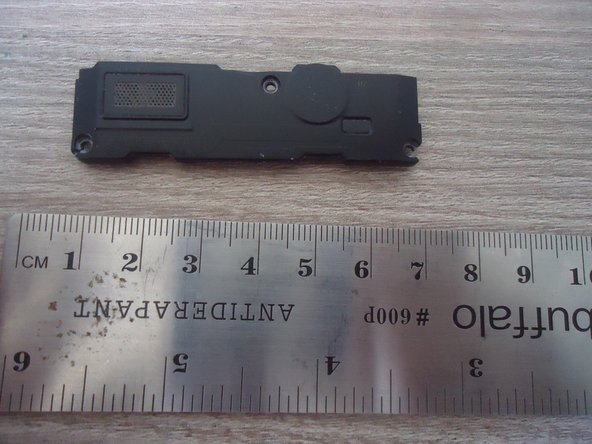
What does this part do?
-
The vibrator which... well, vibrates.
-
And the bottom speaker: used when you listen to music and with hands-free calls).
-
From the rest of the phone, the connectors are visible.
-
-
Este paso está sin traducir. Ayuda a traducirlo
-
Now, to access to the motherboard and to the connectors, you are at 7 screws from it!
-
With a spudger (or something flat - NOT a flat screwdriver), pry the glossy part and separate it from the rest of the phone.
-
As a rule of thumb, a rule is somehow effective!
-
-
-
Este paso está sin traducir. Ayuda a traducirlo
-
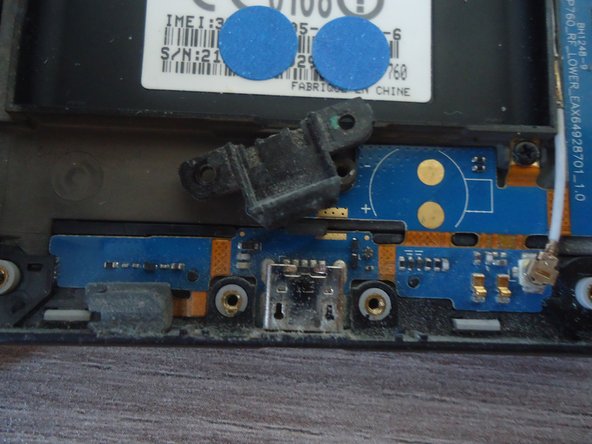
Here we are! Before removing the lower card, let's remove the two little screws and the cache hiding the micro USB port.
-
The phone, with the guts visible (almost...)
-
-
Este paso está sin traducir. Ayuda a traducirlo
-
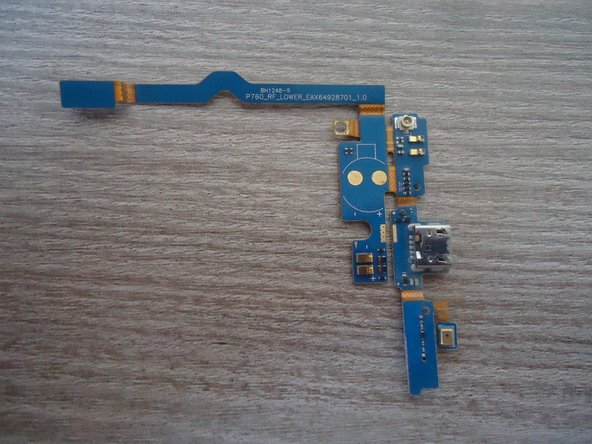
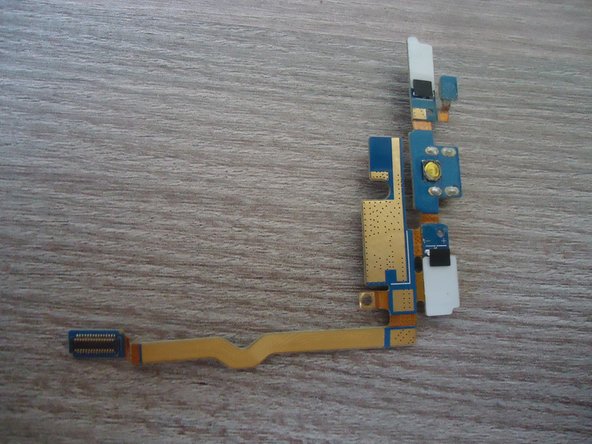
To proceed, detach the antenna and the connector.
-
Then, the tedious part: the board is glued to the case! Proceed wit care not to break the card (by taking the part and with a spudger).
-
We can note the presence of the (little) microphone. This board gathers the connectors for the vibrator, the speaker, the micro USB and the antenna. This part is quite important!
-
-
Este paso está sin traducir. Ayuda a traducirlo
-
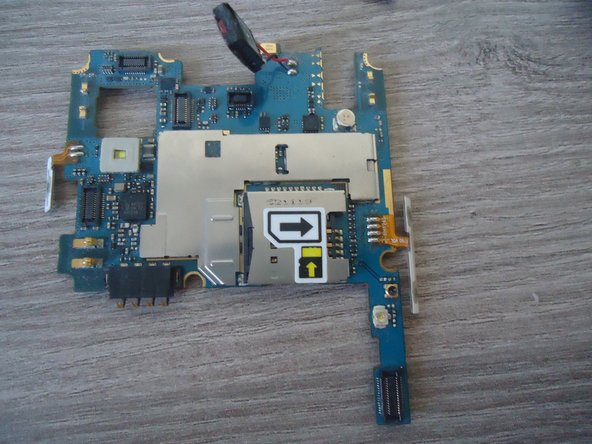
Now, the (dual-)core of the phone: the motherboard. LG was good for the board: almost everything is linked by connectors, easily removable!
-
Let's continue our dissasembly by disconnecting the four remaining ribbons:
-
The digitizer
-
The screen
-
The rear camera
-
The front camera and the proximity sensor
-
The antenna. Useful if the antenna was torn because it is easily replaceable!
-
Is it me or the phone includes a second antenna for dual-SIM models?
-
-
Este paso está sin traducir. Ayuda a traducirlo
-
Careful, the board won't go without unscrewing this tiny screw, securing the top speaker (sorry for the quality)!
-
-
Este paso está sin traducir. Ayuda a traducirlo
-
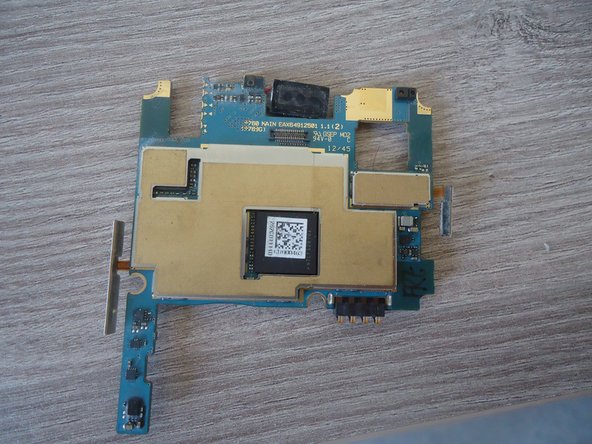
The motherboard, with the shields. With a flat screwdriver (do it if the phone is dead... Otherwise, the components beneath are fragile and may stop working).
-
I don't want to say wrong things so the analysis is left as an exercise for the reader.
-
-
Este paso está sin traducir. Ayuda a traducirlo
-
The most interesting part for a fragile phone: the digitizer.
-
Little by little, with a spudger, the both parts start separating... Be careful though!
-
-
Este paso está sin traducir. Ayuda a traducirlo
-
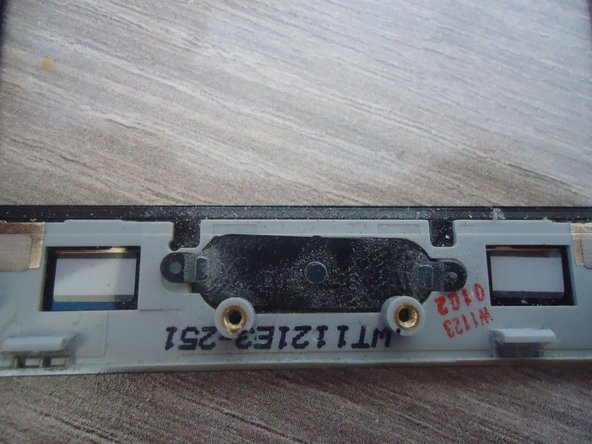
Here is it! It includes the two capacitive buttons on the bottom.
-
The button is barely maintained on the digitizer!
-
-
Este paso está sin traducir. Ayuda a traducirlo
-
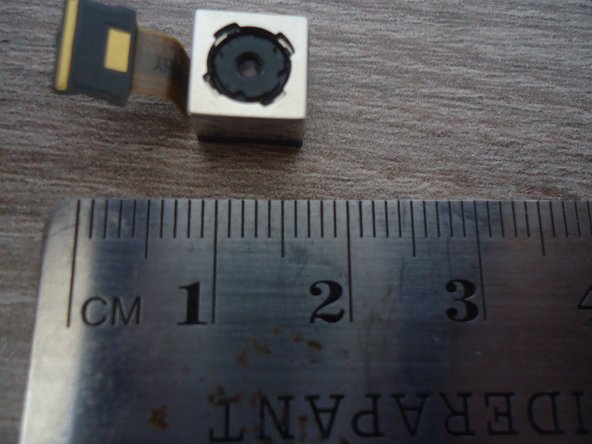
The rear camera is glued to the naked phone. A flat screwdriver and the camera is gone!
-
-
Este paso está sin traducir. Ayuda a traducirlo
-
The female Jack connector is not soldered at all! Only on its place, with the four connectors touching thr motherboard.
-
-
Este paso está sin traducir. Ayuda a traducirlo
-
This teardown is completed (almost).
-
Feel free to add information if you want!
-
Rest in Pieces, phone...
-