Introducción
Una mirada al interior de los Google Pixel Buds 2
Qué necesitas
-
-
Características:
-
Resistente al sudor y al agua.
-
Bluetooth® 5.0
-
Ventilación espacial para la reducción de la presión en el oído y la conciencia espacial
-
Micrófonos duales de formación de haces / Acelerómetro de detección de voz
-
Hasta 5 horas de tiempo de escucha y hasta 2,5 horas de tiempo de conversación
-
Sensores táctiles capacitivos / Sensores de proximidad IR duales
-
-
-
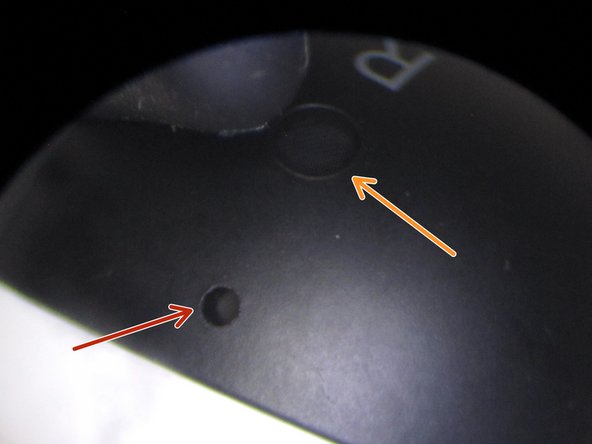
Vista posterior de los auriculares
-
ventilación espacial
-
Conectores para cargar la batería cuando está en el portaequipajes/estuche de carga
-
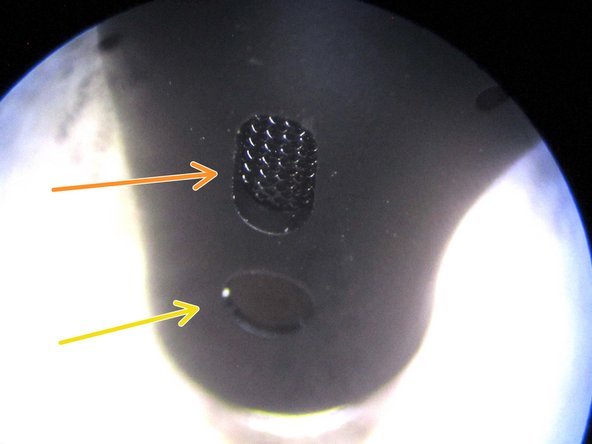
Detector IR para detectar si los auriculares están en el estuche de carga o en el oído
-
Detector IR para detectar cuando el botón está en el oído
-
Cubierta de la cámara de sonido de rejilla metálica puesta a tierra
-
Vista de cerca de la rejilla metálica puesta a tierra
-
-
-
Dado que los Google Pixel Buds están hechos de plástico y están pegados, la única forma de entrar era cortar el Google Pixel Bud. Este es un desmontaje destructivo
-
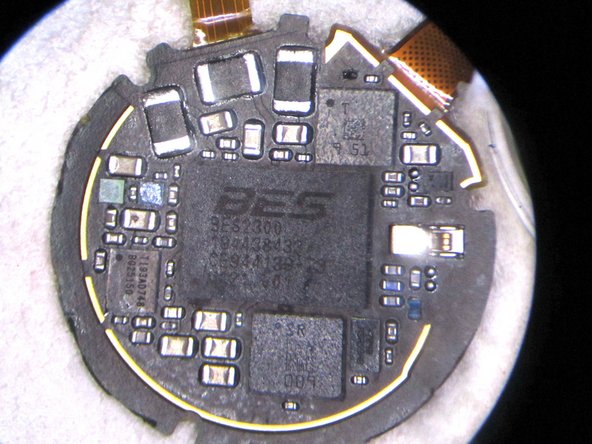
Una vez dentro, podemos echar un primer vistazo a la electrónica de Google Pixel Bud. Los componentes internos apilados en los Google Pixel Bud son los siguientes:
-
Sensor tactil
-
Placa de circuito principal
-
Batería
-
Altavoz
-
Micrófonos
-
Detectores de carga e infrarrojos en el oído (no se muestra)
-
-
-
-
Vista de los componentes electrónicos cuando se retiran de la carcasa de Google Pixel Bud
-
Sensor táctil basado en PCB flexible
-
Circuito impreso (PCB) principal. Contiene MCU, radio Bluetooth, procesamiento de audio, administración de energía y sensores
-
Batería
-
Micrófonos MEMS
-
Bobina de altavoz, imán de altavoz y diafragma de altavoz.
-
Cubierta de canal de sonido de rejilla metálica con conexión a tierra
-
Detector IR para detecciones en el oído
-
-
-
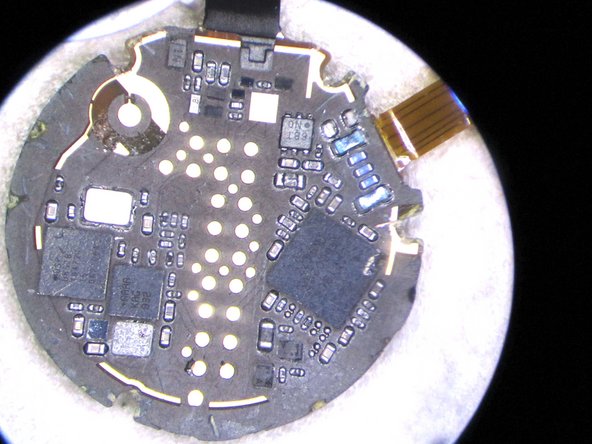
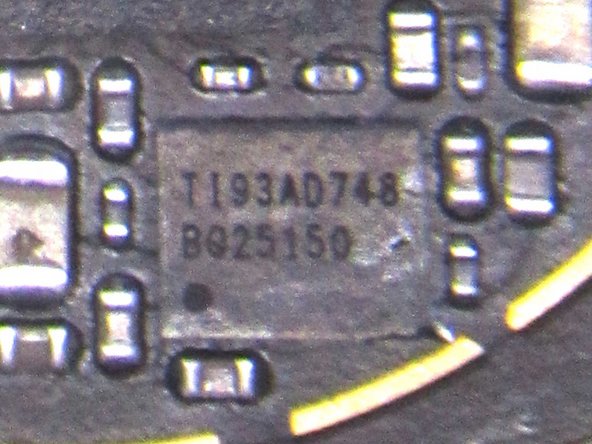
Vista de cerca de la parte inferior de la PCB principal
-
Componente desconocido. Etiquetado como "ix6". Por favor, deja un comentario si conoces este componente.
-
Interfaz de programación y puntos de prueba. Parece ser el diseño estándar del conector ARM de 20 pines.
-
Antena Bluetooth. Corre alrededor del exterior de la placa de circuito impreso principal: superior e inferior
Well, it is definitely not the MAX98502 - you just don't need a 2.2W output to the earbud from a battery-operated device ) It might be something headphones-oriented, for example MAX9723
-
-
-
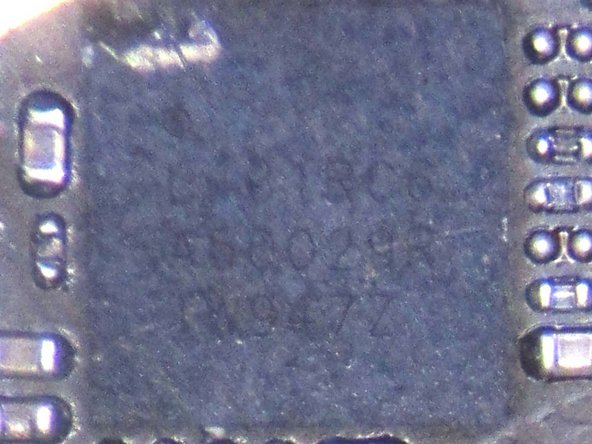
Vista de cerca de algunos de los componentes en la parte inferior de la PCB principal
-
-
-
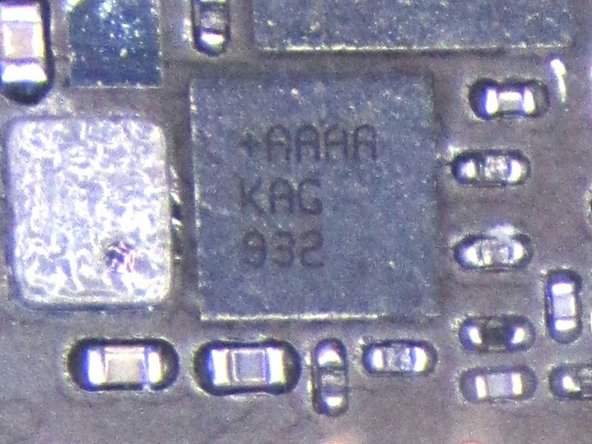
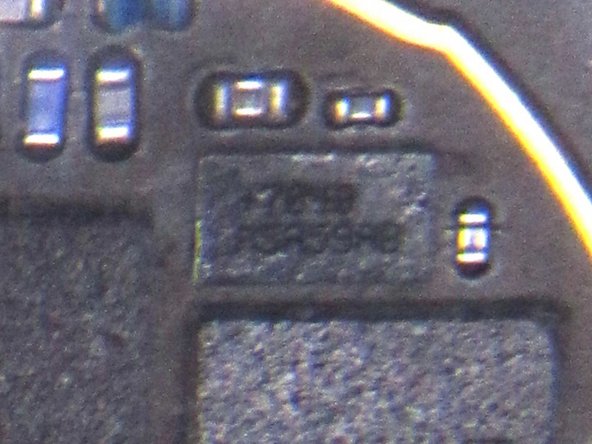
Vista de cerca de la parte superior de la placa de circuito impreso (PCB) principal
-
Dispositivo desconocido - +7048/A5A59AB - Puede ser el acelerómetro y el giroscopio utilizados para la detección de voz. Por favor, deja un comentario si conoces este dispositivo.
-
Dispositivo desconocido - T 9 51 - Podría ser memoria flash o RAM. Por favor, deja un comentario si conoces este dispositivo.
-
Dispositivo desconocido - SR 009 - Podría ser memoria flash o RAM. Por favor, deja un comentario si conoces este dispositivo.
-
-
-
Vista de cerca de algunos de los componentes en la parte superior de la PCB principal
-
Dispositivo desconocido - +7048/A5A59AB - Puede ser el acelerómetro y el giroscopio para la detección de voz. Por favor, deja un comentario si conoces este dispositivo.
-
-
-
Micrófono MEMS
-
No se pudo cruzar la referencia del número de pieza del micrófono, pero parece ser una pieza de Goertek. Por favor, deja un comentario si conoces este componente.
I don’t know how much this helps, but I scanned the DataMatrix and it told me “G20093D180NRD10A”
-


Un agradecimiento especial a estos traductores:
100%

¡ Francisco Javier Saiz Esteban nos está ayudando a reparar el mundo! ¿Quieres contribuir?
Empezar a traducir ›
25 comentarios
Great teardown, I can see the effort and finesse that it took., Great job.
Bru this is iFixit
I would also like to see teardown of the case.
Yes. Microphone ports, charging connections, etc are mirrored from right or left buds.
Excellent teardown, kudos Google, they admitted hardware is hard, this is an excellent effort, love the fit.. I've used some other flagships like jabras elite active 75t.. but these are great
Awesome teardown! :)
Hi. Is the bluetooth-chip on left or right Bud?
Bluetooth is in both
It is impressive to see Google added two IR sensors for better wear detection. As far as I know only Airpods/Airpods pro has that, Galaxy buds+ also have it but it is done partly through capacitive touch sensing rather than IR sensor. The usage of BES2300 also seems reasonable as it might be the only Bluetooth SOC that has enough performance for Google to implement various features such as translation to the headset.
Are the buds able to be put back together? The charging pads on one of my buds is recessed, so I wanted to open them up and put it back into place.
No, these devices are not designed to be taken apart. It is very easy to damage the units. I had to cut into it to open it. Inside there are flexible PCBs (easy to damage), and soft cone speaker (easy to damage)
Fantastic tear-down. Thanks so much for doing this!
I’ve had a couple pair of these over the last 2 years and nothing quite compares for the feature set.
I know it’s an older tear-down, but I have a specific question I hope you might be able to help with. My left Pixel Bud 2 fell into a pan in the sink with some oily water. Fully submerged.
It still works, but the bass/mid-range is just gone. The left bud now just sounds tinny and thin.
I’ve tried cleaning it with alcohol, q-tips, a micro vacuum. Can’t seem to make an improvement.
Any insight into what one could try in order to restore the performance? What component might have been impacted in the dunk?
I’ve seen this kind of sound behavior before when some of the external screens get gunked up with earwax. Cleaning them has always restored performance in the past. There’s just nothing left on the surface to clean.
Thanks!
Here is a video of how to replace the dead battery of the Pixel buds two and A-series
Thanks for the teardown, may i know how to charge the buds without the case? I lost the charging case and i wonder what are the pogo pins wiring, VBUS, GND etc..
Did you ever figure out which pin is what on those buds? I have a washed/broken charging case and am trying to charge the buds to see if they survived the bath and drying cycle.
Still no clue about the pinout. i lost my case so i cant charge them :/
Would you be willing to do this with Pixel Buds A-series & Pixel Buds Pro? If you need donated earbuds, I would be willing to do so.