Saltar al contenido principal

Este teardown está en en curso – Recarga periódicamente para ver los cambios más recientes!

Qué necesitas

  1. Curtis RCD718 Teardown, Curtis RCD718 Teardown: paso 1, imagen 1 de 3 Curtis RCD718 Teardown, Curtis RCD718 Teardown: paso 1, imagen 2 de 3 Curtis RCD718 Teardown, Curtis RCD718 Teardown: paso 1, imagen 3 de 3
    • First things first, you're gonna need to remove the outside screws that will be in your way later if you don't remove them.

    • Start off on the back, there are a total of 6 screws on the back side of this stereo. You only need to remove 2, the 2 that are on the grey part, not the metal. More specifically, the screw that is under the speaker plug-ins, and the screw on the top middle of the back.

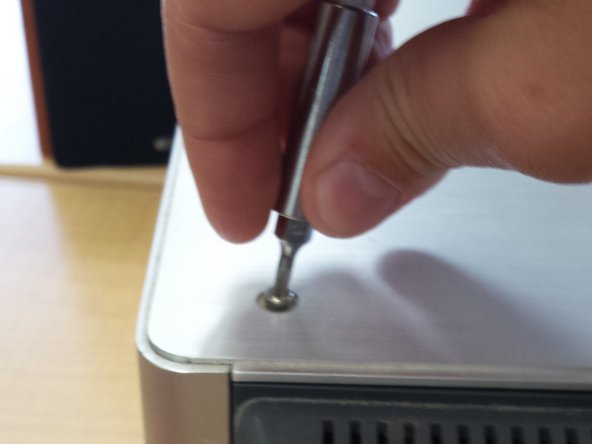
    • Next you will need to remove the screws on the top. This is the only place in/on the entire stereo where the screws are NOT Phillips. For these screws, you will need a hex 2.5 screwdriver, this can be found in most IFIXIT kits. There are 4 of them on the top of the stereo.

  2. Curtis RCD718 Teardown: paso 2, imagen 1 de 3 Curtis RCD718 Teardown: paso 2, imagen 2 de 3 Curtis RCD718 Teardown: paso 2, imagen 3 de 3
    • Once you have the cover off, you will need to remove the 3 metal bars that are placed across the device. Be careful with the middle section, there is a wire attached to the screw that you will need to slide through the slot in the metal bar.

bthompsdavid

Miembro Desde 05/26/15

101 Reputación

1 Guía escrita

Un comentario

hello, please come back and help me fix my stereo. It won’t play at all

Mia Cantu - Contestar

Agregar Comentario

Ver Estadísticas:

Ultimas 24 horas: 0

Ultimos 7 días: 0

Ultimos 30 días: 0

Todo El Tiempo: 557