Esta traducción podría no reflejar los cambios más recientes añadidos a la guía de referencia. Ayúdanos a actualizar la traducción o revisa la guía original.
Qué necesitas
-
-
Retire ambos tornillos T3
-
Deslice la pieza de plástico levantándola y luego hacia arriba.
-
Deslice el conjunto de plástico y resorte fuera del riel
-
-
-
Calienta la pantalla de cristal con un secador de pelo para ablandar los adhesivos.
-
Inserta una hoja de afeitar entre el cristal y el cuerpo
-
Sigue rodeando el borde de la pantalla hasta que quede suelto
For me, this step caused the back color of the display glass to be damaged (but my screen was to be replaced anyway, due to it being really dim), which looks bad if you keep your screen. Also, I looked around a bit and people seem to be using T-8000 glue/adhesive to put the display back in place (the adhesive that was there originally isn't really usable anymore after opening the whole thing up). Also, this whole step made me wonder why Fitbit would tell us we could swim with it.
-
-
-
-
Retira los dos tornillos T2
-
Retira el tornillo T3
-
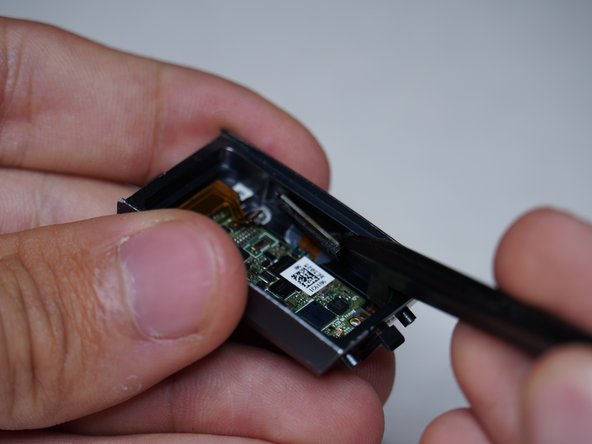
Despega el Escudo metálico
-
-
-
Despegue de ambos conectores de pantalla
-
-
-
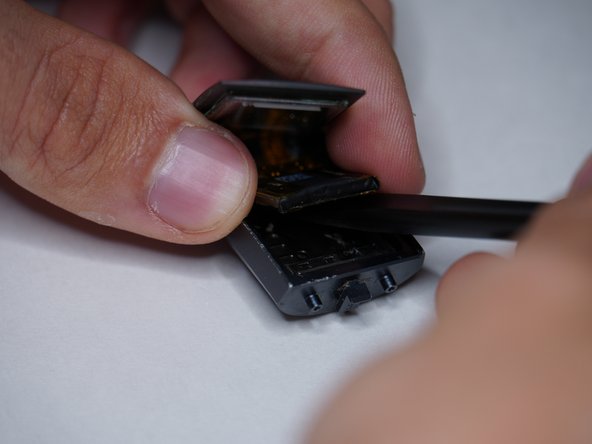
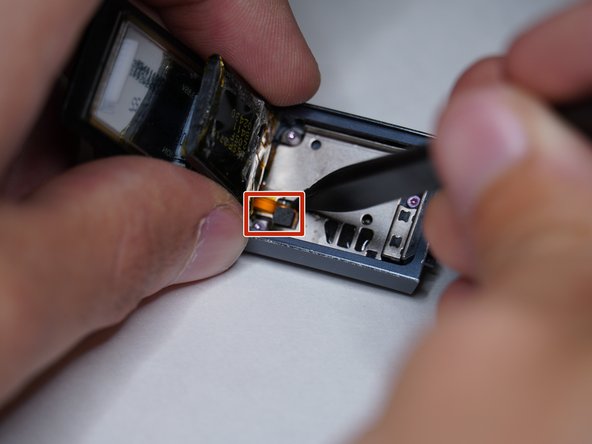
Desconecta conectores y altímetro
-
Desconecta el pulsómetro y el conector de carga
-
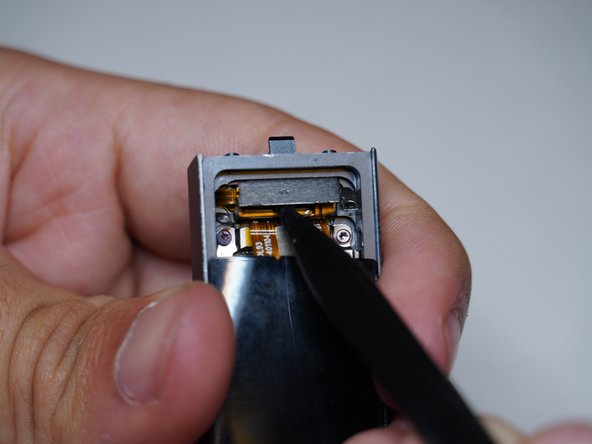
Retira el altímetro
-
-
-
Retira el conjunto de botones de la carcasa
-
Desmonta el motor vibrador
-
-
-
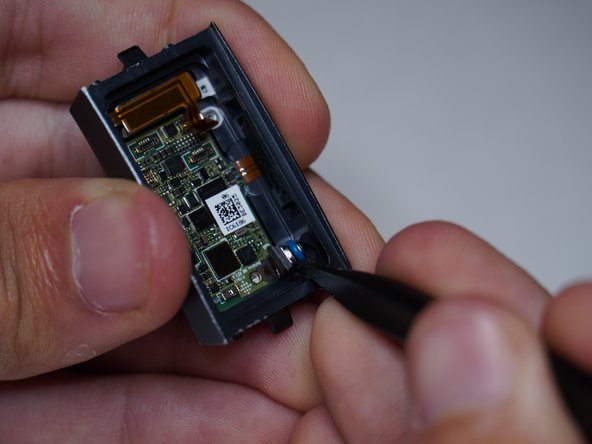
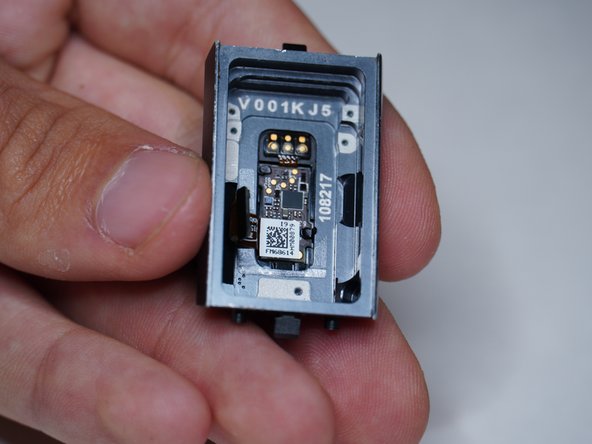
Retira la placa base
-
Parece como si el sensor de ritmo cardíaco y las clavijas de carga estuvieran moldeados en la carcasa, y no pudes quitarlos
-


Cancelar: No complete esta guía.
2 personas más completaron esta guía.
Un agradecimiento especial a estos traductores:
95%


Estos traductores nos están ayudando a reparar el mundo! ¿Quieres contribuir?
Empezar a traducir ›

Equipo

12 comentarios
The tear down pictures are great, but in my Charge 3 I needed a T-1 and a T-2 driver
Same, my ifixit pro kit only had a driver for the external screws and did not come with a small enough driver to remove the screws inside the charge 3 unit. I'll need to get the smaller bit from a different kit.
Which step in the teardown guide needed the T1 driver?
This tear down was very easy to follow. The heart rate monitor was also sealed in with some adhesive for me too but a little heat gun took it right off. I had suspected water leaked in and that in fact was the culprit after inspecting the connection. corrosion all around the HR monitor.
Great teardown guide! Here is a replacement battery for the Fitbit Charge 3 for around $20 shipped if anyone is looking:
Fitbit Charge 3 Replacement Battery
It includes all the necessary installation tools and it has a one year replacement warranty!
por favor en español
I followed this guide to replace the screen, it was really good. One thing to note, is that if you order a replacement screen, out of the three cables one might be ending in a different position. It is still possible to connect it, but much harder due to this.
I think it might have been the difference between my charge 3 being special edition, and the replacement screen is for the standard edition. I also think that since I replaced the screen with the standard edition one, my fitbit pay might not work anymore. So be sure to check what you order :)
Actually fitbit pay works. So it is just an annoyance if the cables don't fully line up.
Gabor -
If following this to put it back together, do NOT forget the thin metal part that shields the vibration motor specifically. I did at first and was going mad trying to figure out why my screen wasn't working. I checked my own pictures and realized I had left it out. Whoops!
Also, small springs go small side against the metal bracket. Don't know why, but they are tapered and this is important.
Yeah! go for it!
I have an old Fitbit Charge 3 that I took apart and I got the heart rate/charging terminal board out by pushing on it from the inside and it just popped out instantly.
Be careful of the small spring, it can jump away!
Niels Fennema - Contestar
Mine are definitely T2 torx screws (not T3 as written here). I'm pretty sure mine is the fitibt is Charge 3. Maybe they come in different versions. The rest of the instructions, up to the battery, are the same. I only needed to change the battery.
S C - Contestar
Confirmed that mine also had T2 torx screws for all the screws (also for the internal screws). The strap connectors on both sides are the same, so don't worry if you mix them up. But to open up the Fitbit, you actually only need to remove one side (the side opposite of the logo).
Kenneth - Contestar