Introducción
This teardown guide indicates the necessary steps to separate all individual components of the Breville "Control Grip" Immersion Blender.
NOTE: The actions required to separate the individual components involve irreversible damage to the product casing as it exhibits plastic welded fixtures on the inside, preventing it from being opened in a clean manner. This may cause performance issues and therefore this guide should foremost be used to teardown or salvage parts from the blender.
Product Link: https://www.breville.com/au/en/products/...
CONTRIBUTORS:
David Howell - z5209669
Phoebe Li - z5213846
Matthew Kwon - z5215254
William Fabian - z5208767
Qué necesitas
-
-
Breville "Control Grip" Immersion Blender - (Model BSB510)
-
Dimensions - 10 x 5.6 x 22.4 cm
-
Construction Materials - Stainless Steel Blending Shaft
-
Variable Speed Control Settings - Adjustable 15 setting speed control for precise blending and processing.
-
Power - 700 Watts
-
Voltage - 220–240 Volts
-
-
-
Depicted here are the individual components of the immersion blender that will be separated during this teardown.
-
-
-
Make sure to begin the teardown in a well lit and clean environment with lots of space to ensure you are able to remove and set aside pieces with ease. (A zip-lock bag is optional to hold some of the smaller pieces in the teardown such as screws, etc.)
-
-
-
Press into the two buttons located on the outside of the product to release the metal immersion blender stick.
-
-
-
-
To remove the speed adjustment dial first turn the cap onto the number 15 speed adjustment as this gives more room under the cap at the front to pry it off.
-
Next grab a flat-head screwdriver and wedge it under the dial on the front side opposite of the wiring.
-
-
-
The top cap of the blender is held in by two screws that were located under the adjustment dial.
-
Simply unscrew these and place them aside as you wish and you are then able to remove the cap with ease.
-
-
-
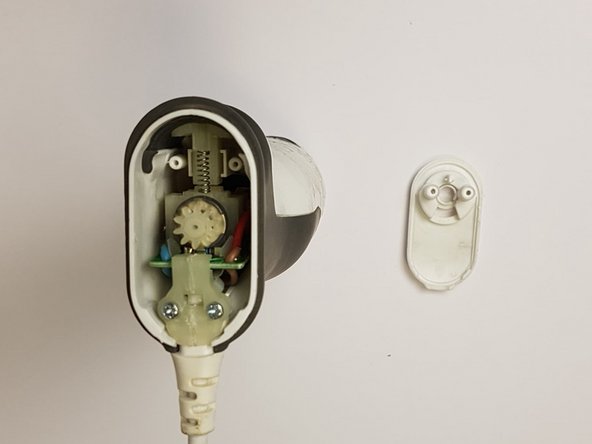
Further two screws can be found under this top cap that hold in a plastic moulded PCB and wire holder.
-
Simply unscrew these from the product and set them aside as you wish.
-
-
-
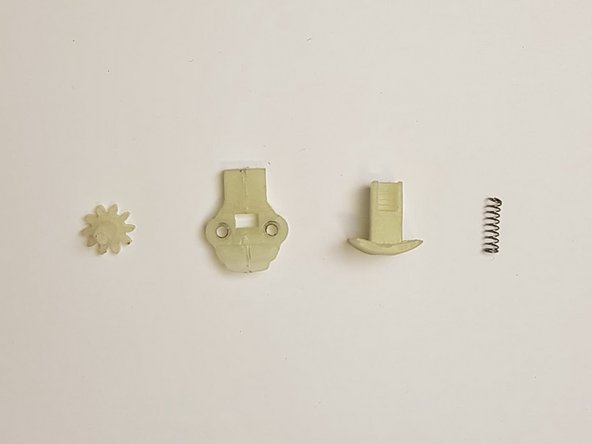
Remove all plastic pieces and the spring. Twist the gear and pull gently to remove.
-
Remove all the components depicted in the image by simply lifting each piece upwards.
-
The spring can be compressed and removed and the gear requires a twist and gentle pull to take out.
-
-
-
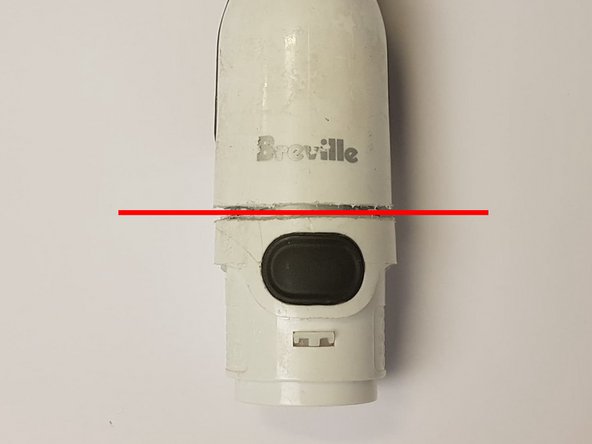
Begin by taping the circumference of the shell above the release buttons.
-
Draw a line around the shell with a marker, 5mm above the two release mechanisms.
-
Using a hacksaw, gently slice back and forth along the line while rotating the casing, making sure to stop at the surface of the metal component inside, this is the motor.
-
-
-
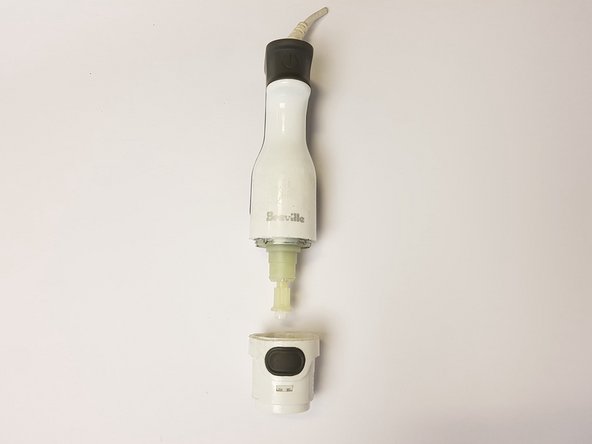
To access the main components all that is left is to remove the bottom section that we had just cut.
-
-
-
Now the bottom section is removed you may simply slide the main components out from the bottom as one piece.
-
The last part that can be removed is a small plastic component at the bottom as indicated.
-
-
-
This is a list of components that you should have at the end of the teardown.
-


Documentos Adjuntos
3 comentarios
Honestly That’s An Amazing Hand Held Blender But we’ve many better option in the market I’m Not Gonna list them here. I’ll post a review link right here: https://decorsimilar.com/best-immersion-...
Consumer blender internals tend to be made so cheaply it’s not worth buying because they will fail within a short enough period of time it drastically tips the scales on the ROI or TCO of owning it in a bad way.
Thanks for the guide, but I was looking for something to help with the blend stick part. I was running it and the bottom part (blade, steel cup above the blade, plastic "gasket", plus shaft) just popped off. I can whap it all back together but I don't trust it to stay together. Looking for advice to repair in a permanent food-safe manner.