Saltar al contenido principal

How to Install a Gusset to Enlarge a Sleeve

Qué necesitas

  1. How to Install a Gusset to Enlarge a Sleeve, Sleeve: paso 1, imagen 1 de 3 How to Install a Gusset to Enlarge a Sleeve, Sleeve: paso 1, imagen 2 de 3 How to Install a Gusset to Enlarge a Sleeve, Sleeve: paso 1, imagen 3 de 3
    • Use tailor's chalk to mark 4 inches from the seam joining the sleeve to the bodice on the center sleeve seam.

    • Use tailor's chalk to mark 4 inches from the seam joining the sleeve to the bodice on the bodice seam.

  2. How to Install a Gusset to Enlarge a Sleeve: paso 2, imagen 1 de 2 How to Install a Gusset to Enlarge a Sleeve: paso 2, imagen 2 de 2
    • Use a seam ripper to remove the center sleeve and bodice seams up to the chalk marks.

    • Be sure to avoid splitting the horizontal seam joining the sleeve itself to the bodice.

    • Turn your garment inside out so the seams are facing towards you.

  3. How to Install a Gusset to Enlarge a Sleeve: paso 3, imagen 1 de 3 How to Install a Gusset to Enlarge a Sleeve: paso 3, imagen 2 de 3 How to Install a Gusset to Enlarge a Sleeve: paso 3, imagen 3 de 3
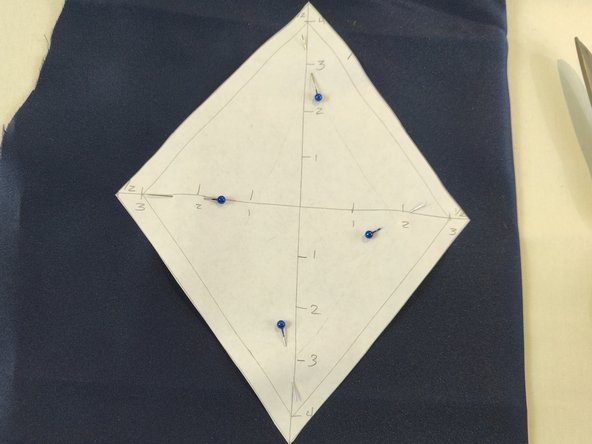
    • Create a pattern by drawing a diamond that is 4 inches by 3 inches on a piece of paper.

    • Add an additional half inch to each side for seam allowance.

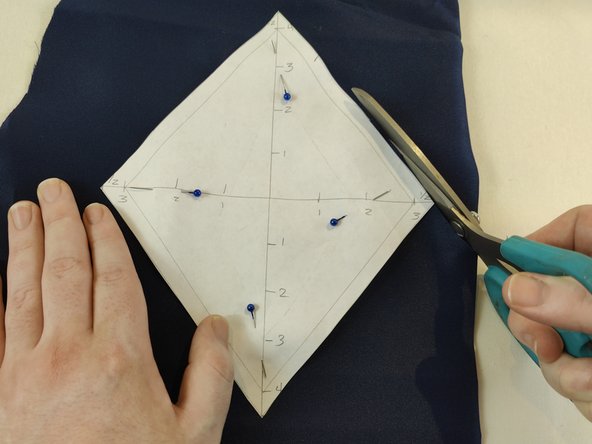
    • Cut out your pattern using scissors.

    • On a piece of similarly-colored fabric, pin your pattern using sewing pins to hold it still on the fabric.

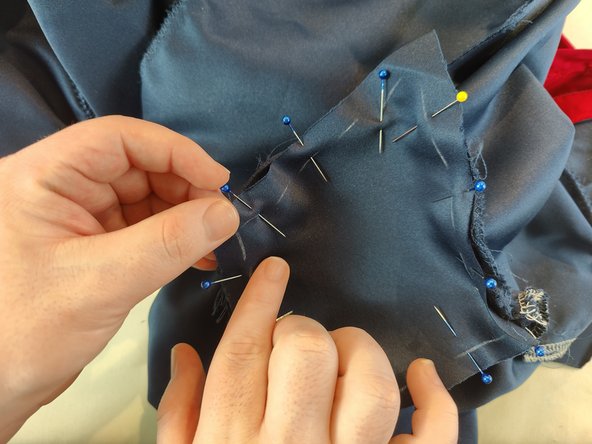
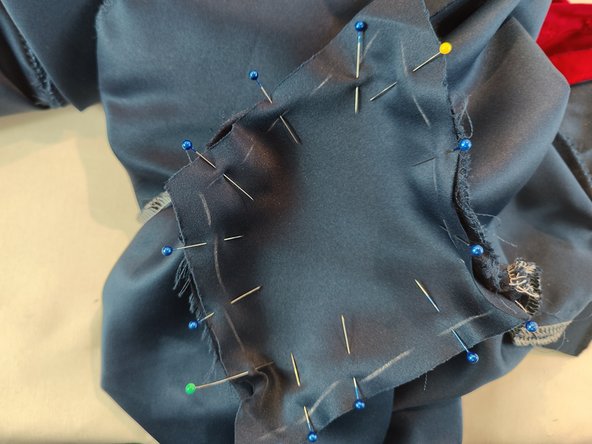
    • Using fabric scissors, cut out a diamond-shaped piece of fabric following the pattern you created. This is your gusset.

  4. How to Install a Gusset to Enlarge a Sleeve: paso 4, imagen 1 de 3 How to Install a Gusset to Enlarge a Sleeve: paso 4, imagen 2 de 3 How to Install a Gusset to Enlarge a Sleeve: paso 4, imagen 3 de 3
    • Line up your gusset against the hole in your garment.

    • The longer sides of the diamond should be pointing towards the cuff of the sleeve and the bodice.

    • Pin your gusset to the garment along the edges of the hole you created earlier.

    • You should pin them together with the edges of the gusset and hole overlapping by about half an inch for seam allowance.

  5. How to Install a Gusset to Enlarge a Sleeve: paso 5, imagen 1 de 2 How to Install a Gusset to Enlarge a Sleeve: paso 5, imagen 2 de 2
    • Using a sewing machine or needle and thread, take a quarter-inch stich on one edge of the diamond with a straight stitch.

    • Be sure to remove the pins ahead of your stitch as you move down the edge to avoid damage to your sewing machine.

    • Repeat this step for each of the remaining edges of the diamond.

    • Use sewing scissors to trim excess fabric along the edges past your stitch.

  6. How to Install a Gusset to Enlarge a Sleeve: paso 6, imagen 1 de 2 How to Install a Gusset to Enlarge a Sleeve: paso 6, imagen 2 de 2
    • Use a zig-zag stitch to seal the rough edges of the diamond using a sewing machine or needle and thread.

    • Turn your garment inside out again, so the seams are on the inside of the garment.

    • Inspect the gusset to make sure there are no gaps in your seam.

Linea de Meta

Joseph Meyers

Miembro Desde 09/26/21

133 Reputación

1 Guía escrita

0 comentarios

Agregar Comentario

Ver Estadísticas:

Ultimas 24 horas: 2

Ultimos 7 días: 31

Ultimos 30 días: 104

Todo El Tiempo: 250